Showing posts with label Chicken. Show all posts

Monday, April 30, 2012

Busy Day "Rotisserie" Chicken

I learned a new trick that I'm pretty excited to share with everyone!

For those of you who know me, you know that I'm a little busy.  And by "a little busy" I mean I over schedule myself to the point of near nervous breakdown.  Now, I will acknowledge that I don't have kids, so it's possible that I don't even really know what busy means, but it sure feels like I do a lot.  And it's important to me to still put a good meal on the table.  To be honest, both cooking and eating good food are two of the things that I think really keep me sane.  No matter how busy I am, eating real food just makes me feel better.  When I eat crap, I feel like crap.  And I really believe that eating well helps keep me healthy, too.  I see my friends and co-workers who eat fast food every day, and they just seem to get sick more often.  

But, I do recognize that it is a challenge to cook every day.  Especially for those of you with kids.  I don't know how you do it!

As you may have noticed, I like using my slow cooker on busy days.  But I really try to not make red meat more than once a week, and I feel like I use up all my red meat meals on stew... when what I really want is a steak.  Steak sandwiches are a good middle of the week meal, especially in the summer when I can throw it quick on the grill!  Stew is good, but not as good as steak sandwiches.  Chicken in the crock pot is okay, but generally works best with similar pieces - like thighs or legs.  Since I'm buying from the farmer, I usually have a whole chicken, not individual pieces.  Plus a whole chicken costs less.

So, that's why I felt this one was too good to not share!

Now, I have to give fair warning right off the bat that this is not a gourmet meal.  While good, the chicken is not as good as it would be if grilled or roasted.  The flavor is there, but the chicken itself has turned out just a little dry both times I've done it.  Really, the only problem I found was in the breasts, and we generally don't eat those for dinner.  Usually the breasts get set aside and used for something else the next day, so it's not that big of a deal.  But still, this is not the best chicken you'll ever have in your entire life, so I feel it's important to provide some warning.  This probably isn't the chicken you want to make when you have fancy company coming over, and you don't want to use it in a cooking competition.  But it's good enough.

One solution I just thought of, and will be trying next, is to brine the chicken.  Brining is a process of soaking meat in a salt water solution.  This solution allows the meat to soak in and retain more water.  The salt also helps break down some of the meat, keeping it from drying out in the cooking process.  I have brined a turkey with much success, and I think it could be a great solution to the dry meat issue of this recipe.  The problem with a brine is that it generally leaves you with a less crispy skin, but this recipe (on it's own) leaves you with no crispy skin at all - so we need to resolve that anyway!

I am going to include the brining process in my recipe below, because I do believe it is the solution, but know that I have not actually done this yet, and it is not necessary.

I have done this twice now.  The first I just salted and peppered the chicken, and filled the cavity with an onion and lemon.  The second time I used a jerk seasoning rub that I had made almost a year ago and then froze (and then forgot about).  Both times it was quick and easy and turned out fairly well!

You are going to need a 3 to 4 lb chicken (if you want to do bigger, and you have a slow cooker that can hold it, I don't see why that would be a problem.  Not sure how long you would cook it for...), as well as any seasonings you want and something to elevate the chicken off the base of the crock pot.  The first time I used potato slices wrapped up in aluminum foil.  For some reason, this did not work well and the potatoes got a funny taste.  I'm not sure if they sat too long, or something reacted to the foil or what.  The second time, I wrapped three whole potatoes up in aluminum foil and that worked beautifully.  It came out just like a regular baked potato.  You could also just use balls of aluminum foil, if you didn't want the potatoes.  I used three, because that was the smallest number I could use and still adequately balance my chicken.

Season the chicken well, or even slightly more than well.  I have found that slow cooking tends to draw flavor out of meat.  That being said, brining would probably fix that as well.

Wrap three (or more) potatoes tightly in aluminum foil and place at the bottom of a slow cooker large enough to hold your chicken lying on its back, breasts up.  Once you've got the chicken seasoned in whatever way you would like (consider stuffing the opening with aromatics such as herbs, onions, garlic, and lemons), place it on top of the potatoes, being careful that it does not touch the bottom or sides of the slow cooker.  Cover, and cook on low for 9 hours.

Once you pull the chicken out (carefully, because it will want to fall apart), you will want to either broil or grill it to crisp up the skin.  I did try browning the chicken prior to cooking it, and this didn't seem to have much effect.  Mushy skinned chicken is really disappointing, and this step really only takes 10 more minutes.  I think it's worth it.  Your other option would be to remove the skin, which would be healthier, but come on - the skin is the best part!

This is a "do as you want" recipe, since really anything can be changed to suit your needs, but here is one specific example.  Assuming you made a batch of Jerk Chicken Seasoning in advance and froze it, this is extremely quick and great for a busy Monday.

Slow Cooker "Rotisserie" Jerk Chicken
The night before, drop your chicken into your brine and refrigerate overnight.  Since this is just a chicken and not a turkey, it's a lot easier to fit the whole thing into the fridge.  I like to use my stock pot, which just barely fits onto the bottom shelf of my refrigerator.  

In the morning, remove the chicken and discard the brine.  Dry the chicken well.  Wrap the potatoes tightly in aluminum foil (I used two layers), and place around the edges of a slow cooker big enough to lay your chicken down in, breast side up, without the chicken touching the edges of the slow cooker.

Rub the chicken all over, inside and out, with the jerk seasoning.  Place the chicken, breast side up, in the slow cooker, on top of the potatoes.  Make sure that the chicken is not in contact with the bottom or sides of the slow cooker.  Cover, and cook on low for 9 hours.

When the chicken is done, pre-heat a grill or grill pan to high heat.  Carefully (it will want to fall apart) transfer the chicken to the hot grill, and grill for about 5 minutes on each side, just to crisp up the skin.

Serve chicken with baked potatoes, and whatever vegetables you have on hand (I grilled up some asparagus), and additional jerk sauce if desired.


Friday, January 27, 2012

Stupid Blog

I had almost a full blog posted, and it disappeared.  It was very thoughtful and deep and SO well written that it probably would have gotten me my own show on cooking channel.  And now it's gone and I am bitter.  Boo.  There goes my chance of fame and fortune.

Guess I am stuck being your plain, boring food blogger... for now.

I don't have the time or energy to re-craft the whole thing.  It's like when you leave a really ranty drunk-dial voicemail message, and when you're almost done you get the "If you are satisfied with your message, press one.  If you would like to re-record, press two."  No, computerized phone bitch, I am neither done nor do I want to re-record.  I want to finish my drunken rant uninterrupted, and then go back to being amused with how clever I am!

Anyway, the point was that food mistakes are good.  Even if a meal is completely inedible, you can learn something from it.  Also, if a meal is inedible, you should order up some sushi, because you earned it. It was also about learning from your successes, and building new recipes off of those successes, and excluding based on the failures. 

Having to find interesting things to post every other day (it's my goal, even if it doesn't really happen) has made stray from my regular, go-to, top 10 recipes.  One way that I have stretched myself is by combining recipes I know into weird Frankenstein recipes.  Usually this works.  Sometimes it doesn't.

Taste wise, this recipe worked really well in my opinion.  Looks wise, it's pretty brown.  So I've got to work on that...  The recipe itself is a combination of two recipes from my regular repertoire: pork chops braised in apples and onions, and Coq a Vin.  The thought process goes like this: Chicken is good braised (Coq a Vin); things can be braised in apples and onions (pork chops), so lets braise chicken in apples and onions.

The failure here is in the color.  This chicken was delicious, but I ended up throwing some of it away.  I really believe that is because it wasn't a pretty color.  If I did this again, I think I might substitute red wine for the apple cider.  This would make the sauce darker, and the whole thing not mud colored.  Also, this could have used some potatoes or past or something to soak up some of that sauce.  But, otherwise, really good.

But, not as good as the awesome post that stupid blogger deleted. 

I used my stand by Coq a Vin recipe as the base, mostly to figure out how much liquid to use, and how long to cook the chicken.  Even though this recipe is more like my pork chop recipe, I didn't use that as the base, because I'm not cooking pork chops... if that makes sense.  Chicken needs a certain amount of liquid and a certain amount of time to braise properly, regardless of what the liquid is and what else you put in it.

 This is also a good use for apples that have gotten a little old and you don't really want to just eat anymore.  You could also just make them into a pie.  If you weren't completely stocked up with apple pie filling, that is.

Chicken Braised in Apples and Onions:
Served with roasted beets, wilted spinach, and goat cheese


  • 1 3 1/2 to 4 lb chicken, cut into serving pieces
  • 2 tbsp olive oil or (if you're feeling frisky) bacon fat
  • Salt and freshly ground pepper
  • 1 large onion, quartered and thinly sliced
  • 2-3 firm apples, peeled and chopped
  • 3 large cloves garlic, smashed and minced
  • 1 tbsp ground cinnamon
  • 1/2 tsp freshly ground nutmeg
  • 1/2 tsp ground cloves
  • 1 cup chicken stock
  • 2 cups chicken cider, red wine, or a combination of the two.  (I think, next time, I will use 1 cup wine and 1 cup cider.  Hard, if you've got it and you're willing to put it into food as opposed to straight into your belly.)
  • 1 bayleaf

Season the chicken generously with salt and pepper.   Heat the olive oil in a large frying pan over medium high heat (or bacon fat.  Have I mentioned that I keep a jar of bacon fat in my fridge.  Every time I make bacon, I pour leftover fat from the pan into the jar and stick it back in the fridge.  Then, I scoop it out and cook with it.  Economical and DELICIOUS.)  Once the oil is shimmering, add the chicken in batches and brown on all sides.  Transfer to a platter and set aside.

Reduce the heat to medium and add the onions to the pan.  Saute until lightly browned and soft.  Add the apples and continue to cook until the apples are just tender, about 5 more minutes.  Increase heat to medium high, add the garlic, cinnamon, nutmeg, and cloves and cook, stirring constantly, until fragrant - about two minutes.  Please, for the love of god, do not burn the garlic or I will come to your house and slap you.

Add the stock and (hard) apple cider/red wine and deglaze the pan.  Add the bay leaf.  Bring to a boil, and reduce to a gentle simmer.  Carefully place the chicken back into the pan, cover, and cook for about 30 minutes, or until the thickest part shows no pink when cut into.

Serve over some sort of starch so the sauce doesn't pool all over the plate like mine did!

Monday, October 24, 2011

Delicious Mushrooms


I love mushrooms.  Really, they are one of my most favorite foods.  They are also kind of baffling to me.  With so many kinds, and so many more kinds that will make you violently ill, and not any real obvious distinguishing features between the two, I have to wonder who first decided that this thing growing out of rotted wood or damp soil was good to eat.

I'm very thankful they did, though.

Needless to say, I probably will not engage in much mushrooming.  I like to be outdoors, and the thought of finding my own mushrooms and getting them for free is an intriguing one.  On the other hand, I really like my stomach lining and don't want to see it melt away.  Seriously.  A quick Wikipedia search tells me that possible consequences of eating wild mushrooms that have been incorrectly identified as edible include: liver damage, kidney failure, respiratory failure, neurotoxicity, destruction of blood cells, loss of limbs, and death.

Yes, $20 to $50 a pound for mushrooms may seem like a lot to some people, but it seems a perfectly reasonable price to pay to avoid loss of limbs and death. 

(Side note: a search for "negative consequences of mushrooms" is not a good search to do at work.  Mostly it is tips to avoid a bad trip!)

Last week was the last week at the South Shore Farmer's Market.  It makes me sad, because that market is so close to my house.  That means two weeks of the West Alis Farmer's Market, which frankly is too busy and makes me crabby, and then on to the Winter Farmer's Market at State Fair Park.  My mushroom guy does go to the Winter Market, and his company is at the Stalis Market, but he's not there and he's fun.

So, to mourn the last day of the SS Market, I decided to treat myself.


Hen of the woods!  Otherwise known as the Maitake mushroom.

Okay, let's be honest.  I probably would have "treated" myself had it been the last day or not.  I can't turn down a good fancy mushroom.

I'm not sure I've had hen of the woods before, but I haven't had a mushroom I didn't like yet.  The texture of the hen of the woods was firm, almost even chewy.  I ended up cooking them much longer than I would cook a regular mushroom, which did help them to get very tender.  The taste was very meaty and earthy, and I was actually disappointed that I made them in a chicken recipe - since I thought the flavor overwhelmed the chicken a bit.  It probably would have been just as good had I totally omitted the chicken from this recipe - which would have saved some money too.

That's not to say that this was not good.  In fact, it was excellent, however I think it would have been just as good without the chicken.  I left the Hen of the Woods in pretty large strips, so they did seem like additional meat.

Wild Mushroom Chicken Marsala
Modified from The Williams-Sonoma Collection: Chicken
Serves two with a good amount of leftovers for the next day

  • Two boneless skinless chicken breasts (L)
  • Salt and freshly ground pepper
  • 1/4 cup flour (L)
  • 4 tbsp butter, divided (L)
  • 1 lb total mixed wild mushrooms - I used about 1/2 lb Hen of the Woods, and the rest was cremini, shiitake, and oyster (L)
  • 2 tbsp finely chopped shallot (L)
  • 2 minced garlic cloves (L)
  • 1/2 cup dry Marsala
  • 1/2 cup chicken stock (L)
  • Garlic Mashed potatoes (L)
 Cut the chicken breasts in half laterally, so you each breast half becomes two thin fillets.  Alternately, or if you have thinner breasts, you can use four half breasts, pounded to an even thickness.

Season the flour well with salt and pepper, then dredge each chicken fillet in the flour, shaking of any excess.

In a large frying pan, heat 2 tbsp butter over medium-high heat.  Add the chicken breasts and cook, turning once, until lightly browned on both sides - about 3 to 4 minutes per side.  Transfer to a platter and cover to keep warm.

In the same pan over medium heat, melt the remaining butter.  Add the mushrooms and cook until the mushrooms release their liquid and the liquid evaporates.  If I had it to do again, I would add the hen of the woods first and cook those down before adding the others.  Stir in the shallot and garlic, and cook until softened - about 2 minutes.  Add the Marsala, raise the heat to medium high, and boil for 30 seconds.  Add the stock and return to a low simmer.

Add the chicken back into the pan, burring it under the mushrooms as much as possible.  Cover, and allow to cook at a very low simmer until the chicken is cooked through - about 5 more minutes.  Season the sauce with salt and pepper, and serve over garlic mashed potatoes.


Garlic Mashed Potatoes:

  • 3-4 large Yukon Gold potatoes (about 2 lbs), peeled and cut into thin slices (L)
  • 3 cloves garlic, peeled but whole (L)
  • 2-3 tbsp heavy cream (L)
  • 3-4 (or more) tbsp butter (L) 
  • salt and pepper to taste
Place potatoes in a pot and cover with cold water.  Add a good amount of salt and the garlic cloves.  Bring to a low boil, and continue to cook, boiling, until potatoes are easily pierced with a fork (note, the smaller the pieces are the quicker this will happen!)   Drain the potatoes, retaining the garlic cloves.  Return potatoes and garlic to the pot.  Add butter and milk, and mash to desired smoothness (I like chunky mashed potatoes).  Season to taste with salt and pepper.


Wednesday, October 19, 2011

Tiny Carrots!

This year, my father grew carrots in his garden.  Tiny, tiny carrots.  And when he pulled them up, he gave a bunch to me.  Yay for tiny, tiny carrots!


They were, I have to say, spectacular.  Better even than the carrots at the farmers market.  But, I suspect a lot of that is due to the fact that I can't really eat a carrot.  It's on the list.  The day I get my braces off I am having a caramel apple, corn on the cob, Laffy Taffy, and carrot party.  So, really, any carrot would taste good.  But, I suspect these were still better than average.

Carrots are one of those foods that I kind of feel like it should be a crime to cook.  Carrots, peas, beans, and broccoli are all on this list.  I have not had any of those foods cooked in a way that caused them to taste better than the raw version.  And they're all so good for you - and cooking pulls out the nutrients - so why would you want to cook them?  But, if I would have just sat down and eaten them raw, I probably would have broken a bracket.  So I decided to cook them up.  Plus my dad told me that he was only giving them to me so he could see them written about on my blog, and I bet he wouldn't have been happy with this:

Sat on the couch.  Ate so many carrots my skin turned orange.*

*True story.  This happened to my aunt when she was a kid!

I also was left with the question of what to do with all the beautiful carrot tops.  Google "Can you eat carrot greens" and you will receive responses ranging from "Absolutely!  Put them in your salad!  They are delicious" to "Absolutely not!  They are poison and they will kill you immediately!"  So, for the record, I do not recommend eating carrot tops.  If you eat them, and they are poison, and you die, I cannot be held responsible.  Also, if they are a slow killer, and you die someday (like at the age of 97), you cannot come back and blame me.  Okay?  Good.

But I threw them in my freezer and I intend to put them in my chicken stock.  I did eat a leaf off of one, and it tasted like a cross between spicy parsley, a carrot, and grass.  Not something I would want to eat raw or even wilted, but I think it would add a nice taste to chicken stock.

The other exciting thing about this dinner is that I made it on a Saturday.  That very next day I was engaged in my normal Sunday behavior (cleaning the house and watching cooking shows) and the SAME recipe I made was featured on Good Eats!  It was an old episode (Garlic), but one I had never seen before.  The part that made me jump up and down and clap my hands with joy was when it came to peeling the garlic.  When I read the recipe, it said to leave the garlic in its paper while it cooked, and then run the whole thing through a food mill or fine meshed sieve to get the paper off after cooking.  "That sounds like the dumbest plan ever," I thought to myself.  "What possible benefit could come of that?  I'm just going to take the skins off now and mash the garlic at the end - save myself making a mess!"

And what did Alton say the very next day? "Traditionally, this meal is made by leaving the garlic in their papery skins while cooking, and then removing them at the end.  That seems to be to be a good way to make a mess and burn your fingers, and I can't see any benefit to it!"

Huzzah!

I modified my recipe from my Essentials of Slow Cooking Cookbook, but it is also very close to the one presented in Good Eats "In the Bulb of the Night".  I think I probably like Alton's better, because it is Alton's, after all, and because you end up with garlic oil.

This meal should have had mashed potatoes.  It didn't, and I was sad.


Garlicy Chicken
  • 1 chicken (3 to 4 lbs), cut into serving pieces (L)
  • Salt and freshly ground pepper
  • 2 tbsp olive oil
  • 4 heads (yes, heads!) garlic, separated into cloves, peeled and lightly smashed (L)
  • 1/4 cup dry white wine
  • 1/4 cup chicken stock (L)
  • 1 tbsp chopped fresh thyme (L*)
Season the chicken all over with salt and pepper.  In a large dutch oven over medium high heat, warm the oil.  Working in batches, brown the chicken well on all sides.  Remove from the pan and set aside on a large platter.

Add the garlic to the pan and saute over medium heat until lightly golden brown.  Pour in the wine and deglaze the pan.  Add the chicken stock, and stir again, scraping up any browned bits on the bottom of the pan.  Add the chicken back into the pan and stir so the garlic is not trapped on the bottom.  Cover and cook on low until the chicken is tender and cooked through, about 45 minutes to an hour.

Once the chicken is cooked through, transfer to a platter and cover loosely with aluminum foil to keep warm, retaining any garlic cloves and remaining wine/stock/chicken juice in the pan.  Mash the garlic in the sauce with a potato masher, until the sauce is smooth.  Raise temperature to medium high and bring to a boil, then reduce to a simmer.  Add thyme, and allow to simmer, uncovered, until sauce is thickened.  Season to taste with additional salt and pepper if necessary. 

Return the chicken to the pot and stir to coat the chicken well.

Honey Candied Carrots

The thing I found somewhat annoying about making this recipe is that none of the carrots were the same size.  When I make Jeff be my kitchen bitch, I always harp on him to cut things the same size so they cook evenly.  I can't do that, if the food is already different sizes to begin with.  I guess I could have cut all the carrots down to be the size of the smallest carrot... but that seems like a lot of work and I would have ended up with carrot mush, because some of these carrots were tiny.  So, instead, I sorted the carrots into different sizes and added them strategically to the pot so they were all done at about the same time.  What made it extra OCD was that I had to write down a list of what time each pile went in.  This list also included a diagram showing which pile was which number on the list.

I may be a crazy person.  It's okay, though...


  • Salt
  • 1 lb carrots (L)
  • 2 tbsp butter (L)
  • 3 tbsp honey (L)
  • Freshly ground black pepper
Bring well salted water to a gentle boil over medium heat.  (A note on boiling vegetables.  As I said before, I am totally against cooking the nutrients out of vegetables.  So you want to use as little water as possible, and then, if you can, do something with that water so you're still eating it!  Put it back into your food!  But you certainly don't need enough water to cover the vegetables you are cooking.  In fact, I try to do half as much water as I have veggies...)

Once the water is boiling, add carrots and cook until they are just tender.  They should be soft enough not to break your braces off of your teeth, but still firm to the bite!  Remember, they're going to continue cooking after this, so they shouldn't be completely "done."  Drain carrots, and return to pan with butter and honey.  Cook until a glaze coats the carrots, about 5 minutes.  Season to taste with salt and pepper.

Thursday, September 1, 2011

These are a Few of My Favorite Things

If you've been paying attention at all, you've probably realized that there are two things that we eat a lot of in my house:

1. Chicken
2. Rhubarb

(okay, I'll give you 3. Zucchini, but that's just because there's so darn much of it right now.)

We eat a lot of rhubarb for the same reason we eat a lot of zucchini.  I have a lot of it, and since it's in my garden it's basically free.  But I also really like it.  I feel like rhubarb is a very under appreciated vegetable.  (It would be a vegetable and not a fruit, because it doesn't have any seeds.  According to Wikipedia, Rhubarb is USUALLY considered a vegetable; however, in the United States, a New York court decided in 1947 that since it was used in the United States as a fruit, it was to be counted as a fruit for the purpose of regulations and duties.  This reduced the amount paid in taxes on rhubarb.  So what we have learned from this is that taxes are higher on vegetables than on fruit.)  Rhubarb is, in most homes, at most, a pie filling.  Maybe occasionally a crumble or something of that nature.  But a dessert to be certain.  I have so far used it for ribs, risotto, and as a salad dressing.  It's good savory, because it has so much flavor.  If you cook it down without sugar, or with a little bit of honey or maple syrup, you can get a tart sauce that pairs amazingly with spice.  You don't even need a recipe; just throw a cup or two in a pan over low heat and let it cook down until soft and bubbly and there are no more solid chunks.

We eat a lot of chicken because it is probably my favorite meat.  From a foodie perspective, I'm guessing that's blasphemous.  Chicken is boring and pedestrian and whatever.

But it's not.  Chicken is, in my opinion, the most multi-functional meat there is.  Especially if you take into account how much smaller it is than your other major varieties of meat.  I mean, you may have way more cuts of beef than you have cuts of chicken, but on the other hand, a cow is like 100 times bigger than a chicken, so that would make sense!  And, yeah, to grill a chicken is pretty easy... you know... unless you do this... but there's so much more you can do with chicken as well.

So, my thought was to combine the two.  And that brings us to today's recipe.  This is a pretty simple recipe, with not a lot of steps and ingredients.  It's starting to feel like fall in Wisconsin in the evenings, and I'm starting to want to turn the oven on a little.  As much as I like the comforting taste of baked food, this summer has not been long enough and it's a little disappointing:

Baked Rhubarb Chicken

  • One chicken, cut into quarters (L)
  • Salt and pepper
  • Garlic powder
  • 2 tbsp olive oil
  • 2 cups rhubarb, cut into 1/2 inch slices (L*)
  • 1 Serano chili, minced (L*)
  • 2 tbsp garlic scapes, minced (L)
  • 2 tbsp honey (L)
Pre-heat oven to 375 degrees.

Season chicken generously with salt, pepper, and garlic powder.  Heat olive oil over high heat in large pan, and brown chicken on both sides, working in batches to avoid crowding.  Meanwhile, in a large baking dish, combine rhubarb, chili, garlic, and honey.  Flatten mixture so it creates an even layer on the bottom of the dish, and as the chicken is browned, place it on top of the rhubarb in the dish.


I left one piece out here, so you could see the rhubarb.
Bake at 375 degrees for about 45 minutes, or until chicken is cooked through.  The chicken should be golden and crispy on top, and the rhubarb should be soft, with no crunchy-ness.  It is okay if you can still see the shape of the individual pieces of rhubarb; it should more or less look like rhubarb pie filling.


I served this with boiled new potatoes, and actually scooped the juice of the rhubarb sauce over the chicken and potatoes, using it as a gravy.  I also made a tomato and cucumber salad, which is an easy summer side dish.  One of the nice things about fresh cucumbers in the summer is that the peel tastes delicious, and isn't tough.  Don't eat the peel on a grocery store cucumber, though, because it's actually wax.  In my opinion, the crispness and acidity of the salad is a really good balance for the chicken.  The chicken itself is pretty rich, and would make a good fall or winter meal, if you have the rhubarb at that point:

Tomato and Cucumber Salad:

  • 1 cucumber, peel intact, cut into quarters and then sliced - about 1 cup (L*)
  • 2 cups halved cherry tomatoes (L*)
  • 1 tsp sea salt
  • 1/2 tsp minced fresh dill (L*)
  • 1 tbsp minced garlic scapes (L)
  • 1/4 cup feta cheese, crumbled (L)
  • splash balsamic vinegar 
Combine all ingredients, and mix gently.


Tuesday, August 23, 2011

Who you calling a jerk?!

Oh, my chicken?  Okay, that's fair.

Two successful attempts at Chicken in a row!  I better be careful not to start getting cocky, as we all know what that leads to...

Anyway, this is also another example of things that I learned by going to the Milwaukee Public Market cooking classes.  Which reminds me, I need to check out the September schedule and find out what to register for!

I've actually found the cooking classes to be a great date for my husband and me.  I recommend this for anyone who is mildly interested in cooking.  Don't take them at the Milwaukee Public Market, though, because that's my secret and I don't want to have to start signing up for them way in advance :)

Anyway, I'm sure you can find some local cooking classes somewhere near you.  For about $25, they give a demo, and then you get to eat the food.  The public market allows you to purchase wine or beer (or a margarita!) from any of the local vendors, and then bring it up with you - in theory to drink with your food but, if you are anything like me, more likely to drink while you are watching the demo!  It's a good date, you get fed, you feel like you learned something, and you don't spend that much money.  It's a nice change from dinner and a movie.
I look so fancy and I am so easy!
(That's what she said...)

Anyway, about a month ago, we attended the Jamaican cooking class, so I decided to make jerked chicken. Also, it's another excuse to butterfly a chicken, which is my new skill that I am very proud of even though it is not hard at all.  I feel like I've talked about butterflying a chicken before, but I can't find it in any of my previous posts, so maybe I didn't. Butterflying a chicken is impressive.  It makes people think you are fancy.  And it is really, really, REALLY easy.  You can find a great tutorial at this website.

What I learned at my Jamaican cooking class is that jerked whatever is really easy.  And because of that, it combines four of my favorite food related things:

1. Chicken
2. Things that are really easy
3. Things that most people can't make (or more specifically don't know that they can make) and are therefore impressive
4. Spicy things

The thing that I liked best about the jerk sauce was that it required almost no work: Take ingredients, place in food processor or blender, blend to liquid, pour over chicken.  Excellent.


Jerk Sauce
*a note on habanero chilis.  These mothers are hot.  Seriously.  If you are going to cut them up, wear a glove.  Put them on a piece of wax paper before you cut them or the hotness will juice onto your cutting board and soak in.  The next time you cut bread, the bread will be crazy spicy.  Seriously.  Maybe not if you have a plastic cutting board, but all of mine are wood and once I had to throw one out because it was just infused with spiciness.  Even though you are wearing a glove, still wash your hands after cutting the habaneros.  Don't touch your eyes.  DON'T try to put in contacts.  You will go blind (I did this once.  It was bad.)  My preferred method for handing habaneros is to freeze them, and then to cut them up as quickly as possible, whilst touching them as little as possible.  The fact that they are frozen helps the hot parts not to get all over everything.  Oh, and if you want to make them less hot, knock out the seeds.  But don't scoop the seeds out with your finger because you don't want to touch all the seeds!

I am always pro fresh spices, but I did learn at this event that there is a time and place for dried spices too.  Specifically if you want them to soak into the meat.  That is why they are featured prominently here.

All my spices, as always, are from our local spice house, "The Spice House." 

Jerk ingredients in food processor
  • 1 large red onion, roughly chopped (L)
  • 5 large heads garlic, peeled (L)
  • 1/2 cup brown sugar
  • 3 tbsp Jamaican allspice
  • 1 tbsp dried thyme
  • 2 tsp salt
  • 1/2 tsp freshly grated nutmeg
  • 1 tsp cinnamon
  • 1 habanaro chile (L*)
  • 1 tsp freshly ground black pepper
  • 2 tbsp soy sauce (L) (Really.  Kikkoman Soy Sauce is made in Lake Geneva, WI.)
  • 1/4 cup olive oil
  • 1 whole chicken, butterflied (L)


Chicken in pan
Add ingredients to a food processor and blend.  Place chicken in a glass baking dish, just big enough to fit it, skin side up.  Pour sauce over chicken.  Allow to sit for at least 1 hour, refrigerated, then for 30 minutes more at room temperature.


Actually, this recipe made about twice as much jerk marinade as I needed for one full chicken.  Which brings us to the other awesome thing I learned at this class.  Jerk marinade can be frozen. So my recipe for my husband making this would be:


Remove jerk marinade from freezer.  Allow to thaw.  Pour over meat.  Apply heat.  Feed me.
Chicken in pan with jerk marinade


This marinade can certainly be used on meat other than chicken.  According to Wikipedia, Jerk spice mixes can be applied to pork, chicken, fish, shrimp, shellfish, beef, sausage, and tofu.  Mmmm.  That's what I want for dinner.  Some jerked tofu.  No.


Once you are ready to eat, grill the chicken just as you would normally grill chicken - about 30 to 35 minutes, over a medium grill.  I like to start with a higher heat on the skin side to get it extra crispy, and then turn the heat down a little when I flip the chicken over to allow it extra time to cook through without getting burnt.

Chicken on the Grill
I learned (don't ask me where, I don't know.  Perhaps I made it up...) that you are supposed to avoid flipping meat as much as possible.  Give it as few flips as you can.  However, in doing my research for this blog (extensive research is put into all of my blogs, I promise), I learned that there are several possible reasons for the name "Jerked."  The first explanation I found is that it refers to the process of cooking: during the cooking, the meat is turned over again and again (jerked over) until it is fully cooked.  Hmmm...  Other suggestions: the term "jerk" comes from the Spanish "Charqui" (yes, those words clearly look and sound the same... No).  which means dried meat.  It has the same root as the word "jerky" as in beef jerky (because Jerked Chicken and Beef Jerky have so very much in common.  I don't buy that one much at all).  OR... the word "jerk" applies to the reaction your mouth has to the spices.  OR... the word jerk applies to the the fact that you are supposed to jerk and poke the meat with sharp objects to produce holes which are filled with the spices (I didn't do this, so I hope that's not the reason).  OR... (according to Ask.com, and by far my favorite answer) "Because your mama is a jerk and she smells like chicken."  Done and done.

This is not terribly spicy.  In fact, I might add more spice when making it in the future. But I really like spice, so you might want to try it this way first!


One Jerked Chicken.  
A lovely dinner.  For information on the pretty bowl to the right of the shot, tune in tomorrow!


Tuesday, August 2, 2011

Summer Part 2

So, yesterday I talked about my realization that I already was a locavore in the summer without even trying.  Today I want to talk about why I haven't been posting as much as I thought I would.  I think the excuse that it's summer and I don't want to sit in front of my computer and type is pretty self explanatory.   It's either nice out, and I want to be outside, or it's hot out, and I don't want to sit in front of a computer that is giving off more heat.  Kind of self explanatory.

What I really wanted to explain was my statement that, in the summer, I don't want to cook fancy food.  Don't get me wrong, I have not fallen off of the locavore wagon at all.  In fact, I suspect the past four or five meals I've prepared were 100% local with the exception of olive oil, salt, and pepper.  But, there is something about summer that makes me hungry for very simple food.

I've said it before, but during the winter in WI there isn't much fresh.  This is a good time to experiment with strong flavors and spices, because the food itself doesn't have that much flavor on its own.  But in the summer - and especially right now when the produce is really just starting to come - I want to do as little with it as possible.  I don't even want a tomato mozzarella salad, even though that is probably one of my favorite foods in the world, I just want to eat the tomato.  I don't want to make coq a vin (another one of my favorite foods), I just want to throw the chicken on the grill and let the flavor of the chicken really shine.

One thing I'm really starting to notice is that there really is a difference in the flavor of chicken.  Purchase a local chicken from your farmer's market - one that has been butchered the day before and has never been frozen - and grill it up.  The first thing you will notice as compared to grocery store chicken is the texture.  The meat is firmer and moister - an effect of not being processed and not having anything added to it.  The next time you are in the grocery store, take a look at what you are buying and what percent of it is "added solution."  This is basically water.  They are selling you meat by weight, and adding water to it.  Most chicken at the grocery store has a label on it that shows it is 8-12% added solution by weight.  If you buy a 4 lb bird at $2 a pound, almost a dollar is going to water.

But if you start to get fresh chickens regularly, you will also start to notice the difference in the flavor of these chickens.  A chicken that lived and was butchered in the spring tastes different than one from the summer, or one from the fall or winter.  The saying "you are what you eat" is very true when it comes to food, and if you think about it, you can taste what the chicken has been eating - whether that's chicken feed or fresh grass and clovers.  It's a subtle flavor and, in the end, it all still tastes like chicken, but I don't want to cover that up.

In a week or two, I will have so many tomatoes and so many zucchini that I will be sick of them in the same way I am now sick of rhubarb, and will be looking for any way to get rid of them.  But for now, I want to enjoy them in their purist form.

This, in my mind, is the perfect summer meal, followed by the perfect summer leftover meal:


Yup.  We were eating outside.  It got dark.
Grilled Chicken with Summer Herbs
(serves two with leftovers)
  • 1 chicken (3 to 4 lbs) cut into serving pieces and patted dry (L)
  •  2 tbsp Olive Oil
  • 1 tbsp kosher or sea salt
  • 1 tbsp fresh oregano, finely chopped (L*)
  • 1 tbsp fresh chives, finely chopped (L*)
  • 1 tbsp fresh garlic scapes, finely chopped (L)
  • 1 tsp thyme, finely chopped (L*)
  • 1/4 tsp rosemary, finely chopped (L*)
Combine all ingredients except chicken, then massage into chicken skin.  Allow to sit about 15-25 minutes.  Grill over medium/medium high heat about 20 minutes or until cooked through.

Grilled Zucchini
(recipe is per person)
  • 1 small zucchini (L*)
  • 1 tbsp olive oil 
  • Salt and fresh ground pepper.
Cut ends off of zucchini, then quarter length wise. Toss with olive oil, salt, and pepper, and grill just briefly (about 3-5 minutes each side depending on how thick they are) until the pieces are warm all the way through but are still basically raw on the inside.

Grilled Corn 
 (Don't tell my orthodontist!)

Throw corn on grill still in husks.  Grill for about 10 minutes, rotating for 2-3 minutes, until husk is well charred.  I usually do this before cooking anything else, and then move the corn to the top grill rack away from direct heat and let them sit there while everything else cooks.  If you want to do the corn all at once, it will probably need 15 to 20 minutes total over direct heat to be done.

Tomatoes and Cucumbers.

Slice.  Season with salt.  Eat.

The other half of not wanting to do too much cooking wise in the summer is that it does take time, and I there is always so much to do.  So, it's also important to use whatever I have in the best way possible.  So, I thought I could start giving you some of my leftover recipes as well.  I'm sure I've said it before, but not wasting food is the best way to keep your food budget low.  I know that I personally don't want to eat the same thing two days in a row, so if I can make something that involves a little bit of work the day before, and then use it to make something involving almost no work the next day, I'm not only able to use up all the food and save money, but I also get to be lazy on day two.  The official name for this recipe is "Cottage Breakfast," because it's what my family eats for breakfast when we're at our cottage.  It's basically an egg scramble of whatever you had for dinner the day before.  It doesn't have to be for breakfast, though.  I do love eggs for dinner.  This recipe is basically a road map.  Anything can be substituted for anything else...  Except the eggs.


Leftover Egg Scramble/Cottage Breakfast
(2 big servings)
Total time: 20 minutes
Clockwise from top: Tomatoes, chives, sage, chicken, mozz,
oregano
  • 5 eggs, lightly whisked (L)
  • 1 medium potato (L)
  • 1/4 to 1/2 cup water, vegetable, or chicken stock (I used water... so... L?)
  • 2 tbsp butter, divided (L)
  • 1/2 cup cooked meat - in this case chicken - chopped or shredded into bite size pieces (L)
  • 1/4 cup vegetables - in this case tomatoes.  I would have used the zucchini too, but we ate it all the night before (L)
  • 1/4 cup cheese, in this case mozzarella (L)
  • Fresh herbs if you want.  I used chives, sage, and oregano.
  • Salt and pepper
These potatoes are boiling too hard.
 Cut potato into bite sized cubes.  Place in a large, shallow frying pan over medium heat, and pour in 1/4 cup water or stock.  Bring to a simmer, and allow to cook.  Do not cover.  The liquid should evaporate as the potatoes cook, and they should be fork tender and ready to eat at the same time that there is no more liquid in the pan.  If the liquid is evaporating too quickly and the potatoes are not cooked through, add more liquid a tablespoon or two at a time.  Once the liquid is completely evaporated, add 1 tbsp butter and saute potatoes until they are lightly browned and crisp on all sides. 

Add remaining tbsp of butter, and all additional ingredients, stirring to combine and to scramble eggs.  Turn heat to medium.  Cook, stirring constantly, until eggs are cooked through and cheese starts to melt. 

Monday, July 18, 2011

Leftovers, anyone?


Like most people, I'm busy.  I do a lot.  So leftovers become a big part of my weekly meals.  I try to cook "real" meals on the days I can - usually Friday or Saturday, Sunday, sometimes Monday, and Thursday, and I try to cook enough that we can eat the leftovers the rest of the week.  Sometimes this means literally just a reprise of what we had the night before, but personally I would rather have something different.  Lots of times, this means pasta.

One of my personal cooking specialties is "Pasta Ala Whatever the Heck I Have in the Fridge."  This is very similar to my Super Top Secret Mac & Cheese recipe, in the fact that it doesn't really matter what you put in it.  Pasta is good like that.  Basically every time I'm watching "Chopped" I think: "Oh, I would make a pasta with that basket."  Got a bit of meat?  Throw it in a pasta.  Even better, got two different kinds of meat, neither of which is enough to make a meal?  Don't eat them as a midnight snack!  Throw them in some pasta.  Some random, kind of old vegetables?  Cook them down, add some butter and cream... like magic you have pasta sauce.  Rock hard cheese that you're not sure what it used to be?  You got it, grate it over your pasta.

Pasta is cheap.  It's filling.  It can take a lot of additional, random ingredients if you have them, or it can be eaten basically on its own.  It's a good meal.  The below recipe is just a possible example.  Basically anything can be substituted for any of the items.

This recipe is technically out of order.  I recently graduated from my MBA program, and in celebration had a crawfish boil.  The crawfish was not, as you might expect, local.  But it was good, and it did include many local ingredients - including local sausage which I have used in the below recipe.  More on my boil later...

Spinach Pasta with Chicken, Sausage, Mushrooms, and Zucchini

  • 2 servings (approx. 8 oz each) fresh spinach pasta (L/L*), or use dried pasta from a box
  • Leftover chicken - about 1 breast worth (L)
  • Leftover sausage (In this case, spicy andouille sausage) - about 1 link (L)
  • 5 or six large cremini mushrooms, sliced (L)
  • 1 small zucchini, sliced (L*)
  • Salt and pepper
  • 2 tbsp butter, divided (L)
  • 1/4 cup half and half (L)
 Cook pasta in a medium pot with well salted water, and cook until pasta is just under al dente.  Meanwhile, melt 1 tbsp butter in a large frying pan.  Add chicken, sausage, mushrooms, and zucchini, season with salt and pepper, and saute until meat is warmed through and veggies just start to get tender.  Add half and half and remaining butter, and cook, stirring, until butter melts and small bubbles start to form around the edge of the pan.  And pasta, stir, and allow to cook a 2-3 more minutes, until pasta finishes cooking and all ingredients are well combined.


Another choice for using leftovers is to make something that's almost a recipe.  For example, many quick weeknight recipes call for boneless, skinless, chicken breasts.  Generally when Jeff and I have a whole chicken, we end up with 1 breast and 1 thigh leftover.  By carefully slicing the meat off of these two pieces, I can get pieces of chicken that serve the same function as a chicken breast - even if they are a little smaller.  From there, I just follow the recipe, substituting my pieces of chicken for the chicken breasts, and cooking for less time since the meat is already cooked through.  This would work for chicken marsala, or you could cut the pieces smaller and use them in tacos.  In this case, I made chicken saltimbocca... sort of.  I made this a while ago, while there was still asparagus at the market.  You could substitute any veggies you want, or not use the vegetables at all.  If you are not using vegetables, reduce the wine to 1/4 cup, and the butter to 1 tbsp.

Chicken Saltambocca (ish) with Asparagus and Turnips 
  • 3-4 slices bacon (L), or use prosciutto to be more traditional
  • 2 cooked chicken breasts, or one breast and one thigh, sliced into tenders about 1/2 inch thick. (L)
  • 1/4 cup flour (L)
  • salt and freshly ground pepper
  • 2 tsp fresh chopped sage, plus whole leaves (L*)
  • 2 tbsp butter, divided (L)
  • 1/4 lb fresh mozzarella cheese, thinly sliced (L)
  • 3/4 cup dry white wine
  • approx. 10 stalks asparagus (L)
  • 2-3 small turnips, sliced (L)
In a large frying pan, cook bacon until it is done, but not crispy.   Remove from pan and drain on paper towels, but leave bacon drippings in pan.  Season flour to taste with salt and pepper, and stir in chopped sage.  Dredge chicken tenders in flour, and fry briefly in bacon fat over high heat (you want to create a crust on the chicken here, but you don't want to leave it in too long as the chicken will dry out due to being already cooked.)  Remove chicken from pan and set aside.  Add 1 tbsp butter to pan and allow to melt.  Add vegetables and saute for about 3 minutes.  The veggies should not be cooked through.

Meanwhile, assemble chicken by layering 1 piece of bacon on top of each chicken breast, followed by sage leaf, followed by mozzarella cheese.  Trim bacon, sage, and cheese so all items are the same size as the chicken tender.

Add remaining tablespoon butter and wine to pan, and cook just until butter melts.  Add chicken to pan, turn heat to very low, and cover tightly.  Cook just until chicken is heated through and cheese is melted.

My point, I guess, is that food is not a science.  Most of us learn to bake before we learn to cook.  I can remember helping to mix up cookies and brownies well before I was cooking anything.  This makes sense, I guess, because baking rarely requires sharp knives, and the hot part can easily be handled by mom or dad or grandma without the kids feeling left out.  But, in reality, that's backwards.  Baking is a science.  It requires following precise directions, or things don't turn out well.  I think we learn, at an early age, that cooking also has to be precise.  But it doesn't.  There are no rules.  Your pasta won't fall like a cake or a souffle.   It doesn't really matter what you put into your food, as long as it tastes good.  And the only way to learn what tastes good is to try different combinations.  I've found, if I can eat my leftovers in a meal that isn't an exact replica of what the leftovers originally were, I'm more likely to eat them, and less likely to throw food away.

Thursday, June 16, 2011

Quick Recipies

Very, very, VERY early tomorrow morning I am leaving for the Mecca of Locavore-ness: San Fransisco.  Not for locavore type activities.  In fact, I'm fairly certain I won't have time to eat!  I will be filming the next FatChanceBellyDance video, which I cannot express how honored I am to be in the video, and excited and all sorts of crazy emotions that I don't even know how to feel.  But I think it's going to be a very long, exhausting weekend and I'm not even bringing my laptop with.  So here are some recipes to hold you over.

These recipes got "forgotten."  They weren't interesting enough to have their own story, but are still good and quick to make!

Grilled Turkey Wing with Sauteed Spinach and Mushrooms and a Baked Potato:
This is a Jeff style meal: Meat, Potato, Vegetable!

Serves 2:
Total Time: 30 Minutes

  • 2 turkey wings (L)
  • Salt
  • Garlic Powder
  • Onion Powder
  • Butter (L)
  • 1/4 clove garlic, minced (L)
  • 1 large bunch spinach (L)
  • 1/4 lb mixed wild mushrooms (L)
  • Fresh ground pepper
  • 2 baking potatoes (L)
Bake potatoes in your preferred method.  I prefer microwaving for about 10 minutes.

Season wings generously with salt and pepper.  Grill over medium high heat for about 20 minutes, turning once.

In a large frying pan, melt 1 tbsp butter.  Add garlic, and saute for about 3 minutes.  Add mushrooms to pan and season with salt and pepper.  Allow to cook until mushrooms soften, release most of their liquid, and liquid has evaporated.  Remove from heat and add spinach to pan.  Cook, stirring constantly, until spinach is wilted.  Season with additional pepper.


Grilled Bok Choy, Elk Steak, and Potatoes
(This is a Kate style meal - Meat, Vegetables, and Potatoes... with a twist!)
Active time: 30 minutes
Total time: 45 minutes
  • Fingerling or red potatoes (L)
  • 1 tbps Olive Oil
  • 3 tbsp butter
  • 1 bunch bok choy, pulled apart and washed (L)
  • 2 small elk steaks (or any other meat) (L)
  • Salt
  • Pepper
  • Garlic Powder
  • Onion Powder


Preheat grill.

Cut potatoes into halves or quarters depending on their size.  Toss with olive oil and season with salt and pepper. In a grill basket, grill potatoes over medium heat, tossing regularly, for about 25 minutes or until soft.

Meanwhile, melt butter in a small microwavable bowl.  Brush both sides of the bok choy with the butter, and season with salt.  Set aside.

Season steaks with salt, pepper, garlic, and onion powder.  Grill over medium high heat, for about 5 minutes per side, or until they are as done as you want them to be.

While steaks are resting, turn grill up to high and grill bok choy for about 3 minutes on each side, until stems are softened and leaves are crispy.  I have found that the back of my grill is a bit hotter than the front, so I put the stems towards the back so they get done before the leaves char off.  If you are using a gas grill with multiple burners, you could also set one to high and one to medium, and put the leaves across so the stems are over the hotter area.


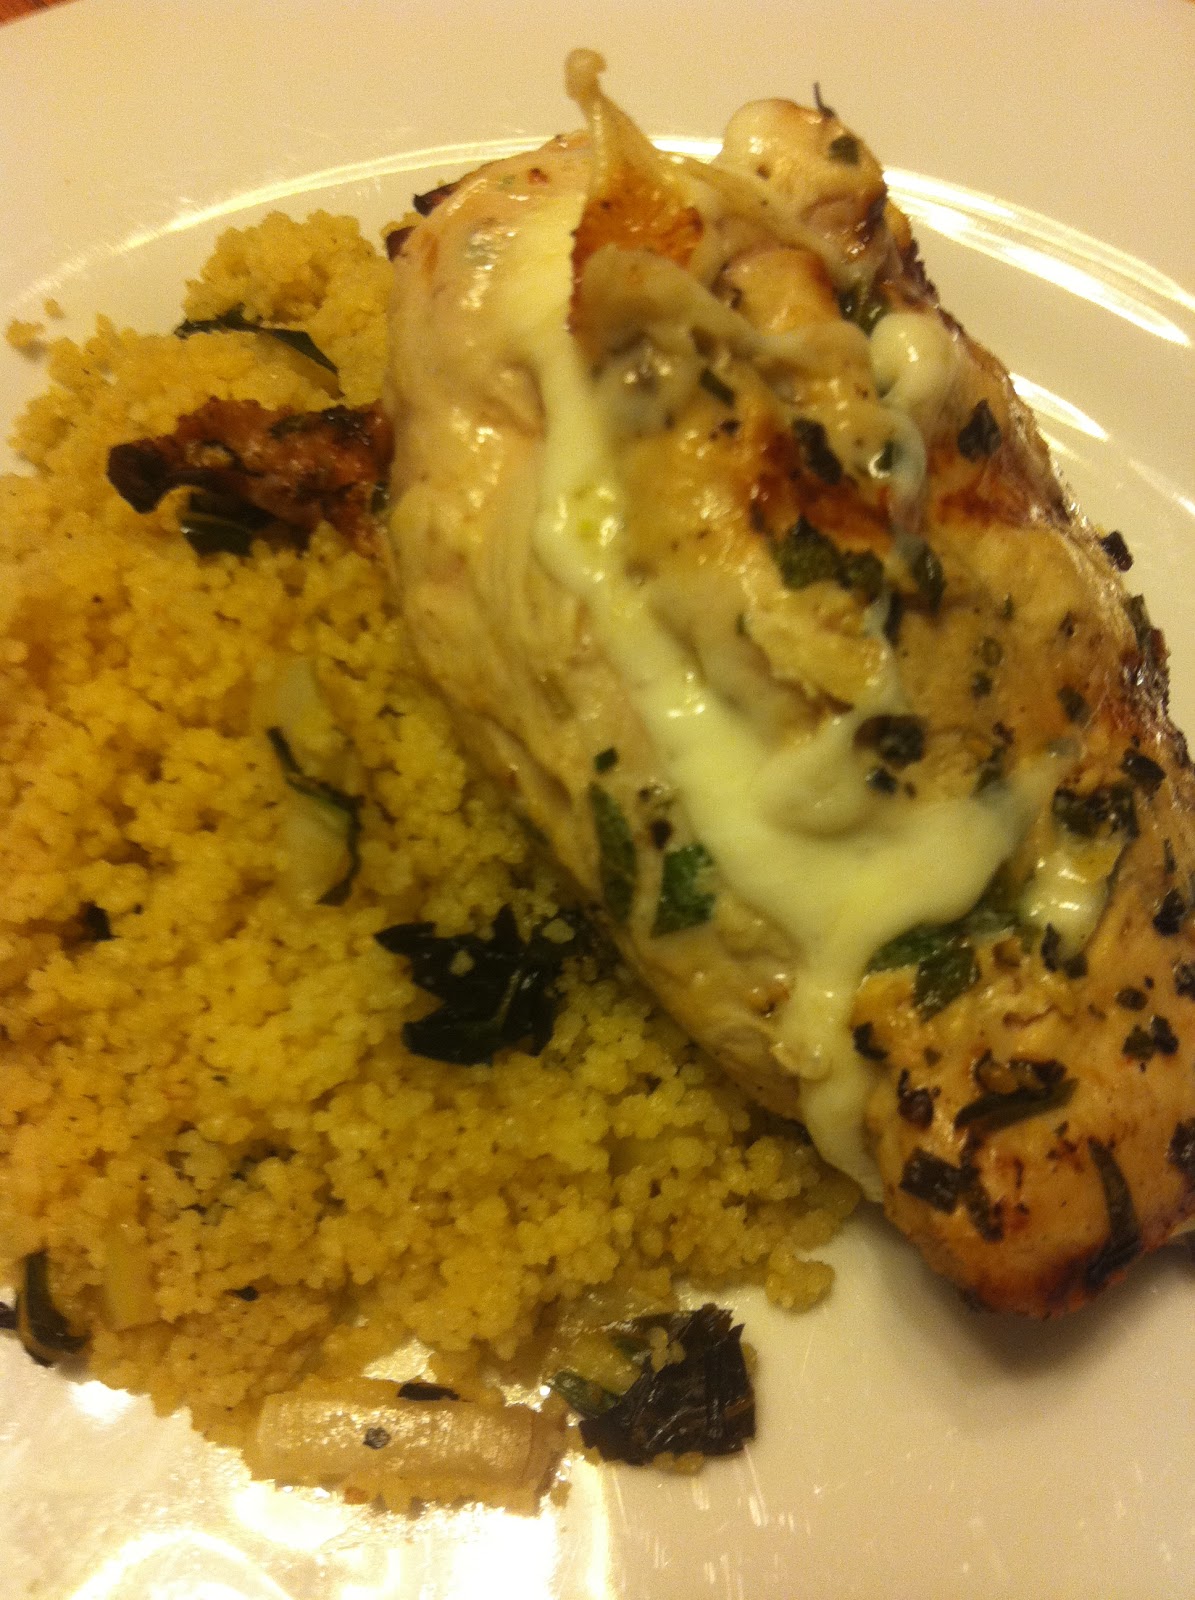
Mozzarella and Sage Stuffed Chicken Breasts

This is a summer time staple at my house, because it is super easy and delicious!
Active time: 10 minutes
Total Time: 30 minutes
Serves 2

  • 2 boneless, skinless chicken breasts (L)
  • Salt and Pepper
  • Garlic Powder
  • Onion Powder
  • 8-10 sage leaves, whole (L*)
  • 1 8 oz ball fresh Mozzarella (L)
Preheat grill to Medium-High heat.

Make sure chicken breasts are 100% thawed, or this will be harder.  Carefully, butterfly the chicken breasts: Slice chicken breasts down the length of the side of the breast, almost to the end but not all the way through, so the breast opens up like a book.  Season the chicken breast inside and out with salt, pepper, garlic and onion powder.

Open up the chicken breasts so the two "insides" are showing, and what originally was the "outside" of the chicken breast is facing down.  On one half (what will become the "bottom" half) lay 4-5 sage leaves per breast, depending on the size of the chicken breast and the sage leaves.  Thinly slice the Mozzarella, and lay that on top of the sage leaves, trimming to match the bottom half of the chicken breasts.  Fold the top half over the mozzarella, and use a tooth pick to hold the breasts closed (it should now look like the original chicken breast, except with sage and mozzarella stuffed in the middle!)

Grill over medium high heat, until cooked through, about 8-10 minutes on each side.

I served this with couscous, prepared using the manufacturer's directions, mixed with chopped leftover bok choy from the recipe just above this one (Grilled Bok Choy, Elk Steak, and Potatoes)

Friday, May 6, 2011

Happy Cinco De Mayo!

Mexican food means to me (in addition to Margaritas) either: 1. Super Americanized Chicken Tacos (you know, some chicken breast, cheddar cheese, lettuce, tomatoes, sour cream...) or, 2. Going out for Mexican food!  I don't have a lot of real Mexican dishes in my repertoire.  And by a lot I mean any.  I make a mean taco dip...

I picked this recipe because I thought it would be a good opportunity to use up some of the leftover pumpkin seeds I had from the Chewda... That would have been a great plan, had I read the recipe ahead of time and realized that there were no pumpkin seeds in it.  And also, that there were a lot of things I DIDN'T have... even after a shopping exertion.  I'm not sure how authentic this recipe (taken from epicurious.com) was to begin with, and I really didn't follow it that much anyway.  So, I still might not have any real Mexican dishes in my repertoire.  But this was good and fairly easy, and I will make it again!

This also has the benefit of being a one pot meal, unless you want to serve it with rice, which I totally did!

Pumpkin Chicken Mole
(serves 2 with leftovers for dinner or lunch the next day)
  • 2 dried Serrano chillies (L) 
  • 2 tbsp olive oil 
  • 1/2 medium white onion, chopped roughly (L)
  • 4 garlic cloves, peeled and smashed (L)
  • 3/4 cups canned diced tomatoes, or fresh tomatoes if you have them (I don't)
  • 1 3/4 cups chicken broth (L)
  • 1/2 cup canned pumpkin
  • 2 boneless skinless chicken breasts, sliced into about 1/2 inch thick slices (L)
  • splash half and half (L)
  • Fresh cilantro
  • Sour Cream
  • Lime wedges
  • Salt
  • Pepper
  • Garlic Powder
  • Onion Powder
 Cut the stems off of the chilies, cut them in half, and remove the seeds.  Heat a large pot over medium heat, and toast the chilies until they start to darken. DO NOT stand over the pot and breath deeply, as I was coughing all night!  Once chilies have toasted (about 3-5 minutes), remove and place into a bowl of warm water to soften.  Allow to soak for about 30 minutes.

Meanwhile, add oil to the same pot.  Saute onions and garlic until they are staring to brown.  Place onions, garlic, (leave any remaining oil in the pot) tomatoes, and softened chillies into a food processor, and blend until smooth.

Season chicken with salt, pepper, onion, and garlic, and put into the pot, adding more oil if necessary.  Cook until browned over medium high heat.  Chicken does not need to be cooked through.  Add contents of the food processor to the pot with the chicken, along with chicken stock.  Bring to a boil, then reduce heat and allow to simmer, uncovered, for about 30 minutes or until chicken is cooked through and is starting to fall apart, and sauce is thickened.  Add pumpkin, taste, and adjust seasonings - adding honey if you would like the Mole to be sweeter.  Add a splash of cream and cook, stirring constantly, until the sauce comes back to temperature.

Serve over rice if desired, with cilantro, sour cream, and a squeeze of lime over the top.

Monday, April 18, 2011

Morocco Meets Milwaukee (Chicken Tagine with WI Root Vegetables)

Sorry to be missing lately.  Jeff had a lot of gigs last week, and there's really no point in me cooking for myself.  I had a lot of bread and cheese dinners.

For my birthday this year, my mom got me a tagine, which is basically a North African casserole dish.  Traditionally, it would be cooked over an open fire, and I actually did try to use it on my grill, but it is too tall and the cover of the grill wouldn't close, so I used my oven instead.

I didn't make it to the farmer's market this Saturday, as I had to teach class at 10:00 am and I totally overslept - so my cupboards are rather bare... Seems like the perfect opportunity for a one pot, simple meal!  A little bit of Morocco, a little bit of Milwaukee, and a whole lot of yum!  I would not change a thing in this recipe.  It came out absolutely perfect, with the exception of a lot of water in the bottom of the tajine when it was done.  It didn't effect the flavor at all - in fact I'm sure all the steaming made the chicken even more tender, but it wasn't as pretty to serve.  I'm guessing that was from the vegetables I used, because the chicken was very moist.  I've never cooked with rutabaga or celery root before, so I'm not sure how much liquid they're supposed to give off...  This was also pretty sweet because of the honey, but in a good way.  If you wanted to add some spice, I think a hot madras curry powder would add a nice flavor as well.

I did purchase a chicken at the farmer's market two weeks ago - my first non-Farmer Jones chicken in almost three years.  It made me sad, but the guy selling it looked like Spike from Top Chef Season 4/Top Chef All Stars, so that helped a little.  It would have helped more if he looked like Spike from Buffy, but a girl can only ask for so much!

This was 100% local... if you don't count the spices!  The celery root takes a lot longer than everything to cook, so I started that cooking and then did everything else.

Moroccan Chicken Tagine with WI Root Vegetables

  • 1 medium rutabaga (local)
  • 2 small celery root bulbs (local)
  • 3 cloves garlic (local)
  • Salt & freshly ground pepper
  • 1 tsp ground cinnamon
  • 1 tsp ground ginger
  • 1/2 tsp turmeric
  • 1/2 tsp black pepper
  • 1/2 cup olive oil, divided
  • 1 (3 lb) chicken, cut into serving pieces (local)
  • 1 onion, halved and then thinly sliced (local)
  • 3 tbsp (ish) honey (local)
Pre-heat oven to 400 degrees.

Peel and cut celery root into about 1/2 inch pieces.  Mince 1 garlic clove and combine with 1/8 cup olive oil.  Coat celery root with garlic/oil, and season with salt and pepper.  Place into bottom of tangine.  Cover, and cook in oven for 40 minutes.

While celery root is cooking, peel and cut rutabaga into about 1/2 inch pieces.  Mince 2nd garlic clove and combine with 1/8 cup olive oil.  Coat rutabaga with garlic/oil and season with salt and pepper.

Combine spices, salt and pepper to taste, and remaining 1/4 cup olive oil in a large bowl.  Add chicken pieces and turn to coat.  In a large skillet over medium high heat, brown chicken in multiple batches (don't crowd the chicken), and set aside.  If you have any seasoned oil left in your bowl, add that into your skillet (if not, you may need to add a little more oil) and cook onions and final clove of garlic until the onions are just starting to soften.  Add honey to onions.

After the celery root has cooked for 40 minutes, add the rutabaga to the tagine and cook for 10 more minutes.  Then, add the chicken , and top with the onions.  Return tagine to oven and cook for an additional 40 minutes, or until chicken is cooked through.

Total cooking time: 1 hour 30 minutes.

You certainly could serve this with couscous.  I did not serve it with anything, and it was enough and quite delicious.

Friday, April 1, 2011

Chicken

I would like to start off with an apology for being absent.  I will discuss that later, but I want to get right into this for those of you who won't make it to the end of this blog.

Not that long ago, I was asked "why are you doing this?  What's your point."  I didn't really have an answer that I could articulate, partly because I'd been drinking, and partly because I'm so passionate - but I don't really know why.  Why am I doing this?  

Wednesday, that question was answered for me in a very painful way.  I've only made a handful of posts, but I know I have mentioned my "chicken man" on several occasions.  Farmer Jones personified why this is important to me.  I'm passionate about food.  He's passionate about raising healthy, happy chickens.  I can't say this better than him, so please read this.  Click on the picture to make it bigger:


I cried when I read this letter.  I cried as I am writing this.  This is a man who cared about what he was doing, and what he was providing.  This is a man, who this time last year, sent a letter to his customers stating that we should let him know families in our area who were suffering due to the economy.  Who sent a letter, stating that he knew times were tough, and was happy to provide food, at no cost, to those who could not afford it.  This is a man who knew what I ordered and when I ordered it, and worried about me when I didn't show up at the market on Saturdays.  This is a man who cared about his customers.  This is a man who I joked with.  This was a man who I made chicken Christmas cookies for.  This is a man who cared about his community.  He didn't deserve to lose his business.  Moreover, he didn't deserve to lose his dream.  This was a man who I considered a friend.

I had one chicken left from him, which I baked up for dinner.  I stuffed it simply with onion, garlic, and a half a lime.  Seasoned with salt, pepper, garlic and onion powder.  I served it with mashed potatoes, and local greens with ranch dressing.  It was a fitting last chicken dinner.  I'm pretty sure if I knew I was going to die tomorrow, this would be my last meal.

I know there will be more chicken.  There are farmers at the winter farmers market with chicken.  But this was a friend, and he didn't deserve this.  Those of you who know me, know that the environment is important to me.  I know that replacement energy sources are important.  But I also know that ethanol is not the answer.

What I ask from you, is to think about where your food comes from.  If the answer isn't a person, then you have no way to know what you're really putting into your body.  If the answer IS a person, then they deserve to be treated like one.  If you're interested in learning more about where your food comes from, visit http://www.foodandwaterwatch.org/food/global-grocer/  I know I'll talk about this more later.  Right now I'm too upset to be rational.  But think: everything in life is a trade off.  Make sure you trade wisely.

I love my husband.  He's a good man and he cares.  He made a copy of the letter and sent it to our representatives in state government.  I ask you to consider doing the same.  Our environment needs to be protected, but so does our food supply.  Without either, we are truly lost.


Rami says, "what do you mean there's no more chicken??"