Monday, October 31, 2011

Attack of the Monster Zucchini!!!!

This is somewhat of an outdated story.  It should have occurred at the same time as my taking down my garden for the fall, but I just didn't have time to get it typed up.  Live with it.

I have the same issue every year.  I'm out picking zucchini, and at some point I stumble across the LARGEST ZUCCHINI IN THE HISTORY OF EVER.  It wasn't there the previous day.  I looked.  There's no way that I could have missed a zucchini this big, or even a zucchini one day less that big. And then I grumble to myself and pick it.

And then, I stop dead in my tracks and curse.  I should have let it grow!  It's already too big to use; I should have just let it keep growing and see what happens.  Maybe I could actually grow the largest zucchini in the history of ever and go on to win a prize and get put in the Guinness Book of World Records and go on TV talk shows and pimp out my blog.  It would be awesome!

And, this year, I actually accomplished it.  No, not the actual biggest zucchini in the history of ever, or any of the other stuff above, but the general foresight to not pick the big ass zucchini.  It's something.


According to the Guinness Book of World Records, the longest zucchini ever grown was 7 feet 10.3 inches, and the heaviest zucchini ever grown was 64 pounds, 8 oz.  I did not come close to this.  My zucchini was thee feet nine inches, and weighed about 16 pounds.  Still big, though.

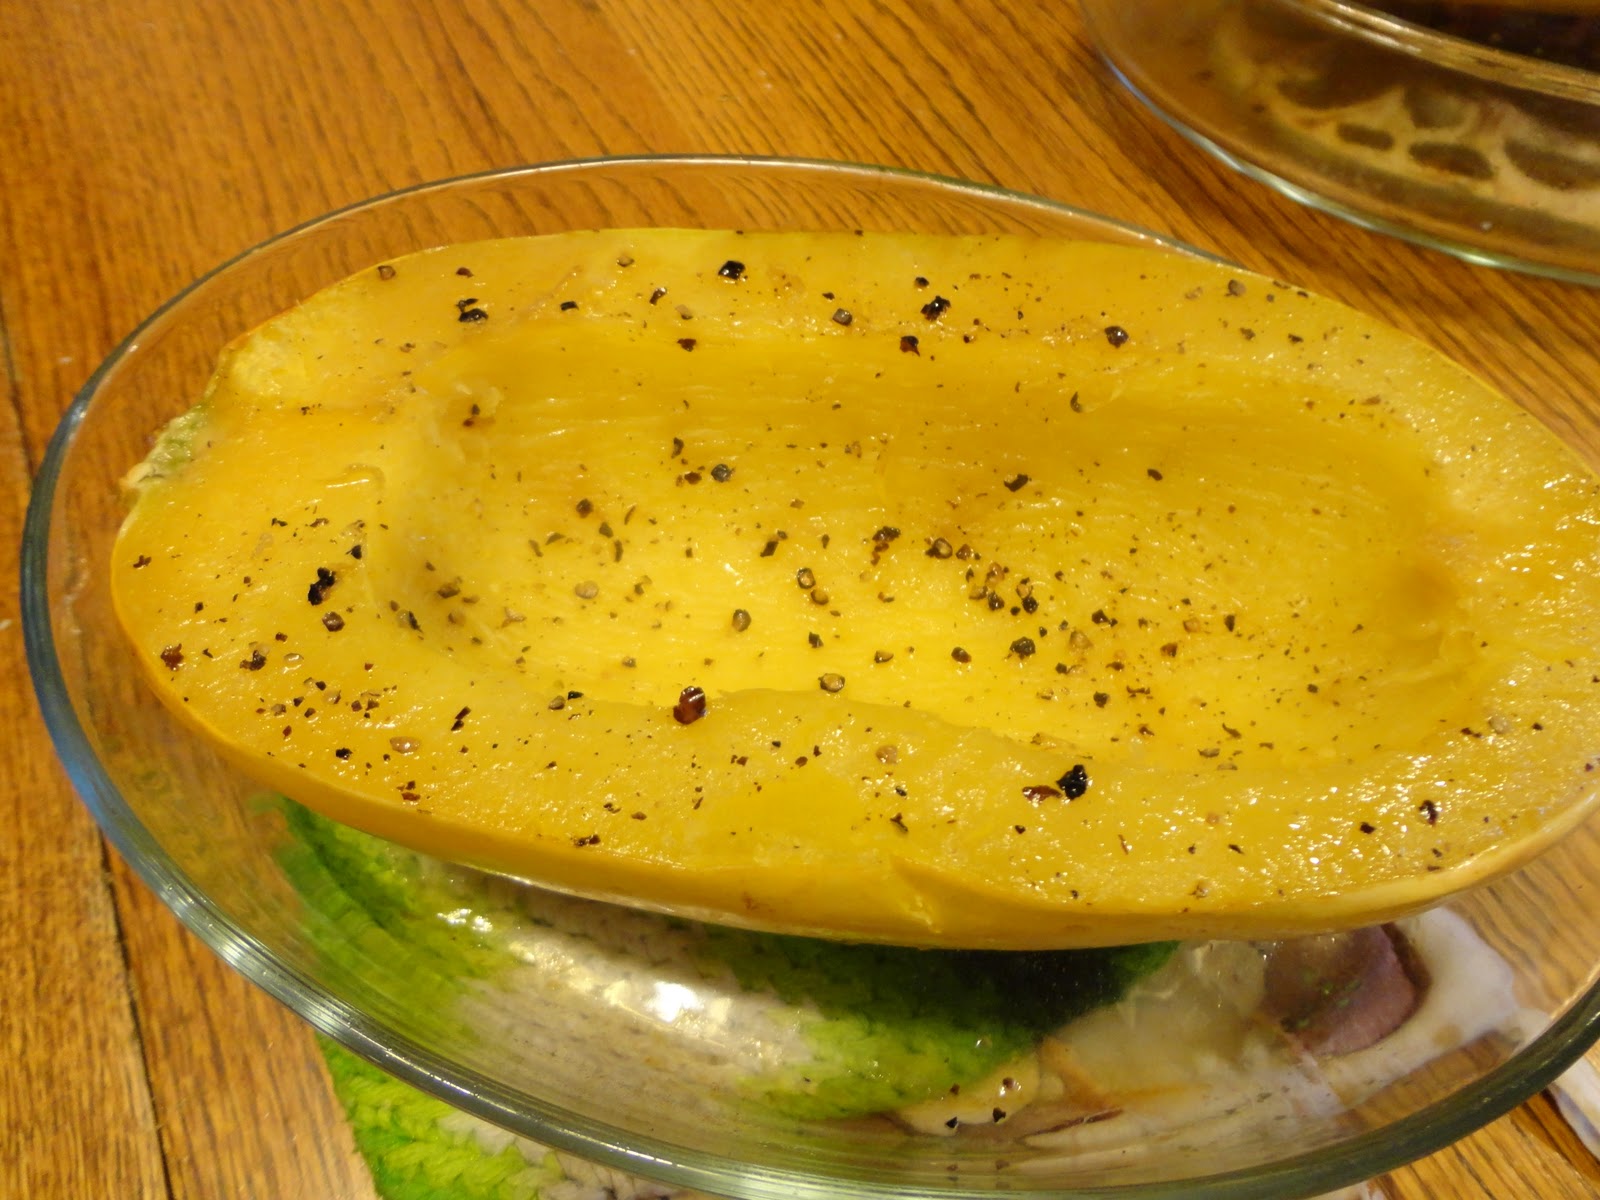
The biggest surprise, in my opinion, was when I went to cut into it.  I had to cut into it to weigh it, because my kitchen scale only goes up to 7 lbs, and it was rock hard!  Rock hard like a winter squash.  I immediately assumed that the inside was going to be terrible, and even went so far as to throw some of it into the compost bin after cutting it up.  But the more I cut, the more I felt like I was cutting up some sort of hard winter squash.  Even the inside was kind of orange and squash like.  The seeds had hardened like a pumpkin, and the inside part was even starting to get stringy like a winter squash.


So I decided to treat it like one.

I peeled off the skin with a sharp knife, scooped out the guts in the center, and cubed up the remaining squash.  I popped a small bit in my mouth and it tasted like butternut squash.

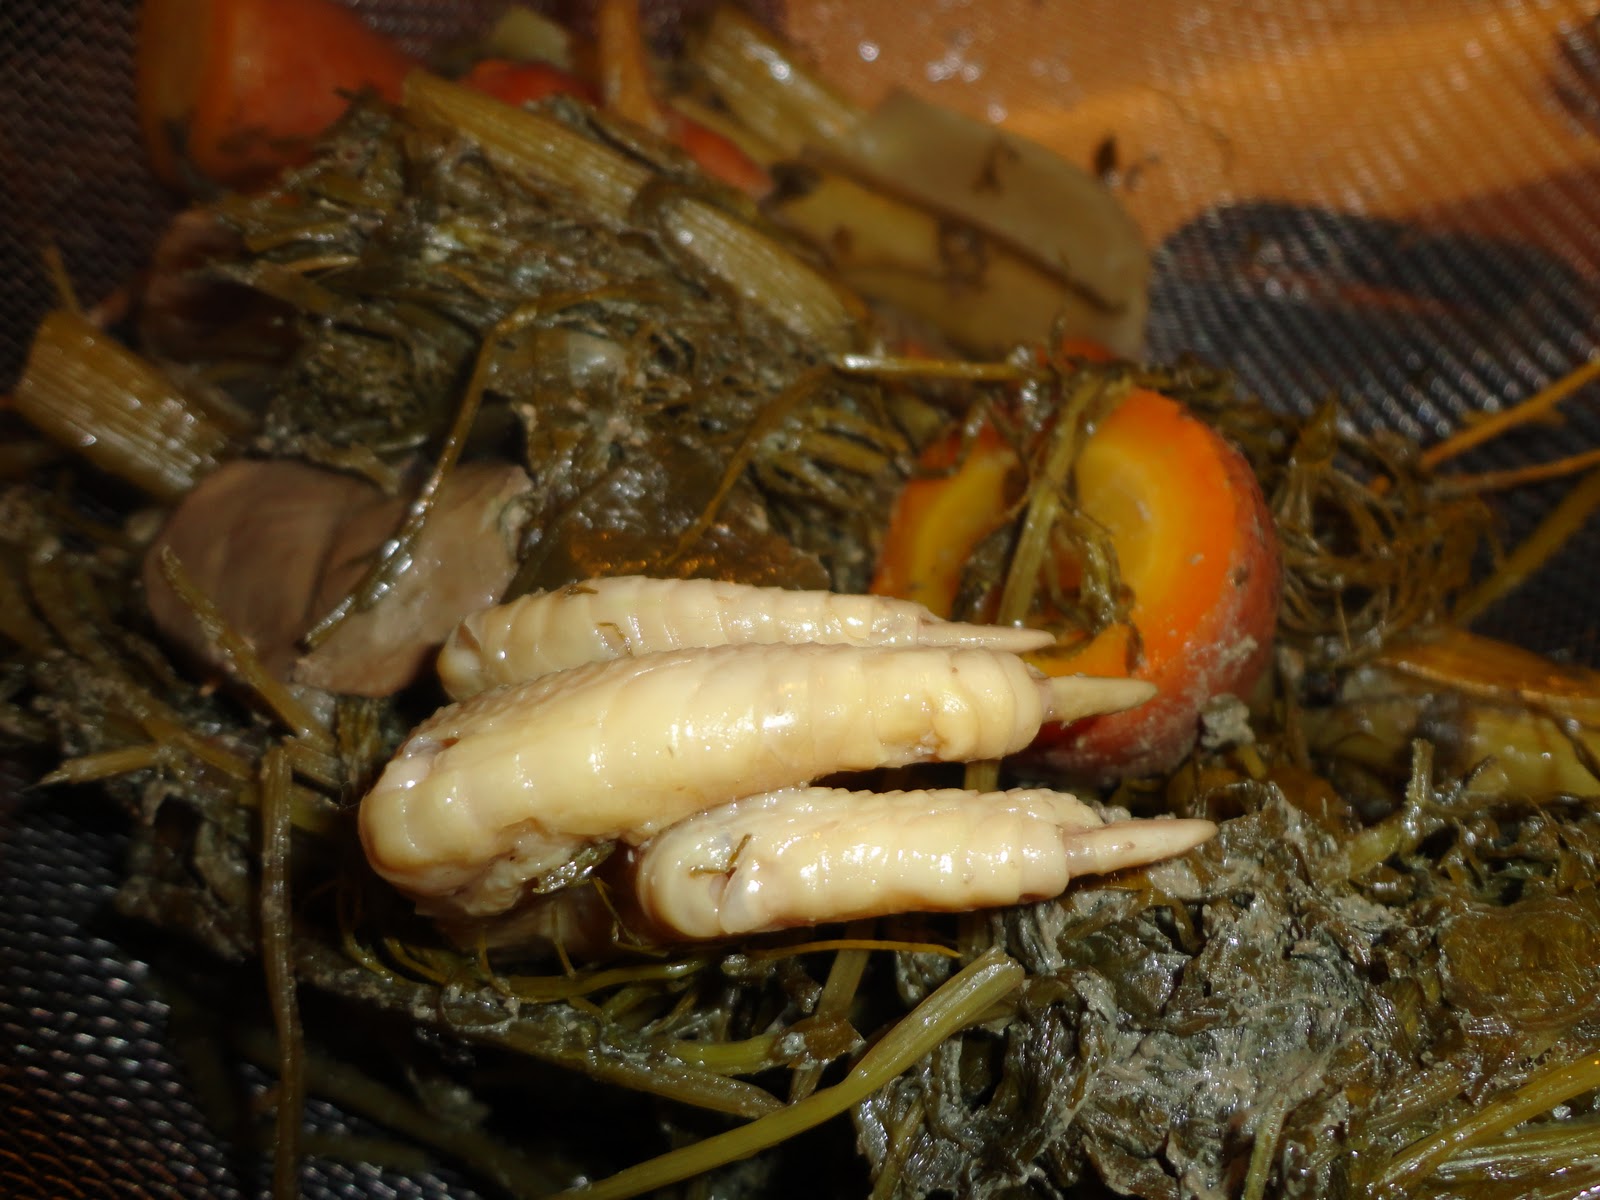
I threw it in a pot, covered it with water, added a little bit of salt, and boiled it until soft:


Then I mashed it.  I used about half of it to make bread.  The other half I froze.  I'll probably use it to make more bread.  Or cake.

The bread itself tasted like a very mild pumpkin bread.  It was very subtle, but the flavor was definitely there.  I'm not sure if this is a GOOD use for zucchini, and I have a feeling that leaving this one courgette on the vine all year dramatically reduced my zucchini production - but if you end up with a hard ass zucchini at the end of the year, you don't have to throw it away.  I made several loves of this bread, and froze all but one.

Old Zucchini Bread (the zucchini is old... not the bread...)
  • 2 (.25 ounces) packages active dry yeast (I don't use packages.  I have a jar.  It said on the back of the jar how much equaled two packages... but I don't remember what that amount was.  If you don't use packages, there should be a conversion on whatever you do have...)
  • 1/2 cup warm water (110 to 115 degrees) (L)
  • 1 1/4 cup mashed, cooked old hardened zucchini (or substitute any winter squash) (L*)
  • 1 cup warm milk (110 to 115 degrees) (L)
  • 2 eggs, beaten (L)
  • 1/3 cup melted butter (L)
  • 1/3 cup sugar
  • 1 tsp salt
  • 7 cups flour (L)
In a mixing bowl, dissolve yeast in water.  Let stand for 5 minutes.  Add squash, milk, eggs, butter, sugar and salt.  Mix well.  Gradually add 3 and 1/2 cups flour and beat until smooth.  Add enough remaining flour to form a soft dough.  Turn on to a floured surface and kneed until smooth and elastic, about 6-8 minutes.  Place in a greased bowl, turning once to grease top.  Cover and let rise in a warm place until doubled, about one hour.  Punch dough down.  Shape into 3 loaves, place into greased 8x4x2 inch loaf pans.  Cover and let rise until doubled, about 30 minutes.  bake at 375 degrees for 25-30 minutes or until tops are golden.  Remove from pans to cool on a wire rack.

Wednesday, October 26, 2011

A Halloween Fright!


It's almost Halloween, and I wanted to share something really scary!!!!


Okay, fine.  I made chicken stock and this is some of the stuff that was in the stock draining.  Yes, that is a chicken foot you see!  Chicken feet are great for stock because they're all yummy cartilage.  Plus they're cheap. 

I watched an episode of Chopped the other day where they had chicken feet in their basket, and none of the contestants cut the talons off.  Can you imagine trying to eat one of those babies?  Now that is scary!

One thing that I forgot to mention in my previous post about chicken stock is not to push down on the ingredients while they are draining.  Pour everything through a fine mesh strainer and collect the stock, but don't squeeze the remaining ingredients to get extra juice out of them.  This makes your stock cloudy.  Once I run it through the strainer, I strain it again through a cheese cloth to get out any smaller bits that may have made it through the strainer.

Monday, October 24, 2011

Delicious Mushrooms


I love mushrooms.  Really, they are one of my most favorite foods.  They are also kind of baffling to me.  With so many kinds, and so many more kinds that will make you violently ill, and not any real obvious distinguishing features between the two, I have to wonder who first decided that this thing growing out of rotted wood or damp soil was good to eat.

I'm very thankful they did, though.

Needless to say, I probably will not engage in much mushrooming.  I like to be outdoors, and the thought of finding my own mushrooms and getting them for free is an intriguing one.  On the other hand, I really like my stomach lining and don't want to see it melt away.  Seriously.  A quick Wikipedia search tells me that possible consequences of eating wild mushrooms that have been incorrectly identified as edible include: liver damage, kidney failure, respiratory failure, neurotoxicity, destruction of blood cells, loss of limbs, and death.

Yes, $20 to $50 a pound for mushrooms may seem like a lot to some people, but it seems a perfectly reasonable price to pay to avoid loss of limbs and death. 

(Side note: a search for "negative consequences of mushrooms" is not a good search to do at work.  Mostly it is tips to avoid a bad trip!)

Last week was the last week at the South Shore Farmer's Market.  It makes me sad, because that market is so close to my house.  That means two weeks of the West Alis Farmer's Market, which frankly is too busy and makes me crabby, and then on to the Winter Farmer's Market at State Fair Park.  My mushroom guy does go to the Winter Market, and his company is at the Stalis Market, but he's not there and he's fun.

So, to mourn the last day of the SS Market, I decided to treat myself.


Hen of the woods!  Otherwise known as the Maitake mushroom.

Okay, let's be honest.  I probably would have "treated" myself had it been the last day or not.  I can't turn down a good fancy mushroom.

I'm not sure I've had hen of the woods before, but I haven't had a mushroom I didn't like yet.  The texture of the hen of the woods was firm, almost even chewy.  I ended up cooking them much longer than I would cook a regular mushroom, which did help them to get very tender.  The taste was very meaty and earthy, and I was actually disappointed that I made them in a chicken recipe - since I thought the flavor overwhelmed the chicken a bit.  It probably would have been just as good had I totally omitted the chicken from this recipe - which would have saved some money too.

That's not to say that this was not good.  In fact, it was excellent, however I think it would have been just as good without the chicken.  I left the Hen of the Woods in pretty large strips, so they did seem like additional meat.

Wild Mushroom Chicken Marsala
Modified from The Williams-Sonoma Collection: Chicken
Serves two with a good amount of leftovers for the next day

  • Two boneless skinless chicken breasts (L)
  • Salt and freshly ground pepper
  • 1/4 cup flour (L)
  • 4 tbsp butter, divided (L)
  • 1 lb total mixed wild mushrooms - I used about 1/2 lb Hen of the Woods, and the rest was cremini, shiitake, and oyster (L)
  • 2 tbsp finely chopped shallot (L)
  • 2 minced garlic cloves (L)
  • 1/2 cup dry Marsala
  • 1/2 cup chicken stock (L)
  • Garlic Mashed potatoes (L)
 Cut the chicken breasts in half laterally, so you each breast half becomes two thin fillets.  Alternately, or if you have thinner breasts, you can use four half breasts, pounded to an even thickness.

Season the flour well with salt and pepper, then dredge each chicken fillet in the flour, shaking of any excess.

In a large frying pan, heat 2 tbsp butter over medium-high heat.  Add the chicken breasts and cook, turning once, until lightly browned on both sides - about 3 to 4 minutes per side.  Transfer to a platter and cover to keep warm.

In the same pan over medium heat, melt the remaining butter.  Add the mushrooms and cook until the mushrooms release their liquid and the liquid evaporates.  If I had it to do again, I would add the hen of the woods first and cook those down before adding the others.  Stir in the shallot and garlic, and cook until softened - about 2 minutes.  Add the Marsala, raise the heat to medium high, and boil for 30 seconds.  Add the stock and return to a low simmer.

Add the chicken back into the pan, burring it under the mushrooms as much as possible.  Cover, and allow to cook at a very low simmer until the chicken is cooked through - about 5 more minutes.  Season the sauce with salt and pepper, and serve over garlic mashed potatoes.


Garlic Mashed Potatoes:

  • 3-4 large Yukon Gold potatoes (about 2 lbs), peeled and cut into thin slices (L)
  • 3 cloves garlic, peeled but whole (L)
  • 2-3 tbsp heavy cream (L)
  • 3-4 (or more) tbsp butter (L) 
  • salt and pepper to taste
Place potatoes in a pot and cover with cold water.  Add a good amount of salt and the garlic cloves.  Bring to a low boil, and continue to cook, boiling, until potatoes are easily pierced with a fork (note, the smaller the pieces are the quicker this will happen!)   Drain the potatoes, retaining the garlic cloves.  Return potatoes and garlic to the pot.  Add butter and milk, and mash to desired smoothness (I like chunky mashed potatoes).  Season to taste with salt and pepper.


Sunday, October 23, 2011

Kate's Famous Green Pork Chili


I have a lot of pictures of fruits and vegetables chopped, or in pots, or in jars.  I could spend the next month or so giving the recipes of everything I canned, but it doesn't seem terribly worth while.  First off, it's mostly too late for you to use any of my recipes, since it's getting to be mostly fall outside, and everything that should be picked... should have been picked already.  Second off, everything is still in jars.  I don't know how any of it tastes, and I can't even guarantee the canning recipe worked.  I'd rather not give you something I'm unsure of.  So, I will provide those recipes as I cook meals with them, through the winter.  

  • Corn Salsa
  • Pickled Fennel
  • Whole Tomatillos 
  • Apple Chutney
  • Spicy Zucchini Pickles
  • Pickled Watermelon Rinds
  • Tomato Sauce
  • Zucchini Relish
  • Pickled Beets
  • Spaghetti Sauce
  • Bruscetta Topping
  • Green tomato Relish
  • Pickled Green Tomatoes
  • Italian Style Pickled Green Tomatoes
  • Apple Pie filling
  • Rhubarb Chutney
  • Yellow Tomato Chutney
  • Pickled Hot Peppers
  • Apple Sauce
I counted, and I have in my basement 150 cans of food exactly.  Lets say that there is an acceptable amount of fresh food available again starting in June.  June is 32 weeks out.  That leaves me with approximately 4.7 cans of food to eat per week.  Hmm... that seems unlikely.

SO, if you actually know me, and you live in the greater Milwaukee Area, and any of the above list looks exciting to you, let me know and I will certainly share.  OR, I could keep it all to myself, stock piled away in the basement, in preparation for the Zombi Apocalypse.  One or the other.  I haven't decided yet.

Whole Tomatillos.  Never bought them before.  They're sticky
once peeled.
One thing I did not actually get enough of and will NOT be sharing, Zombie Apocalypse or no, is tomatillos.  I only have one use for tomatillos.  I could, in theory, find more uses I am sure.  But the one use I have is damn important.

My famous green pork chili.

Okay, maybe it's only famous with my co-workers, but that's famous enough for me.  If I ever had the opportunity to enter a chili contest, I would enter this recipe.  It is damn tasty.  As proven by the fact that I had none to take home after work, and therefore none to take a picture of.  But trust me, it's delicious.

And spicy.  Clears out the sinuses.  It is one of my favorite things that I make, and you will see it again because I have four more pints of tomatillos sitting in my basement.

Canned Tomatillos
(found in several internet locations)

Husk and wash tomatillos.  Don't skip the washing step.  They have a slimy coating that turns foamy like soap.  Place tomatillos into a pot large enough to hold them, and just barely cover them with cold water.  Bring to a boil, and simmer until tender - about 10 minutes.  Be careful on this step.  I let mine boil too hard and they broke apart.  It doesn't matter for what I will be using them for, but if I wanted whole tomatillos I would be cranky. 

Pour tomatillos and hot water into hot, sanitized jars, and add two tablespoons jarred lemon juice into each jar.  Seal, and process in a hot water bath for 30 minutes.


My Famous Green Pork Chili
  • 4 lbs boneless pork shoulder, trimmed of excess fat and trimmed into 1 inch cubes(L)
  • 2 tbsp olive oil
  • Salt, black pepper, onion powder, and garlic powder
  • 1 pint canned whole tomatillos (L)
  • 1 large yellow onion, finely chopped (L)
  • 1 head garlic, broken up and minced (L)
  • 2-3 hot Portuguese peppers, thinly sliced (L*), or you could use Jalapenos, Habaneros, or your pepper of choice to taste
  • 2 cups chicken broth (L)
  • 3/4 lb firm ripe tomatoes, finely chopped (L*)
  • 1/4 cup minced fresh oregano (L*)
  • 2 tbsp ground cumin
  • Sour cream

Place pork cubes into a large bowl and season generously with salt, pepper, garlic, and onion powder.  Heat olive oil in a large pan, add pork in batches and brown.  As the pork cubes brown, remove from the pan and place into a crock pot.

Once all the pork is browned, add onions to the pan, reduce heat to medium, and cook onions until tender, about 10 minutes.  In the last 3 minutes, add the garlic.  Transfer onions and garlic to the crock pot, and add in all remaining ingredients except oregano, cumin, and sour cream.

Allow to cook on low for 8 hours.  In the last 30 minutes, stir in oregano and cumin.  Serve topped with sour cream.

DELICIOUS!!!!

Man, too much of this got eaten at work.  I'm going to need to make it again for just me soon.


***Update!****

I forgot to add that, if this is too spicy, I will add honey to mellow it out a bit!


Friday, October 21, 2011

Two wrongs might some day make two rights!


Today I wanted to take a moment to discuss two recipes I made that were flops.  I feel like it's important to acknowledge my failures for two reasons:
1. So anyone reading won't get discouraged when they fail.
2. To make me sound less douchy.

This is more about the first than the second, because it's important to remember that cooking is an experiment, and experimenting always involves trial and error.  The error part is good, because it leads to new discoveries.

Also, I don't want to sound douchy.

Anyway, I've got two meals here.  The first was pretty okay to eat, but looked awful. The second, completely gorgeous, but just as flavorless.

Calzones:

I've made pizza on my grill before, so I thought I would try my hand at some Calzones.  Basically the same concept, so there shouldn't be any concern there.  I picked up some pizza dough at the local bakery on my way home.

Things started going wrong almost immediately.  I think I put too much inside of the calzone, so when I went to close it, the dough tore and filling started oozing out.  In the past, I have built my pizza directly on the grates of the grill, but I realized that these were so fragile that they would never survive that.  So I plopped them onto a cold pizza stone (mistake 2) without putting down any cornmeal or anything (mistake 3).  Then I threw the pizza stone on the grill.

As I walked away, I was already realizing this was a problem.

One of the reasons you always want to cook on a hot surface is to quickly sear the food.  Searing the food quickly does two things: it browns the food nicely, which makes it look pretty, and it puts a crisp on the outside of the food to keep it from sticking.  When you cook food in a not hot pan, the food sticks to whatever you're cooking on.  Also, it releases moisture slowly, which causes the food to get soggy and, in the case of meat, it will steam the food and cause it to turn grey.  None of this is very appetizing. 

When I went to flip the calzones, I knew I had a problem.  They were totally stuck to the pizza stone.  I basically had to cut them off, which means I lost any golden brown I may have had on the outside of the crust.  Also, it meant I lost that protective "crusty" layer, which let the heat into the calzone and dried out the crust.

Which left me with grey, ripped up, kind of dry crusted calzones.  Fortunately, the fact that the filling was overflowing and too wet helped with the dryness of the crust, so overall they tasted pretty well, they just weren't pretty to look at.

Stuffed Pumpkin
  
This is actually a concept I have done in the past and, done correctly, it is really impressive.  I haven't, however, done it with rice, and I think my first mistake was not believing any of the recipes I read could possibly be correct.  They all said to cook the rice through, then stuff it in the pumpkin.  "No way!" I thought.  "That would leave you with soggy rice.  I'm going to cook the rice half way, then put it into the pumpkin and let it finish cooking in there.  This way it won't be soggy, and it will take on some nice pumpkin flavor.  Right?!?"  Wrong.

I had a lot of problems here:

1. My pumpkin was really thick.  This isn't in itself a problem, but I didn't take into account the extra time it would take to cook through a pumpkin that is this thick.  And then also cook rice on top of that.  No way!

2. I bought wild rice, which I don't really make often.  I bought it because it was local, and that's great.  But using a product that I don't know how to use in a complex preparation with many steps is probably not a great idea.

3. I didn't add enough seasoning.  I think I must have forgotten to season the inside of the pumpkin with salt and pepper, because it pretty much tasted like nothing.

The damned thing took about 2 and a half hours to bake, and at the end of that time, the rice was still basically raw.  So really, really pretty.  But basically inedible:
So pretty!
You know you want this on your Thanksgiving table...

But I'm not giving up!  That's the point, here.  I know what I did wrong, and I know how to make it better.  And I will be trying again.  Plus, I used part of the pumpkin to make something delicious, which I will tell you about tomorrow, so it wasn't completely a waste.

Wednesday, October 19, 2011

Tiny Carrots!

This year, my father grew carrots in his garden.  Tiny, tiny carrots.  And when he pulled them up, he gave a bunch to me.  Yay for tiny, tiny carrots!


They were, I have to say, spectacular.  Better even than the carrots at the farmers market.  But, I suspect a lot of that is due to the fact that I can't really eat a carrot.  It's on the list.  The day I get my braces off I am having a caramel apple, corn on the cob, Laffy Taffy, and carrot party.  So, really, any carrot would taste good.  But, I suspect these were still better than average.

Carrots are one of those foods that I kind of feel like it should be a crime to cook.  Carrots, peas, beans, and broccoli are all on this list.  I have not had any of those foods cooked in a way that caused them to taste better than the raw version.  And they're all so good for you - and cooking pulls out the nutrients - so why would you want to cook them?  But, if I would have just sat down and eaten them raw, I probably would have broken a bracket.  So I decided to cook them up.  Plus my dad told me that he was only giving them to me so he could see them written about on my blog, and I bet he wouldn't have been happy with this:

Sat on the couch.  Ate so many carrots my skin turned orange.*

*True story.  This happened to my aunt when she was a kid!

I also was left with the question of what to do with all the beautiful carrot tops.  Google "Can you eat carrot greens" and you will receive responses ranging from "Absolutely!  Put them in your salad!  They are delicious" to "Absolutely not!  They are poison and they will kill you immediately!"  So, for the record, I do not recommend eating carrot tops.  If you eat them, and they are poison, and you die, I cannot be held responsible.  Also, if they are a slow killer, and you die someday (like at the age of 97), you cannot come back and blame me.  Okay?  Good.

But I threw them in my freezer and I intend to put them in my chicken stock.  I did eat a leaf off of one, and it tasted like a cross between spicy parsley, a carrot, and grass.  Not something I would want to eat raw or even wilted, but I think it would add a nice taste to chicken stock.

The other exciting thing about this dinner is that I made it on a Saturday.  That very next day I was engaged in my normal Sunday behavior (cleaning the house and watching cooking shows) and the SAME recipe I made was featured on Good Eats!  It was an old episode (Garlic), but one I had never seen before.  The part that made me jump up and down and clap my hands with joy was when it came to peeling the garlic.  When I read the recipe, it said to leave the garlic in its paper while it cooked, and then run the whole thing through a food mill or fine meshed sieve to get the paper off after cooking.  "That sounds like the dumbest plan ever," I thought to myself.  "What possible benefit could come of that?  I'm just going to take the skins off now and mash the garlic at the end - save myself making a mess!"

And what did Alton say the very next day? "Traditionally, this meal is made by leaving the garlic in their papery skins while cooking, and then removing them at the end.  That seems to be to be a good way to make a mess and burn your fingers, and I can't see any benefit to it!"

Huzzah!

I modified my recipe from my Essentials of Slow Cooking Cookbook, but it is also very close to the one presented in Good Eats "In the Bulb of the Night".  I think I probably like Alton's better, because it is Alton's, after all, and because you end up with garlic oil.

This meal should have had mashed potatoes.  It didn't, and I was sad.


Garlicy Chicken
  • 1 chicken (3 to 4 lbs), cut into serving pieces (L)
  • Salt and freshly ground pepper
  • 2 tbsp olive oil
  • 4 heads (yes, heads!) garlic, separated into cloves, peeled and lightly smashed (L)
  • 1/4 cup dry white wine
  • 1/4 cup chicken stock (L)
  • 1 tbsp chopped fresh thyme (L*)
Season the chicken all over with salt and pepper.  In a large dutch oven over medium high heat, warm the oil.  Working in batches, brown the chicken well on all sides.  Remove from the pan and set aside on a large platter.

Add the garlic to the pan and saute over medium heat until lightly golden brown.  Pour in the wine and deglaze the pan.  Add the chicken stock, and stir again, scraping up any browned bits on the bottom of the pan.  Add the chicken back into the pan and stir so the garlic is not trapped on the bottom.  Cover and cook on low until the chicken is tender and cooked through, about 45 minutes to an hour.

Once the chicken is cooked through, transfer to a platter and cover loosely with aluminum foil to keep warm, retaining any garlic cloves and remaining wine/stock/chicken juice in the pan.  Mash the garlic in the sauce with a potato masher, until the sauce is smooth.  Raise temperature to medium high and bring to a boil, then reduce to a simmer.  Add thyme, and allow to simmer, uncovered, until sauce is thickened.  Season to taste with additional salt and pepper if necessary. 

Return the chicken to the pot and stir to coat the chicken well.

Honey Candied Carrots

The thing I found somewhat annoying about making this recipe is that none of the carrots were the same size.  When I make Jeff be my kitchen bitch, I always harp on him to cut things the same size so they cook evenly.  I can't do that, if the food is already different sizes to begin with.  I guess I could have cut all the carrots down to be the size of the smallest carrot... but that seems like a lot of work and I would have ended up with carrot mush, because some of these carrots were tiny.  So, instead, I sorted the carrots into different sizes and added them strategically to the pot so they were all done at about the same time.  What made it extra OCD was that I had to write down a list of what time each pile went in.  This list also included a diagram showing which pile was which number on the list.

I may be a crazy person.  It's okay, though...


  • Salt
  • 1 lb carrots (L)
  • 2 tbsp butter (L)
  • 3 tbsp honey (L)
  • Freshly ground black pepper
Bring well salted water to a gentle boil over medium heat.  (A note on boiling vegetables.  As I said before, I am totally against cooking the nutrients out of vegetables.  So you want to use as little water as possible, and then, if you can, do something with that water so you're still eating it!  Put it back into your food!  But you certainly don't need enough water to cover the vegetables you are cooking.  In fact, I try to do half as much water as I have veggies...)

Once the water is boiling, add carrots and cook until they are just tender.  They should be soft enough not to break your braces off of your teeth, but still firm to the bite!  Remember, they're going to continue cooking after this, so they shouldn't be completely "done."  Drain carrots, and return to pan with butter and honey.  Cook until a glaze coats the carrots, about 5 minutes.  Season to taste with salt and pepper.

Tuesday, October 18, 2011

Someday I might learn a lesson, but it's doubtful...


I make the same mistake every year.  Twice a year, actually.  Gardening is fun.  Gardening is a stress reducer.  Gardening is my hobby.  Gardening is an excuse to be outside, not working, not doing chores, enjoying fresh air.

Gardening is certainly not exercise.

But I should still probably warm up first.   Maybe a nice stretch?

Add to that, this year, for the first time, about 15 hours over the next two days, standing in the kitchen, canning the contents of said garden.

It started like this:


It ended like this:


And I, walked away, with this:

That's not even all of it.  That's just Saturday's work. 

  • Pickled green tomatoes (two kinds)
  • Bruscetta topping
  • Yellow tomato chutney
  • Green tomato chutney
  • Rhubarb mint chutney (with frozen rhubarb, to get it out of the fridge)
  • Pickled peppers (not a full peck...)
There's more.  I could go up and check the shelves full of cans in the basement, but that would involve standing.  Which requires quads.  Which I no longer have.

So I will sit here and type. Ass on the couch.  Lap top on my lap.  Glass of wine in hand.  (The wine hinders my typing, but it's mostly worth it.)

I will save the story of my mass canning adventure for another day.  It almost didn't happen anyway.  Canning was my biggest experiment for this year.  It's been interesting, and fun.  To be honest, the experiment isn't really over yet.  Although I am officially done canning for the year, the experiment is really just beginning.  Will I eat all this food I spent hours canning?  Will it be good?  Did I even do it right, or do I have a mass of spoiled food waiting for me in the basement?  I'm excited to have the food in my basement, stocked away for the winter.  I even purchased a textbook on the history of preserving, and I'm hoping to learn more about how this crazy idea started in the first place. 

But it almost never happened. 

Most of the canning I have done has been on a very small scale.  Garnishes, pickles, relish, all stored in small jars.  An accompaniment to the meat and potatoes that will be sustaining me for the winter.

(Speaking of meat and potatoes!  I read in the news paper that I'm supposed to take a garbage can and bury it in the back yard to use as a root cellar - potatoes, turnips, beets, carrots, etc.  Sounds like a boy job.  Jeff?  You want to bury a garbage can in the back yard?!?)

Anywho - I've had one exception to the small jar canning.  Apple pie filling.  This seemed like a great idea in theory.  Apples, spices, and a little bit of sugar.  Put it in a jar.  Pies all year round!  The apples don't need to cook long, only about 5 minutes, and then they need to process for 25 minutes.  Seems like a good time.

Yeah, I forgot to take into account how long it takes to peel 20 lbs of apples.  Seriously.  Could someone buy me one of these for Christmas?  Really.  It's less than $30.  (Also, note that I linked to Sur La Table and not Williams-Sonoma.  My affair is getting pretty serious.)

So I started at about 8:00pm, after dance class.  I had my peeling done by 10:30.  Five minutes of cooking down the apples.  Of course, 25 pounds of apples don't fit into even my largest pot so I've got to cook them in batches.  I didn't take that into account either.  Okay, all the apples are cooked.  Now I have to try to keep them warm while I make the gooey part of the pie filling.  That gets mixed in with the apples.  Crap, wait.  How do I mix this with the apples, when all the apples don't fit in one bowl or pot or anything.  How am I going to keep my ratio of apples to gooey part intact?  Okay, split the cooked apples in half.  Half the apples fit in the biggest pot, but the other half doesn't fit in the second biggest pot.  Damnit.  Okay, half and quarter and another quarter.  Got it.  Pour in the gooey part.  Don't let it get cold; it's getting hard.  Keep moving.  Get them into their jars, and into the boiling water.

Of course, all the jars don't fit in my canning pot at once.  Two batches it is.  It's now midnight.

20 minutes in to processing the first batch and I realize, I didn't add the lemon juice.

Frack.

So I pull them all out.  I open them all up.  I throw away the lids.  I add the lemon juice.  Back into the boiling water.  Second batch in.  It's now 1:00am.  On a Monday.  I have to go to work tomorrow.

Here's the thing, though.  The second batch has been in for 15 minutes.  Which means the first batch has been out for 15 minutes.  And none of them have gone "plink."  Did I do something wrong?  They were in there long enough.  I put new lids on.  Adding the lemon juice shouldn't have changed anything. 

I'm freaking out.  I'm freaking out, and I just want to go to sleep.  I'm getting sloppy, and that's when it happens.  I'm pulling the second batch jars out of the boiling water.  I'm tired, I'm rushing, I'm tired.  And then... I drop one.  I could see it happen, in slow motion.  I could see it slip out of the tongs.  I bobbled it, a couple times, and then dropped it on my foot.

I shouted, I cursed, and the cat ran away.  I hobbled off, brushed my teeth, and went to bed.  None of the jars had sealed.  I was convinced that the whole wasted night was for nothing.  And I was fully prepared to never can again.

But, in the end, that was all that happened.  I burned the outside of my right foot just a little, but I rubbed it down with aloe and it was better in a week or so.  The jar didn't break, which means I wasn't barefoot, surrounded by hot sticky shards of glass that my dog wanted to eat.  And, when my husband woke me up at 6:00 the next morning to tell me that all of the jars had sealed, it felt a little bit like Christmas.

It got me thinking about the science of why canning works.  The jars hadn't sealed because I was using quarts, which were bigger than anything else I had used before.  Also, all of my previous canning experiments were mostly liquid - vinegar and water surrounding whatever I was pickling or preserving.  This one was packed tightly full of apples, which made it cool slower.  The jar needs to cool, so the contents shrink, creating the vacuum that seals the jar.  Actually, the whole experience is what made my buy the history of preserving book, so, if I learn something new, I guess it was worthwhile.  Anyway, I didn't give up on canning, and now I've got pies through the winter.

I haven't had time to make a pie yet, but I did open up a jar and everything seemed perfect.  The apples were soft, the gooey part gooey.  Overall, a success.  An exhausting, infuriating success, but a success none the less.  The title of this post is "Someday I might learn a lesson, but it's doubtful..." The lesson I originally intended was to stretch before gardening, but maybe there's another lesson here, too.  To read ahead in my directions.  To think about what I'm actually doing, and what tools I need, and how long it will take me.  To not over schedule myself and think I can fit in "big projects" on a Monday night after dance class - just because that's when Jeff has band practice.

These are good lessons.  Maybe I might learn them.

But it's doubtful...

Apple Pie Filling
(From The Art of Preserving)

Makes 7 one-quart jars.  One jar makes one pie

  • 19 lbs apples (L)
  • 7 tablespoons plus 1/2 cup bottled lemon juice
  • 5 cups sugar
  • 1 1/2 cup corn starch or Clearjel starch (I used corn starch, because I couldn't find the Clearjel not on the internet)
  • 3 tbsp ground cinnamon
  • 1 tbsp fresh ground nutmeg
  • 1 tbs ground cloves
  • 5 cups apple juice or apple cider (L)
Have ready hot, clean quart jars and their lids.

Bring a large pot of water to a boil.

Put 1/2 cup of the lemon juice in the biggest bowl or pot you have.  Or, if you're like me, you'll need to use two or more bowls, and spread the lemon juice out evenly between them.  Peel, core, and slice the apples, dropping the slices into the bowl and tossing with the lemon juice to keep them from browning.  Add the apples to the water and blanch for one minute.  Drain the slices, and keep warm as best as possible.

In a large, non reactive sauce pan, stir together the sugar, starch, spices, and apple juice.  add 2 1/2 cups water.  Bring to a boil over medium-high heat, stirring frequently.  Reduce the heat to medium low and simmer, stirring constantly, until slightly thickened - about 1 to 2 minutes.  Be careful, it thickens REALLY quickly.  It will be very thin, and then suddenly it will be so think you'll wonder if you should add more water.

Fold the apples into the sauce and stir until apples are re-warmed, if necessary.

Ladle the hot apple mixture into the jars, adding one tablespoon of lemon juice to each jar, leaving one inch of headspace.  Remove any air bubbles, and adjust the headspace if necessary.  Wipe the rims clean and seal tightly with the lids.

Process the jars for 25 minutes in a boiling water bath.  Sealed jars can be stored in a cool, dark place for up to one year.

I didn't get any pictures in process, as I was too busy flipping out...


Thursday, October 13, 2011

Irish Car Bomb Cheesecake Cupcakes!

Offensive name.  Delicious taste.  The taste makes up for the name.

Yeah, one of these is missing.  I had to do quality control!

Hey, quick side bar.  Check out my new Facebook page for "Home Grown, Homemade," and please like me.  You can do that by clicking right here -------------------------------------------------------->
(Warning: This arrow probably will not point to anything if this post is no longer the most recent post.  But I trust you're smart enough to find the Facebook "Like" button on this blog.  Or go HERE.)  If you're here via Facebook, please Follow me here.  Both make me feel popular and help boost my self esteem.

Moving forward...

Basically, I have three levels of locavorism.  First, I try to find it within 100 miles.  If that doesn't work, I try to find it from Wisconsin (lots of things that I can get from Door County - which is about 200 miles away).  If that doesn't work (orange juice, sugar, etc.) I find it from the US.  If that doesn't work, I don't buy it.

Unless it's alcohol, which is for some reason exempt from all the rules.

So, I have a dear friend who likes all things Irish alcohol related.  She also likes cheesecake.  And Tuesday was her birthday.  So, yeah, Irish alcohol is not so much local.  I get that.  But it was important, and it was for a friend so it doesn't count.  Sort of like birthday cake has no calories.  Right?  Right?!?

Here's the super cool thing that I learned making this recipe.  This recipe calls for an Oreo Cookie crust.  I feel like the Oreo Cookie crust is integral to the success of the recipe.  You put the Oreos - whole - into a food processor, so all of the filling part gets mixed in with the cookie part which is DELICIOUS!  But how, I ask myself, will I defend purchasing Oreos on my locavore blog?  Do I try to make them myself?  That sounds like a LOT of work, and something that will have very poor results.  I think the preservatives are part of what make Oreos so delicious.  I'm certain that the same applies to Cheetos.

Anyway, I digress.  I Googled "Where are Oreos made?"  According to Wikipedia (so we know it MUST be true), the Oreo was developed in Chelsea, in New York City, in 1912.  Also, they were originally made with lemon meringue filling.  Gross.  Oreo comes from the Greek word for appetizing.

All very interesting, but where the F-bomb are they made?

So I Google again.  This time "Oreo Factory."  Same Wikipedia article.  And then, something even better.  A website called "amusingfacts.com" that apparently also has a fool proof method for me to "Lose Seven Pounds in 7 Days With The Perfect Diet - Free Report Reveals How!"  There's a picture of a doctor.  It MUST be true!  I trust this website completely!

Anyway, according to amusingfacts.com, the largest cookie factory IN THE WORLD is in Chicago, IL.  And what do they make there?

OREOS!

Holy crap.  This is the mother-load. I validated it.  Google: "World's Largest Cookie Factory." 

According to Yahoo Associated Content: "The World's largest cookie and cracker factory as well as the world's largest ice cream cone factory are located in Chicago. Nabisco (cookie and cracker factory) is located at 7300 S. Kedzie Avenue on Chicago's south side and Keebler (ice cream cone factory) is also located on Chicago's south side at 10839 S. Langley Avenue."

Sweet fancy Jesus.

Nabisco is 98.2 miles from my house.  Keebler is 102.

Now, I'm not really a fan of Nabisco.  Well, I'm not really a fan of Kraft, which owns Nabisco.  They use GMOs; specifically the Genetically Engineered Bovine Growth Hormone (rBST), which I am very strongly against.  But that's another rant for another day.  Nothing is going to stand between me and my Oreos!

Yeah.  It's cheating.  I get that.  But on the other hand, is it really that different than buying the bacon from the bacon factory that's 5 blocks from my house?  Probably.  Oh well.

I originally found this on the internet, but have had it for a few years and have made a couple modifications.  I can't really say where I found it...

These are possibly my favorite cupcakes ever.  They are very alcoholic tasting.  But it's all baked off, so you can eat them and drive.   Eat them with a fork or spoon, because they are ooey-gooey delicious!


Individual Irish Car Bomb Cheesecake Cupcakes

Makes 24 Individual Mini Cheesecakes

Preparation: Heat oven to 350 degrees F. Line two cupcake pans with cupcake liners.

Oreo Cookie Crust
  • 48 Oreos (L) (Makes me giggle to write that!)
  • 12 tablespoons Irish Whiskey
Instructions:
You will probably want to do this in 4 batches, 12 Oreos and 3 tablespoons whiskey.  Otherwise the food processor gets too full and the cookies at the bottom turn into mush while the ones on the top are still totally intact.

Place Oreos in a food processor and pulse in three-four 2-second bursts. Pour Jameson whiskey in and pulse two more time to combine. Alternatively, place Oreos in a Ziploc and using a rolling pin or meat tenderizer, crush cookies and mix in Jameson whiskey. Measure out 1 tablespoon of Oreo crumb into each well and firmly press Oreo crumbs down.  I found the best way to do this is with my thumbs, after greasing them slightly with olive oil.

Cheesecake
  • 5 blocks (20 oz) cream cheese, softened (Not local... Cream Cheese is one thing I have NOT been able to find, and it is something I am going to try to make on my own.  I suppose I could have bought Philadelphia, knowing now what I know about Kraft, but I didn't.  And I won't.)
  • 2 cup sugar
  • 4 eggs (L)
  • 2 tablespoon vanilla extract
  • 1/2 cup Bailey’s Irish Cream
  • 1 cup heavy cream, divided (L)
  • 2/3 cups of dark chocolate chips
  •  1/2 cup Guinness

Add cream cheese and sugar in a bowl and beat until mixture is smooth. Add eggs and beat on low  until combined. Add vanilla and beat until combined. Add 1/2 cup heavy cream and beat until combined.

Place two thirds of cream cheese batter in one bowl (should be about 5 cups) and add Bailey’s Irish Cream into it. Use a sturdy spatula or a wooden spoon to stir until combined.  You should have about 3 cups remaining.

Add chocolate and remaining heavy cream into a glass bowl, and place over (but not touching) barely simmering water. Allow chocolate to melt, stirring regularly, and and keeping an eye on the water to make sure it doesn't boil.

Allow melted chocolate mixture to cool for five minutes before adding it into the remaining cheesecake batter. Once added, stir until combined and then add Guinness and stir until combined.

Pour chocolate Guinness cheesecake mixture first into the lined, crusted cupcake cups, then pour Bailey cheesecake mixture on top.  You could here swirl the two together, using a toothpick, but I prefer leaving the Bailey's in the center of the Guinness - like it would be if you dropped your shot glass of Bailey's into your half pint of Guinness.

Bake at 350 degrees for about 35-40 minutes. Let cheesecakes cool on oven rack with oven door open for an hour. Finished cheesecake will have a slightly sunken center.

Monday, October 10, 2011

Winter Squash

Almost a full week gone.  What a shame.  No, I have not starved to death.  However, I have been working like a crazy fool, which seriously cuts into my blogging time.  Not that I would ever blog from work... because that would be wrong.  Also,  I need my job to afford my food.  No job = No food.  No food = No blog.  So, I work very hard at work!

We've been having quite an Indian Summer for the past week in WI.  It's making me pretty happy, because I had plants and plants full of green tomatoes, and now they're finally ripening.  It also means that there has been lots of produce still coming into the farmers market, which means lots of canning - which means lots of time spent on canning and not spent on blogging.  I am right now behind on telling you about:
  • Corn Salsa
  • Apple Pie Filling (this was my worst canning experience ever, and almost resulted in me swearing off canning forever)
  • Tomatillos
  • Apple/Onion Curry
  • Applesauce
As you can see, lots of apples.  Jeff and I went to Brightonwoods Apple Orchard last Sunday (not like yesterday, but like a week ago yesterday), which was great fall fun.  It wasn't a pick your own, which is fine because we don't have kids and personally picking apples seems like work to me.  I did pick my own apples... out of a bin full of apples!  But, better than picking apples, they also had a winery.  Or, I guess it would better be called a cidery.  We got to do a free tasting of 5 different kinds of apple cider, plus a shot of apple liquor (I had brandy, he had whiskey.)  The full tasting experience - which was a lot of booze and I'm sure would get you completely wrecked - was only $10.  Unfortunately, we were on our way to a family gathering, so fall over drunk was out of the question.

I would like to say that we'll go back this year and get sloppy drunk on fermented apples, but knowing our schedule that seems unlikely.  Hopefully we can get back next year.

I also stocked up on local hard cider.  Local adult beverages have been a bit of a challenge, because I don't like beer - which I believe officially qualifies me for the Worst Milwaukee Locavore Award - and because I'm pretty snobbish about my wine.  WI does make a good deal of local wine, as sampled this year at the State Fair, however very little of it is made out of grapes, and none of it is what I would consider good.  Drinkable, maybe (if they're lucky), but certainly not good.

Because it's been so nice, I haven't broken down my garden yet.  Those of you who live in the Midwest know that this is pretty risky.  The forecast for tomorrow might be 70 degrees right now, but that doesn't mean it's not going to change it's mind and be a blizzard instead.  Seasons change pretty fast around here, and often with no warning.

It is really good for curing squash, though, or so I've read.  I've never grown winter squash before, but I would highly recommend it for someone with the room.  Or, for someone like me, who wants to pretend they have the room.  I actually trained my squash vines to go around the outside of my garden, sharing space with the strawberries - since those are done anyway.  This made for a bit of a problem with mowing the lawn when they got out of control, but mowing the lawn is my husbands job anyway, so my level of caring was at a minimum.

I'm growing butternut, buttercup, and honey nut squash, and I've got at least three or four of each.  Actually, considering the amount of vines I have hiding in places I really can't reach, I may have more than that.  I'm expecting to find quite a few when I finally do break the garden down.

I know that winter squash is something that I should be able to store for an extended period.  It's something that the farmers had at the winter farmer's market up through Christmas if I remember right.  It should last.  But how?

I've been researching curing squash.  The trick!

From what I've read so far, the best way to cure squash is to hold it at a consistent 70 degrees for 15 days.  Uh, yeah.  How am I supposed to do that?   Am I supposed to have a temperature controlled curing room?  I've got stories from people with blogs like mine that say they store them in their living room, or on their kitchen counter, or in a special box nestled up against their furnace... but all of those posts also have comments along the lines of "You idiot!  That's not how to cure a squash!  You're going to burn your house down!!" (For the record, I would love comments of any kind, so if you want to leave me a comment that you think I'm an idiot and that I'm going to burn my house down, feel free.  But you probably want to leave it on this post.)

The other option I found, though, was to let the squash sit on the vine as long as possible and hope for warm weather late in the season.  Then, only pick the squash and bring it in just prior to the first frost.  This technique is working out for me very well this year, although I don't know how I could guarantee success in future years...

Anyway, this squash was not mine.  I did not grow spaghetti squash - not sure why, as it's always been my favorite squash.  Spaghetti squash is very easy to prepare.  Just cut the squash in half the long way, drizzle the inside with olive oil, and sprinkle with salt and pepper.  Place the cut side down into a glass baking pan (this squash was big, so I had to use two baking pans) and bake at 350 degrees until the outside of the squash is soft to the touch.  Remove from the oven, allow to cool slightly, and then run a fork across the squash from side to side.  This will release the fibers in a way that causes them to look like strands of spaghetti.

At this point, you can do anything with the spaghetti squash that you would normally do with cooked pasta.  For this recipe, I melted about 2 tbsp of butter,  and sauteed 1 clove of minced garlic.  Once the garlic was just starting to turn golden, I added in the squash and stirred it around to break the pieces up further and mix in the butter.  I added about 1 tbsp of chopped basil, and seasoned again with salt and pepper.  I topped the squash with honey goat cheese, and some wilted Kale.  A delicious, easy, vegetarian meal! 100% local except for the salt and pepper.


Tuesday, October 4, 2011

Preserving Experiment #5


Beets.

Prior to this year, I had never eaten one in my life.

I do have a cousin who loves beets.  He talks about them a lot - almost inappropriately so - on Facebook.

They are scary looking.

They look like weird, brightly colored potatoes.  They are dirty.  I expected them to taste dirty.  Not entirely sure why I thought that would be a bad thing... after all I do love potatoes and mushrooms, and I prefer my red wine to taste a little bit like dirt.

They have probably become the favorite vegetable in our house - both the root and the greens.  It's kind of shocking.

Doing some quick research on the interwebs, I learned the following about beets.  Very little of this is from scholarly sources, and if I were grading this from one of my students, it would totally get an F:

Supposedly, the eating of beets can prevent or reverse the following ailments:
  • Acidosis, which leads to acid reflux
  • Cancer
  • Anemia
  • Athersclerosis, which is a hardening of the arteries
  • Vericose ceins
  • High blood pressure
  • Constipation
  • Liver Problems
  • Kidney and gall bladder diseases
  • Gout
My husband has acid reflux, and I have anemia (and all the women in my family have vericose veins).  Also my body apparently really enjoys getting kidney stones, so I'm pretty excited that I can magically cure these things just by eating beets!  Okay, I don't think it works quite that way, but never-the-less it's good to know that something I like is good for me.

I don't have kids, but I feel like beets would be a good thing to try to feed your kids - as long as they don't know what they are or get to see them ahead of time!  The fact that they are sweet and brightly colored makes me think you could trick a kid into thinking they're candy or something.  Another good thing about beets is that, after you cut them up, it looks like you killed someone in your kitchen - which is always fun.


Apparently the growing season for beets is June through October, so we're just about done.  I wouldn't want to be without this magical vegetable for a full winter, so I'm glad I got this done in time!  I also thought this was my prettiest canning batch yet, and it made me sad to put the finished jars down in the basement where visitors can't admire them.  Next house: display shelf for canning!


I haven't tried these yet, since all the jars closed properly and I still have fresh beets to eat.  I will report back as soon as I do!

Pickled Beets
From the Art of Preserving

  • 1 pound beets (L)
  • 1 white onion, sliced (L)
  • 1 cup cider vinegar (5% acidity)
  • 1/4 cup honey (L)
  • 1 tbsp cardamom pods
  • 1 tbsp whole cloves
  • pinch of salt
Have ready hot, sterilized jars and their lids.

Put the beets (whole.  Leave a little bit of stem so all the skin is intact and covering all the beet.  This helps keep the nutrients in) into a large saucepan (if using different colored beets, put each color into their own sauce pan) and add water to cover by 2 inches.  Bring to a boil, reduce the heat to medium-low, cover partially and simmer until the beets are tender, 25-30 minutes.  Drain the beets, reserving 2 cups of the cooking liquid.

When the cooked beets are cool enough to handle, peel them (once the beets are cool, the skins slide right off - almost like the tomato skins, but not quite as easy)  and then cut into slices 1/4 inch thick.  Divide the beet slices and the onion slices among the jars.

In a saucepan over medium heat, combine the reserved cooking liquid, vinegar, honey, cardamom, cloves and salt.  Bring just to a boil, then ladle the hot mixture into the jars, evenly distributing the spices and leaving 1/2 inch of headspace.  Remove any air bubbles.  Wipe the rims clean and seal tightly with the lids.

Process the jars for 7 minutes in a boiling water bath.  Let the jars stand undisturbed for 24 hours, then set them aside for one week for the flavors to develop.

The jars can be stored in a cool dark place for up to 3 months (so I have to eat them all by Christmas!)

The recipe said this made 4 pints.  I only got two.  I ended up making three different batches, and stored them in half pint and 4 oz jelly jars.  I figure how many pickled beets do I really need at once?


I have to image that these beets would go great in this recipe.  I actually made this salad with fresh, grilled beets, but the pickled beets would go well too.  Cut out the tomatoes, and this could be a great winter salad when all I can get my hands on is greens.

Smoked Salmon and Beet Salad
(this recipe is for one salad)
  • 1 or 2 large handfuls of mixed greens, washed (L)
  • 1 tomato, quartered and cut into slices (optional) (L)
  • 1 small or 1/2 large beet - steamed, grilled, boiled, or pickled, sliced into bite size pieces (L)
  • 4 oz smoked salmon (L-ish.  Okay, this is smoked by Rushing Waters fishery, but not grown there)
  • 1 oz goat cheese - I used a honey goat cheese (L)
  • 2-3 tbsp Honey Basil Vinaigrette, or to taste 
Put greens in a bowl.  Top greens with other stuff.  Cheese can be crumbled or left in one chunk for presentation purposes as I did in the picture.

Honey Basil Vinaigrette (from this post, except modified to be basil instead of thyme!)
Makes about 1 cup
  • 3 tbsp minced shallots (L)
  • 1/4 cup champagne vinegar
  • 1/2 cup raw honey (L)
  • 2 tsp fresh basil (L*), minced
  • 1 clove garlic (L), minced
  • 3/4 cups extra virgin olive oil
  • Salt and Pepper

Sunday, October 2, 2011

Preserving Experiments 3 and 4


Okay, my two not quite normal preserving experiments were both, in my opinion, a big success.  Pickled watermelon rinds and zucchini relish may not be the most useful things to preserve for the winter, but they were both tasty which has increased my confidence.  And, almost all of the jars sealed properly (I missed one) which made me feel like this really is something I can do.  Also, hearing the jars close is fun, which is enough motivation for me!

Time to make something useful.  Also, I purchased a giant canning pot.  Time to make something in mass quantities.

To be fair, I'm not 100 percent happy with how either of these recipes turned out.  I started with the tomato-basil sauce, because I have a lot of basil and because it is out of my preserving book, so I trust it.  I'm always a little nervous pulling canning recipes off of the internet - because I'm never sure that the person writing the recipe knows what they're doing (pretty sure you should be concerned about that too... maybe you should wait until next year before trying any canning recipes off of this site.  I promise to report back if I get the Botch.)

Also, unfortunately, I do not have pictures of finished products.  I will be sure to get that as soon as I eat some spaghetti!!

I did not (shockingly) (<- Sarcasm) read the recipe well enough before starting to realize that this is not a spaghetti sauce.  The recipe says tomato sauce.  But for some reason, in my head, I read spaghetti sauce.  I like a chunky spaghetti sauce, and this is not.  This is, consistency wise, exactly what you would get if you purchased a can of tomato sauce from the store.   It tastes better than that, and is no doubt better for you, but not at all chunky.  I wouldn't change the recipe, necessarily, I just feel it's important to know what you're getting.  And I don't trust people to read a recipe because, well, I don't.

So, I after that I found a recipe for chunky tomato sauce on the internet.  Or, more specifically, I found about 10 recipes and combined them into one I liked.

My only regret on the spaghetti sauce is that it's too dry.  It could really stand to be mixed with a half pint of the tomato sauce.  SO, if you make both of these, put the tomato sauce into half pint jars.  I have a few half pints, but mostly I put it into pints which I think would give me too much when mixed with the spaghetti sauce.

Anyway, next time I think I won't remove the seeds and juice from the peeled tomatoes in the spaghetti sauce recipe.  It takes too long and I think the recipe needs the extra juice.  This was my first experience peeling tomatoes with the boiling water/ice water method.  I have seen method described on many a cooking website and cooking show, and have ignored it in countless numbers of recipes because it seems like WAY too much work, and I don't mind tomato peels in my food.  But, I wanted to do it here because the recipe called for it, and, as I've said many times, I am terrified of messing with canning recipes at the risk of making everyone I know sick.

I'm glad I did it.  It was SO easy.  Not at all the extensive project I imagined.

Take your tomato and cut a small "x" into the bottom.  It doesn't have to be neat, or perfect, you're just telling the skin where you want it to split.  It didn't seem to matter if I slipped and cut deeper into the tomato, either.

Get a large pot of water boiling, and place a bowl (or in my case I used another large pot) next to it, full of ice water.  A few at a time, drop the tomatoes into the boiling water, and allow to boil for 2 minutes.  Fish the tomatoes out, and transfer to the bowl of cold water.  Allow the tomatoes to sit in the ice water for a few minutes.

At this point, directions say that the peel will just slide off.  Yeah, right (I always thought).  No, really.  That is right.  My thought was sarcasm, but the reality is that they DO slide right off.  You can easily see where you sliced the bottom, because the skin has started to peel back, and if you hold it at the other end and squeeze gently, the tomato pops right out like a banana in a cartoon!  It's fun.  I'll do it again, mostly just because it's fun.  If you have kids, this would probably be a good job for them - as long as you don't mind some of the tomatoes rolling around naked on the floor.
 
I did not use my tomatoes for either of these recipes.  The cold weather has made my garden really slow down, so while it's full of tomatoes, they are all green and show no sign of ripening any time soon.  I did, however, buy a HUGE box of less than pretty tomatoes from the farmer's market for cheap.


Tomato-Basil Sauce
From The Art of Preserving 

Makes 6 pints.

There is no need to peel these tomatoes, as they are being pushed through a sieve.  Or if you're fancy use a food mill.  If you're extra fancy (and nice) you could buy me a food mill too!!
  • 1 Tbsp Olive Oli
  • 4 yellow onions, coarsely chopped (L)
  • 6 cloves garlic, smashed (L)
  • 10 lbs tomatoes, cut into chunks (L)
  • 1/2 cup dry red wine
  • 1/2 cup finely chopped basil (L*)
  • 1/4 cup red wine vinegar (5% acidity or higher)
  • 1 1/2 tsp salt
  • 1/4 tsp pepper
Have ready hot, clean jars and their lids.

In a large nonreactive saucepan over medium heat, warm the oil.  Add the onions and cook, stirring occasionally, until translucent, 5-7 minutes.  Add the garlic and cook, stirring, for 2 minutes longer.

Add the tomatoes and the wine.  Raise the heat to high and bring to a boil.  Reduce the heat to medium and simmer, uncovered, stirring occasionally, until reduced by half.  (The book said this should take 1 hour.  It took me 3.5 hours.  So... be prepared for that!)

Pass the tomato mixture through a coarse-mesh sieve set over a clean, large nonreactive saucepan (or pass it through a food mill).  Bring to a boil over medium-high heat.  Reduce the heat to medium-low and simmer until the sauce reaches the desired consistency.  Stir in the basil, vinegar, salt, and pepper.  Tase the sauce and adjust the seasonings to taste.

Ladle the hot sauce into hot jars, leaving 1/4 inch of headspace.  Wipe the rims clean and seal tightly with the lids.  

Process the jars for 30 minutes in a boiling water bath.  Sealed jars can be stored in a cool, dark place for up to one year.  If a seal has filed, store the jar in the refrigerator for up to 2 weeks.

Chunky Spaghetti Sauce for Canning
Makes 12 pints.
  • 15  lbs Red Tomatoes (L)
  • 2 tbsp olive oil
  • 6 medium onions, chopped (about 6 cups) (L)
  • 2 bulbs garlic, cloves smashed (L)
  • 1/8 cup kosher salt 
  • 5 cups green bell peppers chopped (L)
  • 2 tbsp fresh parsley, chopped (L*)
  • 2 tbsp fresh oregano, chopped (L*)
  • 1 tbsp fresh basil, chopped (L*)
  • 4 whole bay leafs
  • 2 tsp fresh ground pepper

Have ready hot, clean jars and their lids.

Remove tomato skins through method described above.  If you want (I don't recommend it) remove the seeds and squeeze out some of the juice.  Chop the tomatoes coarsely.

In a large, non reactive pot, heat olive oil.  Add onions and saute over medium low heat for about 15 minutes, or until onions start to caramelize.  Add garlic and cook an additional 5 minutes.  Add remaining ingredients, stirring to combine, and turn heat up to medium high.  Bring mixture to a boil, then reduce heat to medium and continue to simmer for 1 hour.


Ladle scalding hot sauce into hot sterilized pint canning jars, clean rims of jars and seal according to manufacturer's instructions. Process jars for 35 minutes for quarts and pints in a boiling water bath.