Showing posts with label Zucchini. Show all posts

Wednesday, August 21, 2013

Saturday Morning at the Market

Thanks so much to every one who stopped by to visit me this past Saturday at the South Shore Farmer's Market.  We had a beautiful (albeit) early morning in the park.  I am not a morning person, so the fact that I got there before some of the farmers were done setting up is something I am equal parts proud of and depressed by.

Having been an avid farmer's market shopper for three years now, I'm starting to get into the hang of what is going to be there when.  It's also helpful that I get an email from my CSA farmers around Tuesday of the week, and what they've got is a good indication of what's going to be available at the market.  Of course, none of that can account for the fact that - I suspect just to throw me off my game - nobody had garlic at the market this past Saturday.

I think that cooking at the farmer's market really exemplifies what's at the heart of locavore cooking.  It's nothing fancy, nothing flashy, nothing rehearsed.  I like to think of my cooking a lot like I think of my dancing.  For those of you who only know me from my blogging, I am also an American Tribal Style Belly Dancer (South Shore Market regulars: those are the belly dancers you see a few times a year!).  The thing that drew me to ATS Belly Dance was the fact that it is improvisational group dancing.  We always dance in groups, and nothing is choreographed.  You practice a lot with the women you dance with, you know your music well, and you learn the "vocabulary" of the dance, but when push comes to shove you just don't know what exactly is going to go down.  This, to me, is the joy of the dance.  You are in the moment, and 90% of the time you need to give that control away.  You know what should happen, and you can even influence it a little, but in the end you need to give that control away.  You are not in charge.  You have to trust those around you to take care of you, and you are responsible for taking care of them.  And when something goes wrong, you smile, forgive, and move on.  And you learn something new for next time.  And maybe, if you're really lucky, you get to create a new move!

This is how I feel about locavore cooking.  You learn the ingredients.  You learn how they should work.  You learn when they should be there.  But in the end, you need to work with what you have.  And maybe things don't turn out exactly how you want, but maybe they turn out better.  And maybe you end up with something even better than what you had intended.  In the end, that is what locavore cooking is about.  You need to let go and work with whatever is at the market.  In today's well stocked grocery store, you can get whatever you want whenever you want it.  That's great, but there's nothing to push you outside of your bubble.

I'm not saying I necessarily got pushed outside of my comfort zone at the market this past weekend.  While not having garlic is fairly traumatic to anyone of marginally Italian descent, "just leaving it out" probably isn't getting pushed outside of your bubble.  But I'm not talking about me right now, am I?  No.  I'm talking about you.  I'm saying that you should allow yourself to get pushed out of your bubble.  Because it's fun.  Because I promise that the bag of weird looking mushrooms that you pick up at the market is going to taste way better than whatever you "just have" to run to the grocery store for.  Because I bet you wouldn't have believed me before that peaches and corn make a good salad.  And because cooking (like dancing) should be fun.  

The recipes came out well.  My helpers Denise and Missie were amazing.  The plants that I strategically placed throughout the audience asked all the right questions at all the right times.  Okay, the gazpacho was a bit spicy, but I cooled everyone down with a little maple bacon ice cream so they have to forgive me, right?  Right.

Thanks again for coming out to see me.  And if you didn't, you can make it up to me next time!  I'll be dancing at the market this coming Saturday...


Corn and Peach Salad


  • 4 cobs corn
  • 1 lb peaches
  • 1 small red onion
  • mixed greens (preferably with edible flowers for decoration)
  • 1 lime
  • 1/4 cup olive oil
  • Salt and freshly ground pepper
  • 1 jalapeno? 
Grill the corn for about 5 minutes on each side.  You're looking to get it charred and a little smokey, but you don't want to overcook the corn.  Meanwhile, slice or cube the peaches into bite sized chunks, and finely dice the red onion.  Once the corn is grilled, cut it off of the cob and combine with the peaches, onion, and mixed greens in a large bowl.  (Larger than the one I used!)  In a separate bowl, whisk together the juice of one lime, the olive oil,  and salt and freshly ground pepper to taste.  (You can also add a minced jalapeno into the dressing, but I accidentally threw this into the gazpacho - making it extra spicy!)  Pour the dressing over the salad, and toss gently again to combine.

This is a light, refreshing salad that would go well with any grilled meat in the summer.  You could also add some avocado, feta, or nuts (if you're into that sort of thing).  Another thing I thought of while walking the market after the demo was to flake some of the Rushing Waters smoked trout on top and make an entree salad. 

Grilled Vegetable "Gazpacho"

Yes, I know that gazpacho is made with raw vegetables.  Yes, I know gazpacho is traditionally thickened with bread.  This has neither of those things.  That's why it's "gazpacho."  Missie (who took the last of it home) named it "Ka-spacho." I don't care what you want to call it.  It's a refreshing summer meal or side, a good way to use up whatever vegetables you have lying around the house, and would make a damn fine Bloody Mary base.  

This is what I did at the market, but you can really feel free to throw in whatever other ingredients you have, or omit any that you don't.  (Garlic anyone?)

  • 1 large zucchini (about 1 to 1.5 lbs), cut into large cubes
  • 1 red onion,  quartered
  • 1 jalapeno (or two depending on how you're feeling)
  • 2 bell peppers - whatever color you're feeling
  • A large handful of fresh herbs (if you find yourself thinking - wait, I didn't notice this at the market, you are very perceptive.  And also shhh!)
  • 1 cucumber
  • 2 (ish) lbs tomatoes, halved or quartered, depending on the size
  • Olive Oil
  • Salt and Pepper
Combine first five ingredients, along with any additional vegetables you may have lying around your kitchen.   Toss with a drizzling of olive oil, and salt and pepper to taste.  Grill until just charred, but not soft or mushy.  If you want, at this point, you can remove the skins from the peppers, and the seeds from the jalapenos.  If the peppers are nicely charred, the skins should slip right off, but this step is not necessary.

While the first set of veggies is grilling, blend the cucumber until it is fully liquified.  Add the grilled vegetables, and blend again until thick.  The zucchini has a nice viscosity to it, and will thicken up the soup nicely, while the cucumber and the tomato thin it out.  In this case, the zucchini takes the place of the bread.

Toss the tomatoes in olive oil, and season with salt and pepper.  Grill for about 10 minutes, tossing occasionally.  You want the tomatoes to start to dry up slightly, and get a little charred on the outside, without drying up.

Once the tomatoes are warm and getting a little caramelized,  transfer them into the blender and puree. 

At this point, I like to combine the green portion and the tomato portion artistically.  You can stir them together, but I like how the layers look.  Depends on how fancy you're feeling that day.


Quark and Beet Dip

Easiest. Recipe. Ever.

Roast off 1.5 lbs of beets (the color's up to you) and allow to cool.  Put into a food processor, and process until smooth.  Combine with 1 8 oz container of quark from the Clock Shadow Creamery (your choice of flavor... try the maple, it's award winning!)  Add a dash of any spices you feel appropriate (cardamom, cinnamon, nutmeg, cayenne...?  Preferably not all four.), or maybe a bit of lemon zest, and stir to combine.  Serve as a dip with crusty bread, carrot or celery sticks, or crackers.

Maple Bacon Ice Cream
(Hahahahaha.  Nope.)

Send me a message to place your order ;)

Next up - what to do with the pile of zucchini and cherry tomatoes building up on my kitchen counter.  Got any tips for me, or anything you'd like to see me try?  Leave them in the comments.

Tuesday, August 14, 2012

Put Up or Shut Up: Episode 3 - Zucchini

Looking up articles on the internet for preserving zucchini, I found they all started something like this:

The main downside to zucchini is just how much zucchini you can wind up getting off of one plant. If you've ever grown zucchini (or you've lived next door to someone who grew zucchini), you know that you can quickly find yourself leaving bags of zucchini on your friends' front porches just to keep up with what's growing in your garden.

or


In the late summer when I was growing up, brown paper bags filled with zucchini used to magically appear on our front stoop. Backyard gardeners in my neighborhood would have such a large crop of zucchini that anonymous zucchini drop-offs were the only solution to getting rid of it.

or

The season of zucchini overabundance will soon be here. Before you resort to unloading your surplus in unlocked cars and empty mailboxes...

Really?

It's not as serious as all that, people.

And yet, when my CSA sent an email stating that vine boring beetles had demolished their zucchini crop, I found myself wondering if I could just sneak a courgette into each of the member's boxes without anyone noticing.

Okay, I don't have quite that much.

Like rhubarb, I actually feel the best way to preserve zucchini is to freeze it.  Grate it up, and stick it in one cup balls into the freezer.  When I grate it, I also like to throw it into a colander and let it's own weight press out some of the water.  I don't go out of my way to squeeze all the water out, because the water is going to help it in the freezer anyway, but there is a lot of water so it's nice to get some of it out.

In the winter, then, you can use the zucchini in anything that you would bake with zucchini - bread, muffins, cookies, etc.  You can also throw it into a stew.  One of my personal favorites uses is in a zucchini fritter, which I discovered in March.  I was just looking for a way to use up the zucchini I had frozen the previous summer, and I found a recipe that is going to become a winter staple for me.  In the winter, when it's almost impossible to get a fresh vegetable, this is something that really tastes like zucchini.  And it's deep fried, which is always a bonus.
Finished Zucchini Pickles

You can also make zucchini pickles, which I made last year and which are good but not great.  I adore a pickle (you may have noticed) and these were not something I would have just eaten on their own.  They tasted to much like a regular cucumber pickle, but weren't as good as a regular cucumber pickle.  They were a nice addition to a picked item plate, so I am including a recipe for both regular and spicy zucchini pickles. I'd recommend a jar or two, but don't overdo it.


A big success from the canning last year was the zucchini relish.  It's like pickle relish, but with zucchini.  Pickle relish is a little scary when you buy it from the store - what with the bright green, not found in nature color, and I found this to be much tastier.  To be fair, I have not tried to make my own pickle relish, so I'm not really comparing apples to apples.  This was again a spicier version, which I appreciate.  It's a nice addition to a sausage in the middle of the winter - especially a richer sausage (like one with cheese!) because the sweet and spicy notes cut through the heaviness nicely.

This year, I will be making the same pickle relish, probably in a larger quantity than last year.  I also am currently in the process of making the same relish but with yellow squash instead of zucchini.  I feel like it should taste about exactly the same, just a different color.  Maybe a little sweeter, too.  We will see, and I will report back.
The yellow squash relish needs to sit for a day. 
Go ahead and click on the link to get the recipe.
For this version, I just substituted yellow squash
for the zucchini, and used green peppers instead
of red.
Finished zucchini relish from last season

Along the lines of yellow summer squash, I had a new addition to the canning repertoire this summer.  I made summer squash and onions.  While I haven't busted it open and tried any yet, I feel like it should be a good winter side dish - maybe with a baked chicken.

The summer squashes can be overwhelming, but there's no need to abandon them on neighbors doorsteps. 

*Quick Side Note: There is some drama on the safety of canning summer squash and zucchini.  According to the National Center for Home Food Preservation:

Why is canning summer squash or zucchini not recommended?
Recommendations for canning summer squashes, including zucchini, that appeared in former editions of So Easy to Preserve or USDA bulletins have been withdrawn due to uncertainty about the determination of processing times. Squashes are low-acid vegetables and require pressure canning for a known period of time that will destroy the bacteria that cause botulism. Documentation for the previous processing times cannot be found, and reports that are available do not support the old process. Slices or cubes of cooked summer squash will get quite soft and pack tightly into the jars. The amount of squash filled into a jar will affect the heating pattern in that jar. It is best to freeze summer squashes or pickle them for canning, but they may also be dried.


 Here's what I took away from that: "OR PICKLED THEM FOR CANNING."  That would make me think pickling is okay.  Other internet sources say no canning no way!  So, use your best judgement.  If you pop open any canned good and it smells weird, has discolored spots, or is growing the mold, don't eat it.  Botulism may be a funny word, but it is not a funny illness. 

Pretty, yes.  Delicious?  No.
One note on the passage from the NCHFP - I did try drying the zucchini and I found it to be a huge disappointment.  I made dehydrated zucchini chips and I was not a fan.  Despite being all the way dried and pretty thin, they weren't very crispy and seemed stale immediately upon coming out of the dehydrator.  Also, despite putting them in an airtight jar, they seemed to get a little weird after only one day.  Looking into it further, I found that you were supposed to refrigerate or freeze dried zucchini.  If that's the case, what's the point in dehydrating it?  The only thing that I could see and might do is dehydrating some bigger chunks to rehydrate later in a stew.  But, I don't generally feel the need to put zucchini in a stew - it doesn't have a strong flavor so I don't feel like it adds that much.  So I probably won't do that unless I decide that I have enough grated zucchini to make zucchini bread and zucchini fritters every weekend all winter long.

Before making either of these recipes, please notice that they both have massive quantities of salt (which does get washed off after soaking).  If you don't, you might have a reasonable amount of salt on hand and start making the recipes, only to have to run to the store late at night to buy salt.  Even though you were JUST there to buy vinegar.  And even though you HATE that grocery store, because the check out people insist on judging your food, and that one time you saw a mouse, but it's the only store that's open in the middle of the night.  Or maybe you're not like me, and you prepare prior to cooking.  Good for you.

Zucchini Pickles
(From Put em Up!)
Makes 6 pints
  • 4 pounds summer squash and/or zucchini
  • 1 large onion, chopped
  • 1/2 cup salt
  • 4 cups white vinegar
  • 6 garlic cloves, smashed
  • 1/2 cup sugar
  • 1 tbsp dried oregano
  • 1 tsp peppercorns
  • 1 tbsp fresh rosemary
  • 1 tbsp fresh thyme
  • 1 bay leaf, crumbled'
Trim the ends from the squash and cut into spears 1 inch shorter than pint jars.  Toss the squash and onion with the salt in a large bowl.  Cover with cold water and set aside for 2 hours.  Drain, rinse thoroughly, and drain again.

Pack the squash mixture into clean, hot pint jars, and add a clove of garlic to each jar.

Bring the vinegar, sugar, oregano, peppercorns, rosemary, thyme, and bay leaf to a boil in a large, nonreactive saucepan.  Pour the hot brine over the vegetables to cover by 1/2 an inch.  Leave 1/2 inch of headspace between the top of the liquid and the lid.

Release any trapped air from the jars and wipe the rips clean.  Process for 30 minutes using the boiling water method.  After 30 minutes, turn off the heat, remove the canner lid, and let the jars rest in the water for five minutes.

Store in a cool, dark place for up to a year.

For spicy zucchini peppers, cut three Thai chillies in half the long way.  Add 1/2 pepper to each jar with the garlic.  For slightly less spicy pickles, remove the seeds carefully (and don't touch your eyes afterward!) 
Finished yellow squash and onion relish

Squash and Onion Relish
(Also from Put Em Up!)
Makes 4 Pints 

  • 2 pounds yellow squash, ends removed, diced
  • 2 pounds yellow onions, diced
  • 1 1/4 cups salt
  • 3 cups distilled white vinegar
  • 1 cup sugar
  • 1 tbsp fresh rosemary
Toss squash and onions with the salt in a large bowl.  Cover with cold water and set aside for two hours.  Drain, rinse thoroughly, and drain again.

Bring the vinegar, sugar, and rosemary to a boil in a large nonreactive saucepan, stirring to dissolve the sugar.  Add the drained vegetables, return to a boil, and simmer for 5 minutes.

Ladle into clean, hot jars, covering the solids by 1/4 inch with liquid.  Leave 1/5 inch of headspace between the top of the lid and the lid.  Release trapped air and wipe the rims clean.  Process for 15 minutes using the boiling water method.  Turn off heat, remove canner lid, and let the jars rest in the water for five minutes.

Store in a cool, dark place for up to one year.

Saturday, August 11, 2012

At the Farmer's Market

Thank you to everyone who everyone who showed up at the South Shore Farmer's Market this morning for my cooking demo.  Also, thank you to those people who didn't show up - because I ran out of food near the end!

It was a good morning - which is unusual for me because I do not, as a general rule, enjoy the morning.  I am not one of those people who feels that the morning is this beautiful, amazing, peaceful time of day.  Wait, I retract that.  I believe all those things, I just prefer to enjoy that time under a pile of blankets with my eyes securely closed.  I've enjoyed a few sunrises, but they were all after a night out - on the way home to go to bed!

So, to wake up and get ready to cook at 6:30 is a bit much for me.  And that, considering I had been up late fretting about the whole to-do and how it would go.  Add to that the fact that I'm not supposed to have caffeine (it constricts your blood vessels, and mine are already constricted on their own) and I am on my own to be bright and cheery in the morning!

And so I did.  I dragged my butt out of bed, I prepped my supplies, and I went out to cook.

I feel like it went well.  It was lovely for being early - not too hot, not raining - and I had my farmers around me.  And I got my first opportunity to cook in front of people.  Fortunately, my belly dance classes have prepared me well.  Talking at a volume that will carry over a busy farmers market is about the same as talking over a class of music and ziling, but to be fair then all I have to say is "and a five, and a six, and a seven, and an eight."

My goal was to promote the farmers.  That is, after all, what I am here for most: to promote the farmers, to promote real food, and to promote people being less afraid to cook for themselves.  I feel like I did a good job of that.  Some of my favorite farmers were not there, which was sad because I would have like to share their meals with them.  In the end, they did the work.  How am I possibly to fail, when I am starting with something so good?

Hopefully I also brought a few new readers on board.  If I did, welcome!  I'm here to help you work a little more local into your life.  And also to rant about the food choices I see made around me.  I like bacon.  I like booze (more on that later).  And I like when I try something that surprises me.

As I said at my demo (if you were there) the trick to cooking from the farmer's market is to not be too set on a recipe.  If you find your recipe, write your list, and go to the market looking for exactly what you need, you're not going to be successful.  The market requires a little more flexibility.  I read a lot of recipes online, and I am highly annoyed by the reviews that read like this: "I tried this recipe and it was terrible.  I didn't have any heavy cream, so I substituted Kahlua.  I also didn't have any potatoes, so I substituted marshmallows.  The finished result was far too sweet.  Whoever wrote this recipe doesn't understand how to cook!"  Don't be that guy.  But at the same time, in order to cook from the farmer's market, you kind of need to be that guy.  But smarter.  It's about an understanding of how foods react, and what really can be substituted for what.  Kahlua can be substituted for cream - if it's dessert.  Potatoes can be replaced with, depending on the recipe, sweet potatoes, turnips, carrots, parsnips, and beets.  Depending on the recipe.  Cooking isn't like baking.  It's an art, not a science, and cooking from the farmer's market, or from a CSA, emphasizes that.  Whatta ya got?  What can you do?  If it doesn't work, keep it to yourself.  If it does, revel in your successes.

Here are my recipes from the farmer's market:

Peach and Basil Salad, with Saxony Cheese
  • 2 lbs peaches, pitted, quartered, and those quarters cut in half
  • 1/4 cup maple syrup
  • 1/2 cup cubed Saxony Cheese or something Parmesan-y
  • About 8 large basil leaves, thinly sliced
  • Fresh ground pepper
Heat a grill to high heat.

Place the peaches in a large bowl.  Add the maple syrup, and gently stir to combine.  Over high heat, grill the peaches until warmed and slightly caramelized.  You can grill all the peaches, or you can leave a few ungrilled to create a variety of texture.

After about 5 minutes, remove the peaches from the grill and return to the bowl.  Allow to cool slightly.  Add cheese, basil, and a dash of freshly ground pepper.  Enjoy warm.

Zucchini "Pasta" with Lime Vinaigrette Dressing

I consider this recipe kind of a cheat, in that it's a good recipe base to alter.  Really, all you need is the zucchini, and in the summer that's pretty hard to get away from.  Don't have limes?  Use a high quality white wine, champagne, or white balsamic vinegar.  No tomatoes?  No problem!  Extra veggies?  Throw them in!  Top it with cheese or meat!  Looking for something more filling, add equal parts cooked spaghetti to the zucchini pasta.

One thing I meant to bring up at the market is that you do not need fancy tools to make this.  My sous-chef, Denise, has a mandolin, so we used it, but at home (where I don't have one: present idea!) I just use my box grater.  The pasta doesn't look quite as fancy, but it tastes just as good:

Zucchini "Pasta" cut on the mandolin.

Here is the recipe, as I served it at the market:

With the box grater, it's not quite as pretty...
but it's just as tasty!
  • Lime Vinaigrette (This makes a HUGE batch.  While it saves well, you may want to cut it in half, or even quarter it)
    • 1 cup freshly squeezed lime juice
    •  zest of 2 limes (zest before you squeeze the juice!)
    • 1/2 cup honey
    • 1 tsp salt
    • 1 Thai chili pepper, minced
    • 3/4 cups olive oil
    • 2 tbsp garlic scapes, minced
  • 1 large zucchini, cut into thin pasta like strips
  • 2 ears of corn
  • 2 cups cherry tomatoes, cut into bite sized pieces
  • Salt and freshly ground pepper
Combine vinaigrette ingredients and mix well.  I recommend making in a bottle or jar that you can close tightly, and then just shaking vigorously.   I also recommend making this dressing a few hours to the night before, to allow all the flavors to marry.

On a mandolin or box grater, create long strips of the zucchini and place in a large bowl.  With a sharp knife, cut the corn off of the cob and add to the zucchini.  Add the tomatoes and stir to combine.  Add enough dressing to coat the zucchini, but don't drown it - about 2 tbsp to a quarter cup is probably good, depending on the size of your zucchini.  Toss gently, and allow to sit for at least five minutes.  The acid in the dressing will start to break down the zucchini, and it should develop a texture more like cooked pasta.

Farmer's Market Breakfast Fajitas 

This is another really good cheater recipe.  You can basically take anything, put it on a corn tortilla, and call it a taco, fajita, or burrito.  Yes, these words do mean something, but if you actually get called out on it, just tell them you're taking artistic liberties.  Cooks are artists too!

The main recipe here is actually for the skirt steak itself:

Skirt Steak Fajita Marinade:

  • 1/4 cup olive oil
  • 1 tbsp soy sauce
  • 1 tbsp balsamic vinegar 
  • 1 tsp fresh ground pepper
  • 2 tbsp garlic scapes
  • 2 tbsp shallots
  • 1 tsp buckwheat honey
  • 1 tsp minced hot pepper (I used Thai Chilli because that's what I had)
Combine ingredients and mix well.  Place 2 lbs skirt steak into a freezer bag and pour in the marinade.  Seal up the bag, and give the whole thing a good massage to work the marinade into the steak.  Allow to marinate at least an hour, up to overnight.

Once you are ready to cook, heat a grill to high.  While you are waiting, prepare a double thickness of aluminum foil large enough to completely contain the steak.  Season the steak with salt and place on the grill.  Cook for about a minute and a half on each side, then transfer to the aluminum foil and wrap up tightly, sealing any ends to prevent heat from escaping.  Allow to sit for 10 to 15 minutes.  At this point, the steak is continuing to cook - it's not really resting.

Slice the steak very thinly against the grain, and serve with corn tortillas and whatever else you would like on your fajitas!

Friday, March 16, 2012

When Food Bloggers Don't Have Time To Cook

Man alive!  What a busy week!  I am absolutely looking forward to the weekend and the Local Farmer Open House (it's tomorrow, people.  Don't miss it!)

It really seems like, when I'm busy at work, I just run out of time for everything else.  It's not that I'm blogging there, of course, for two reasons:

1. That would be wrong
2. Ever since my article in OnMilwaukee.com, I suspect that some of my co-workers/bosses might be reading this.

But mostly #1, of course!

I don't think that's the reason.  When we're busy at work, we're there longer.  We also get more tired.  Being stressed is tiring, and being tired means you don't want to do crappy stuff like cleaning your house, laundry, and cooking.  Yes, if you have to do it every day, cooking is a chore.  Even if you love to cook, it's still a chore.

So, since it's basically all I've eaten all week, I thought I'd take the time to talk a bit about how to locavore up your dinner if you don't have time to braise, bake, or make your own pasta.  All you need is a little pre-planning.  And it can be WAY pre-planning.  Most of the things I ate this week were in my freezer well before the start of the week.

Yesterday I had grilled sausages with carrots and mushrooms and baked potato wedges.   I forgot to take a picture...

We have a selection of sausages in the freezer, as well as a bag of sausage buns.  Bread freezes very well, so it's nice to have buns on hand for when just want that quick sandwich.

I started out by slicing the potatoes into wedges (actually, Jeff did this), and then boiling them until they just start to get soft.  Drain the potatoes, season with about a tablespoon of olive oil, salt, pepper, and garlic powder, lay out on a cookie sheet so the slices aren't touching, and pop into a 425 degree oven for about 20 minutes, flipping them once half way through.

While the potatoes were baking, I chopped up the carrots into bite sized pieces, and boiled them again until they were about half way done.  Heat olive oil and saute thinly sliced shallot or red onion (about a tablespoon) for 2 or three minutes, then add 1 clove minced garlic and cook for another minute.  Add the carrots and one sliced portobello mushroom, and saute until the mushrooms are browned and the carrots are cooked through.  Add 2 tbsp honey, 1 tsp white wine vinegar, and a pinch of cayenne pepper.

Meanwhile, grill up your sausages, plop them in their buns, and dinner is served.

Wednesday, Jeff was playing at a bar and I had hot wings and fries.  Don't judge me!

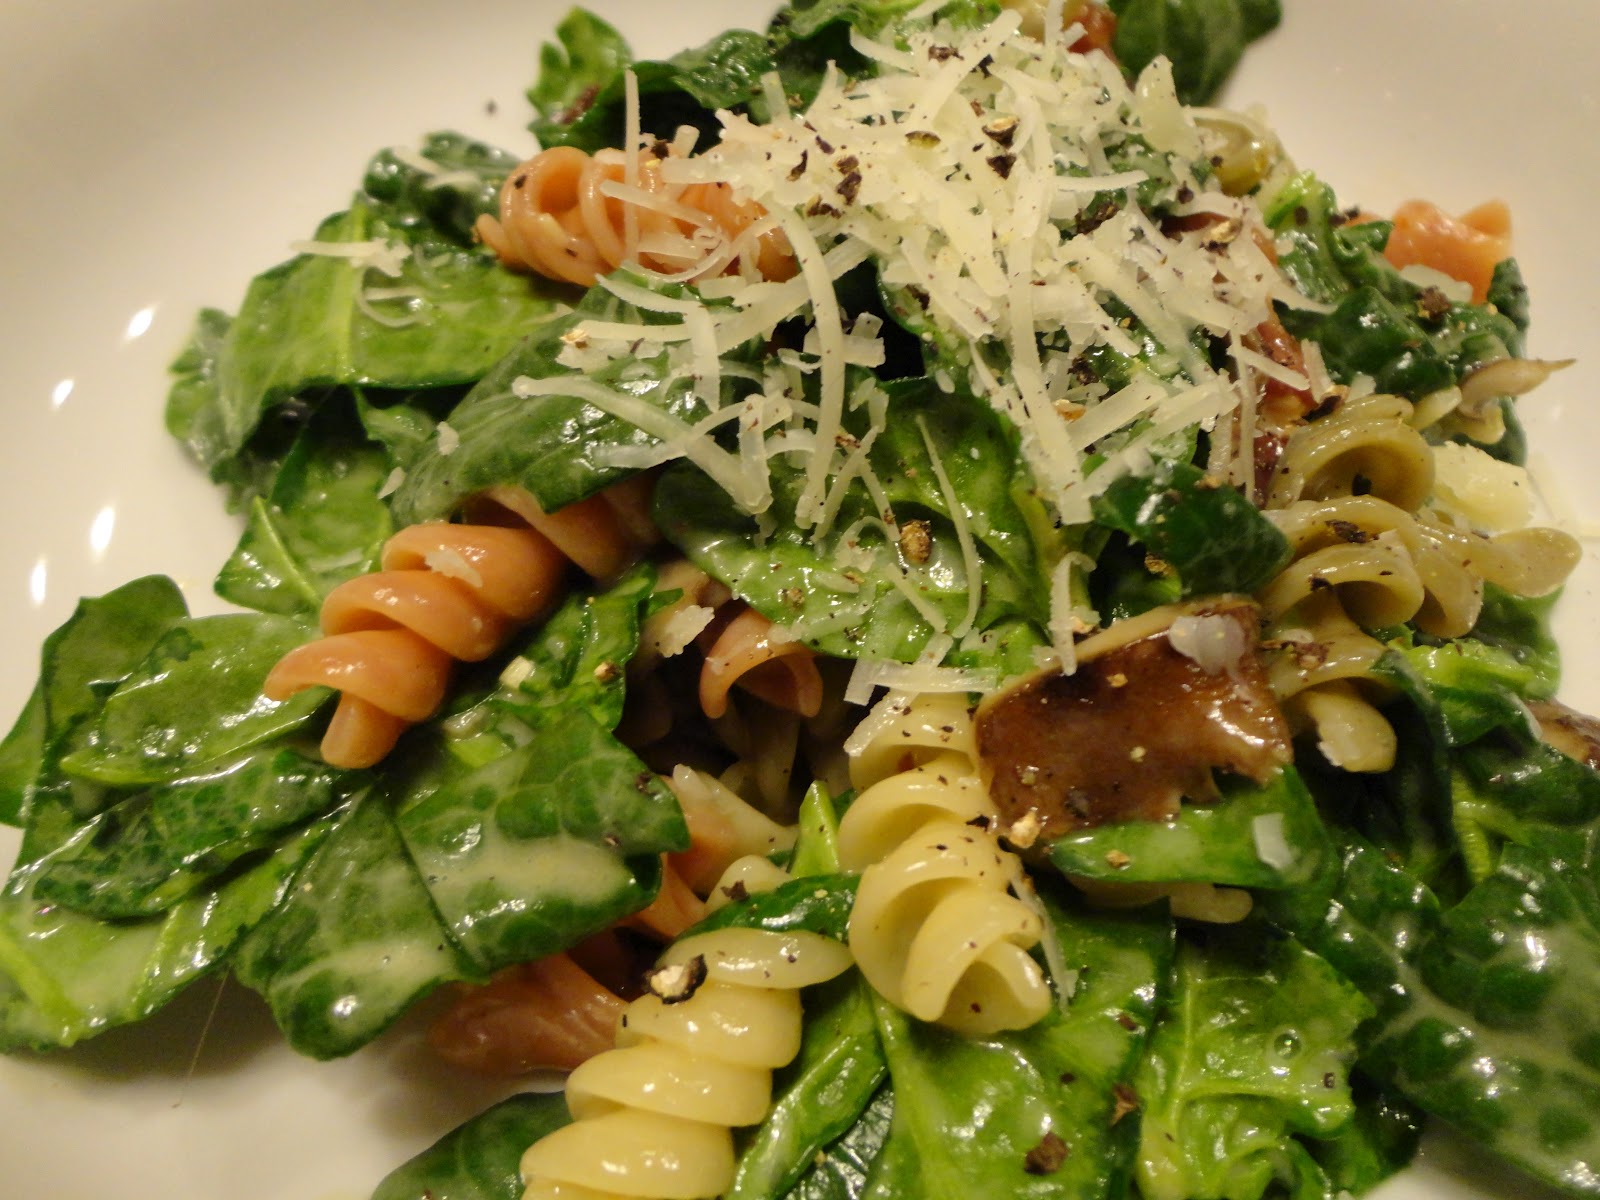
Tuesday, we had pasta carbonara with spinach and mushrooms.

Pasta carbonara is really easy and really quick, and is something that can be made with nothing more than fridge/pantry essentials.  The addition of spinach and mushrooms mean that it's not a "true" carbonara, but it makes me feel better to get some vegetables.  If you want to make a true carbonara, you can follow this recipe and just omit the veggies, and I think you should use a spaghetti type pasta - but I'm not positive on that one.

Start out by bringing a large pot of salted water to a boil.  Chop up about 3 strips of bacon into 1 inch pieces.  (I keep bacon in my freezer.  When I buy it, I open it up and wrap it into 3 slice packages and freeze it like that.  That way, I can use just a little bit of bacon for cooking and not have to thaw the whole chunk.)  In a large frying pan, fry the bacon until it is just about to start getting crispy, then add about 1/2 cup thinly sliced mushrooms to the pan.  By this point, your water should be boiling, so drop in about 2 cups pasta.

Keep an eye on the bacon and mushrooms, and if the bacon looks like it might start to burn, take it off the heat.

While the pasta is cooking, whisk together one egg and two egg yolks with 1 cup grated Parmesan or Romano cheese.  Also, wash about 1/2 lb spinach and tear into bite sized pieces

Once the pasta is done, drain RETAINING SOME OF THE COOKING WATER.  I always forget this step.  The best way (in my opinion) to do this, is to place a bowl under your pasta strainer to catch some of the water.  You don't need all of it, but may need up to two cups.  Don't rinse off the pasta.  You want it to be hot.

Acting quickly so nothing gets cold, remove the bacon/mushrooms from the heat.  Slowly stir 1/2 cup of the hot cooking water to the egg/cheese mixture.  (I know I said act quickly, but you do need to stir it in slowly, so the egg does not cook.)  Add the hot pasta to the mushroom/bacon mix and stir to combine.  Add the egg/cheese/water and stir again.  Add the spinach, stir one more time, and cover the pan.  Allow to sit (no heat) for 5 minutes.  The heat of the pasta and water will cook the eggs and wilt the spinach.

Monday, we had Stuffed Portobello Mushrooms with Pasta Salad.


I removed the casings from one of those sausages and sauteed it up in a pan while I heated up my grill.  Once the sausage was cooked, I added about a tbsp of shallot and a tsp on garlic to the pan, and just cooked that down slightly - about three minutes.  I mixed that with about 1/2 a pound of spinach and 1/3 cup crumbled feta cheese and piled this onto three portobella mushrooms.  The mushrooms will look really full.  It's okay, they will cook down nicely:

Uncooked mushrooms
Place the mushrooms on a hot grill, cover, and cook until the mushrooms are cooked through, the spinach is wilted, and the cheese is melty.

I served this with pasta salad, which I made by combining Sunday's kohl slaw with some cooked pasta.

Which brings us to Sunday's meal: Grilled Chicken Wings with apple kohl slaw and zucchini fritters.


I like to season my wings with nothing but salt, garlic powder, and onion powder.  The kohl slaw was equal parts thinly sliced apple, carrot, and kohlrabi, with a splash of apple cider vinegar, a dollop of mayo, a sprinkle of dill, and salt and pepper.  I served it over lettuce because I had lettuce.

It was the fritters, really, which were the most exciting thing I've eaten all week, so it gets to be written as a real recipe.  I could eat these all winter!  I think this is good enough to make me remove my zucchini question off of my list of questions for the farmers tomorrow.  The more zucchini, the better!

Zucchini Fritters
(this only makes 9 small fritters, so make a double batch!)

  • 2 cups shredded zucchini (if frozen, allow to thaw fully)
  • 2 tsp salt
  • 1 tbsp minced shallots
  • 1 tsp minced garlic
  • 1 tbsp dried dill
  • 1 beaten egg
  • 3/4 cup grated Parmesan or Romano cheese
  • 1/4 cup flour
  • Oil for frying (not canola)
First off, please don't use canola oil.  Canola almost always contains GMOs, which I am against and which are bad for you.  Use sunflower or safflower or grape seed oil for frying.

Combine the zucchini and salt and allow to sit for 10 minutes.  Squeeze well to drain out all of the water.  Mix zucchini with all remaining ingredients except oil.

Fry the fritters by the spoonful in hot oil about 1 inch deep, flipping once.

As you are frying, keep finished fritters in a warm oven.

I served these with a dip that was 1/2 cup sour cream, 1/2 cup Greek yogurt, 2 tbsp fresh minced mint, 1 tsp dried dill, and one clove minced garlic.

So good!

Tuesday, February 28, 2012

Is it Spring Yet?

Before starting this blog, I have a quick note:  Russia, where did you go?  Germany just passed 100 hits.  You're only at 84.  84!  Come on, Russia, I know you can do better!  Let's make a deal.  You click around and get your hits up to 100, and I will make Borscht.  I do love me some beets!


When I started this project, my goal was one year.  That one year mark is quickly approaching!  That's exciting in a sense, but I am in no way counting down the days.  As I said on day one, I haven't been depriving myself.  If I am craving a salmon fillet, I'm going to believe that it's because I'm lacking some Omega-3 fatty acids and my body is telling me that, and I'm going to go get me some salmon.  Not every week, but when I need it, I do cheat.  And I've been pretty open about that.

I'm also not running low on food.  I do recall a point when I first started this project when I couldn't find any food to eat.  It was meat and parsnips.  There weren't even any potatoes!  I know I'm not to that point in the year yet - because it hasn't been a full year yet - but I don't feel like things are nearly that bad.  It could be that I'm doing a better job at sourcing things, but it also could be that there is just more available.  It's hard to tell if I'm noticing things that were always there, or if things are starting to pop up.  Milwaukee has always been a little slow - maybe we're finally getting on board with the locavore movement.

Can I take partial credit?  Would that be wrong?  After all, I am an award winning food blogger.  No, my blog hasn't won any awards, but I won an award, and I blog... same thing, right?

I probably shouldn't take credit.  But I might anyway.  Just in my own mind if nothing else.

I don't expect my eating habits to change much once the one year mark is up.  More seafood for sure, obviously off of the Monterey Bay Aquarium Seafood Watch Sustainability Guide.  Download the App.  It's a good time.  Another App to download, although it has nothing to do with this post, is ShopNoGMO.  It can help you avoid purchasing genetically modified food.  There's a lot of it, and it's sneaky.  It doesn't announce itself.

(True story, Monsanto - the company that develops and sells most genetically modified seeds - says that there's no reason to test their genetically modified seeds to see if they're safe for humans.  Their argument read like circular logic to me.  We don't test because there's no evidence that anything's wrong... which how could there be if no tests were done...?  But, hey, I'm no scientist, so what do I know?)

Anywho, I'm mostly just ready for it to be warm.  This has been a very mild winter in Wisconsin, but it seems even more draining than usual.  I think it's because there hasn't been any snow to play in.  Snow or be warm, damnit!

But I do have food to eat.  And, I feel that my meals over the past week or so have been leaning towards the warm weather side.  I was especially excited to try out my newly delivered sausages.  I made a Greek inspired Summer meal in the middle winter, and it tasted delicious.

It would have helped if I didn't need to put on a sweatshirt right after eating it because I was cold!

Gyro Sausage with Pickled Zucchini Relish, and Spicy Squash with Garlic Yoghurt


Actually, there's really no recipe here.  Bet the bolded title threw you off!  Heat up delicious gyro sausage (or whatever kind of brat you want).  Place on bun.  Top with delicious pickled zucchini relish.  You can also crumble on a little feta cheese, if you're feeling feisty.

I also made the same squash that I made for Christmas this year (last year?  This past Christmas.), but I made it in a pan instead of in the crock pot.  I really didn't notice a difference in flavor/texture/anything on the eating end.  I did notice a difference on the cooking end, when I dropped the squash into the slightly too hot oil and got grease burns all over my face.  And, instead of being smart and going and washing off my face or sticking my face in the freezer or anything else to make it stop burning, I just hopped around the kitchen going "AHHHHH!!! HOT!" while my pets stared on confused.  It's a good thing I wear glasses, or I might be blind right now.  This, by the way, is not a part of the recipe.  Don't follow this step.

Other than that, though, I thought the squash came out exactly the same.  It cooked a lot faster, so if you don't have a reason to use the crock pot (like, not having access to a stove...), I would recommend using the stove top method.

I totally did just copy and paste this from the original post.  Does that count as plagiarizing myself?

Spicy Squash with Garlic-Yogurt Sauce


  • 1/4 cup olive oil
  • 2 1/2 lb squash, peeled, cut in half, and cut into 1 1/2 inch thick slices (I used a combination of butternut and an orange squash that I bought because it was pretty, but which I have no clue what it is)
  • 1 inch piece fresh ginger, peeled and grated
  • 2-3 cloves garlic
  • 1 tsp ground coriander
  • 1/2 tsp ground cinnamon
  • 1/2 tsp curry powder
  • 1 small diced Thai chili (frozen from my garden)
  • 1/2 pint tomato sauce (from my canning frenzy!)
  • 1/2 cup honey (this time I used buckwheat honey.  I liked the less sweat flavor that added)
  • salt and freshly ground pepper
 For the Yogurt Sauce
  • 1 1/2 cup Greek yogurt
  • 2 large cloves garlic, minced
  • 3 tbsp fresh chopped oregano
  •  1 tbsp fresh chopped dill
In a large dutch oven, over medium high heat, warm the olive oil.  Working in batches, add the squash, season with salt and pepper, and saute until evenly browned, about 7 minutes.  (DON'T BURN YOUR FACE OFF!).  Once the squash is browned, remove it from the pan. You may need to work in batches to avoid overcrowding.  To the pan, add ginger, garlic, coriander, cinnamon, curry, and chilis, and saute until fragrant, about 30 seconds.  Stir in the tomato sauce, the honey, 1/2 tsp salt, and 1/4 tsp pepper.  Stir, scrapping the bottom of the pan, and bring to a boil.  Return the squash to the pan and stir gently to combine.  Cover, reduce heat to low, and allow to simmer until the squash is tender - about 30 minutes.

Meanwhile, or the day before, combine yogurt, garlic, oregano, dill, and 1/2 tsp salt.  Cover and refrigerate until serving.

Monday, October 31, 2011

Attack of the Monster Zucchini!!!!

This is somewhat of an outdated story.  It should have occurred at the same time as my taking down my garden for the fall, but I just didn't have time to get it typed up.  Live with it.

I have the same issue every year.  I'm out picking zucchini, and at some point I stumble across the LARGEST ZUCCHINI IN THE HISTORY OF EVER.  It wasn't there the previous day.  I looked.  There's no way that I could have missed a zucchini this big, or even a zucchini one day less that big. And then I grumble to myself and pick it.

And then, I stop dead in my tracks and curse.  I should have let it grow!  It's already too big to use; I should have just let it keep growing and see what happens.  Maybe I could actually grow the largest zucchini in the history of ever and go on to win a prize and get put in the Guinness Book of World Records and go on TV talk shows and pimp out my blog.  It would be awesome!

And, this year, I actually accomplished it.  No, not the actual biggest zucchini in the history of ever, or any of the other stuff above, but the general foresight to not pick the big ass zucchini.  It's something.


According to the Guinness Book of World Records, the longest zucchini ever grown was 7 feet 10.3 inches, and the heaviest zucchini ever grown was 64 pounds, 8 oz.  I did not come close to this.  My zucchini was thee feet nine inches, and weighed about 16 pounds.  Still big, though.

The biggest surprise, in my opinion, was when I went to cut into it.  I had to cut into it to weigh it, because my kitchen scale only goes up to 7 lbs, and it was rock hard!  Rock hard like a winter squash.  I immediately assumed that the inside was going to be terrible, and even went so far as to throw some of it into the compost bin after cutting it up.  But the more I cut, the more I felt like I was cutting up some sort of hard winter squash.  Even the inside was kind of orange and squash like.  The seeds had hardened like a pumpkin, and the inside part was even starting to get stringy like a winter squash.


So I decided to treat it like one.

I peeled off the skin with a sharp knife, scooped out the guts in the center, and cubed up the remaining squash.  I popped a small bit in my mouth and it tasted like butternut squash.

I threw it in a pot, covered it with water, added a little bit of salt, and boiled it until soft:


Then I mashed it.  I used about half of it to make bread.  The other half I froze.  I'll probably use it to make more bread.  Or cake.

The bread itself tasted like a very mild pumpkin bread.  It was very subtle, but the flavor was definitely there.  I'm not sure if this is a GOOD use for zucchini, and I have a feeling that leaving this one courgette on the vine all year dramatically reduced my zucchini production - but if you end up with a hard ass zucchini at the end of the year, you don't have to throw it away.  I made several loves of this bread, and froze all but one.

Old Zucchini Bread (the zucchini is old... not the bread...)
  • 2 (.25 ounces) packages active dry yeast (I don't use packages.  I have a jar.  It said on the back of the jar how much equaled two packages... but I don't remember what that amount was.  If you don't use packages, there should be a conversion on whatever you do have...)
  • 1/2 cup warm water (110 to 115 degrees) (L)
  • 1 1/4 cup mashed, cooked old hardened zucchini (or substitute any winter squash) (L*)
  • 1 cup warm milk (110 to 115 degrees) (L)
  • 2 eggs, beaten (L)
  • 1/3 cup melted butter (L)
  • 1/3 cup sugar
  • 1 tsp salt
  • 7 cups flour (L)
In a mixing bowl, dissolve yeast in water.  Let stand for 5 minutes.  Add squash, milk, eggs, butter, sugar and salt.  Mix well.  Gradually add 3 and 1/2 cups flour and beat until smooth.  Add enough remaining flour to form a soft dough.  Turn on to a floured surface and kneed until smooth and elastic, about 6-8 minutes.  Place in a greased bowl, turning once to grease top.  Cover and let rise in a warm place until doubled, about one hour.  Punch dough down.  Shape into 3 loaves, place into greased 8x4x2 inch loaf pans.  Cover and let rise until doubled, about 30 minutes.  bake at 375 degrees for 25-30 minutes or until tops are golden.  Remove from pans to cool on a wire rack.

Friday, September 30, 2011

Zucchini Lasagna

 Ingredients

    I would not do well on a diet.  First off, I like food that tastes good, and the truth of the matter is fat = flavor.  But more so than that, I'm not good at depriving myself.

    "What?" you might ask.  "You're supposed to be a locavore.  Doesn't that mean depriving yourself of all sorts of food?"

    Okay, I guess that's true in a way.  But it doesn't feel like I'm depriving myself.  If I can't find something local, and it's good for me (like fish), I'm going to eat it.  I haven't cut olive oil, and sugar, and citrus fruit out of my diet.  I do make sure that these things come from the US, so they are as local as possible, and I did have to go without a lime in my margarita the other day because I couldn't find any that weren't from Mexico, but I guess that is a sacrifice that I'm just willing to make!

    What I mean, more so, is the fad diets.  The "only eat" or "eat whatever you want EXCEPT" diets.  It just doesn't make sense to me how those types of diets can be satisfying.  Or good for you.  Or tasty.  With all of the new health laws and suggestions going out (New York attempted to ban salt in restaurants in 2010; a local WI school - where one of my friends' daughter attends - has suggested banning students from bringing bagged lunches because parents don't make healthy choices for their children; apparently it's bad for you to eat a piece of bread spread with bacon fat!) I feel like there is far too much attention paid to telling people what they may and may not eat, and not enough attention being paid to telling people how to figure out what to eat.

    For example, there is a local sports figure who I like to make fun of for being fat (Hint: he plays on a team named for beer makers, and his name rhymes with "Thince Thielder"), and who also is a vegetarian.  I would like to remind him that, just because Twinkies are vegetarian, doesn't mean he should eat them by the case full! (I know, I know.  He's lost a lot of weight this year.  I'm mean.  Whatever.)

    I don't know if there's any low/no food diet that I could reasonably expect to stick to, but the one that makes me angriest is the low carb/no carb diet.  Perhaps it's because I'm part Italian, but the concept of no bread, no pasta, no potatoes, etc. is baffling to me.  Carbohydrates are the fuel on which your body runs.  Okay, so maybe you shouldn't sit around eating wonderbread - try to get some nutritional value with your carbs - but carbs are a good thing.  Also, carbs are what fills you up.  When you eat carbs, you can eat less and still feel satisfied... something I learned with this meal.

    Overall, this was delicious.  If you are on a no carb or low carb diet (let me resist smacking you upside your head for a moment), this might be just the fix you need.  The zucchini really did take on a consistency and texture of noodles, and the flavors were there.  My problem?  I ate about two times as much as I normally would have and still felt hungry.  In the end, I made up a small batch of pasta and mixed it in just to get those carbs.  I will absolutely make this again, but only on a day when we have bread in the house!

    I did not have any ricotta cheese in the house, so I substituted a combo of cottage cheese and marscapone cheese.  You could also just use a 15 oz. container of ricotta cheese.  I also used kale in this recipe because I have it, but you could just as easily use spinach.  Since you blanch the greens, you could use a bag of frozen spinach, if you're into that sort of thing.  If you did that, you would just want to thaw and drain the spinach.

    Zucchini Lasagna
    • 2 small zucchini (L*)
    • Salt
    • 1/2 pound ground beef (L)
    • 1 1/2 teaspoons ground black pepper
    • 1/2 small green bell pepper, diced (L)
    • 1/2 onion, diced (L)
    • 3 garlic cloves, diced (L)
    • 1 6 oz jar tomato paste (I had this sitting in my pantry since before March, so I figured it was time to use it up!)
    • 1 (16 ounce) can tomato sauce (see note above for tomato paste!)
    • 2 tablespoons chopped fresh basil (L*)
    • 1 tablespoon chopped fresh oregano (L*)
    • hot water as needed
    • 1 egg (L)
    • 1 (15 ounce) container small curd cottage cheese (L)
    • 2 tbsp marscapone cheese (L)
    • 2 tablespoons chopped fresh parsley (L*)
    • 4 cups kale, center vein removed, leaves chopped, and blanched (L*)
    • 1 pound fresh mushrooms, sliced (L)
    • 8 ounces shredded mozzarella cheese (L)
    • 8 ounces grated Parmesan cheese (L)

    If you use fresh kale or spinach, I like to blanch in as little water as possible - so I'm more steaming than anything else.  This method helps keep as much of the nutrients in the kale from coming out into the cooking water.  For four cups of  kale or spinach, I would put about 1/2 cup of water in the smallest pot I have that is big enough to hold all the greens comfortably.  Add 1 tbsp salt to the water, and bring to a boil.

    Meanwhile, get a large bowl with ice water ready.

    One the water is boiling, add the kale and cook, stirring regularly, until kale is cooked through and tender.  If it appears all the water has evaporated, add more.  Once the kale is done, transfer it to the pot of cold water to shock, saving any remaining cooking water in the pot.  This will help stop it from cooking and keep it green.  Take the kale out of the cold water and squeeze the water out OVER the original cooking pot, into any remaining cooking water.  I then use this water in my recipe, in order to get all of those nutrients and flavors back into the recipe.

    Directions


    1. Preheat oven to 325 degrees F (165 degrees C). Grease a deep 9x13 inch baking pan.
    2. Slice zucchini lengthwise into very thin slices. Sprinkle slices lightly with salt; set aside to drain in a colander.
    3. To prepare the meat sauce, cook and stir ground beef and black pepper in a large skillet over medium high heat for 5 minutes. Add in green pepper and onion; cook and stir until meat is no longer pink. Stir in tomato paste, tomato sauce, wine, basil, and oregano, adding a small amount of hot water if sauce is too thick. Bring to a boil; reduce heat and simmer sauce for about 20 minutes, stirring frequently.
    4. Meanwhile, stir egg, cottage cheese, ricotta cheese, and parsley together in a bowl until well combined.
    5. To assemble lasagna, spread 1/2 of the meat sauce into the bottom of prepared pan. Then layer 1/2 the zucchini slices, 1/2 the cottage cheese mixture, all of the spinach, followed by all of the mushrooms, then 1/2 the mozzarella cheese. Repeat by layering the remaining meat sauce, zucchini slices, cottage cheese mixture, and mozzarella. Spread Parmesan cheese evenly over the top; cover with foil.
    6. Bake for 45 minutes. Remove foil; raise oven temperature to 350 degrees F (175 degrees C), and bake an additional 15 minutes. Let stand for 5 minutes before serving. 

    Wednesday, September 21, 2011

    Preserving Experiment #2

    For the record, pickled watermelon rinds were a TREMENDOUS success.  Everyone I had try one thought they were surprisingly delicious.  Surprisingly.  No one expected to like them - myself included.  I know for a fact that I will be making them again, but adding something to make them red.  Watermelon anything should be red.  Or pink.  Or not amber.  My first thought was to use red wine vinegar, but now I'm considering just adding a few beet slices.  They dye my cutting board red.  They dye my hands red.  Why wouldn't they dye my watermelon rinds red?

    Anyway, that is a story for another day.

    Canning experiment #1 was a success.  On for canning experiment #2.  Something slightly more normal, but still not "normal."  I have no intent, I should clarify, to make pickles.  This is true for two reasons: 1. I have NEVER had a home made pickle that tasted as good as my favorite store bought pickles.  My favorite store bought pickles are, and always have been, MILWAUKEE'S Pickles.  So, if they're going to be local and delicious, why mess with a good thing?

    This one was a recipe out of my "The Art of Preserving" book.  I bought this book about three years ago because it had pretty pictures, and because canning has always seemed kind of romantic to me.  I can't really define it.  I'm canning now because of this locavore challenge, but I've always wanted to anyway.  I know a lot of people who have canning memories, either with their mom or grandma, and I don't really have this.  I don't recall canning taking place when I was a child.  I have no memories of spending hours in the kitchen over bubbling pots of goodness.  I remember bread, and Christmas cookies,  and chicken stock, but not canning.

    But there's something about being self sufficient that really appeals to me.  Maybe it's because I read the Laura Ingles Wilder books about 27 too many times when I was young.  Maybe it's because I'm a cheep ass.  But, when the world ends in 2012, or the grid collapses, or whatever, everybody's going to want me in their tribe!

    This is a recipe that my friend Jeanette told me was one of her favorites.  I love pickle relish on a hot dog (because I love a Chicago style hotdog).  I had this on Andouille sausage.  The spicy sausage went exceptionally with the sweetness of the relish.  This was almost sweeter than the crazy, bright green, unnatural pickle relish that I love on a pickle at the ball game.  But, at the same time, it tastes more real.  I'm looking forward to this on a burger in the middle of January!


    Pickled Zucchini Relish
    • 2 lbs zucchini (L*)
    • 1 large yellow or white onion (L), diced
    • 1 red bell pepper (L), seeded and diced
    • 2 tbsp salt
    • 1 1/4 cups honey (L) or sugar
    • 1 cup distilled white vinegar
    • 1 tsp dill seeds (L*) or celery seeds
    • 1/2 tsp ground turmeric
    • 1/2 tsp freshly ground pepper
    Cut the zucchini into thin matchsticks, about 2 inches in length.  Transfer to a large, nonreactive bowl.  Add the onion, bell pepper, and salt, and toss to combine.  Let stand at room temperature for at least 6 hours and up to one day.


    Have ready hot, sterilized jars and their lids.

    Drain the zucchini mixture in a large colander.  Rinse thoroughly and drain again.  Transfer to a large nonreactive saucepan and add the honey or sugar, vinegar, dill seeds, nutmeg, turmeric, pepper, and 1 cup water and stir to combine.  Bring to a boil over high heat, reduce the heat to medium-low, and simmer, stirring occasionally, until slightly thickened, 25-30 minutes.

    Ladle the hot relish into the jars, leaving 1/4 inch of headspace.  Remove any air bubbles and adjust the headspace, if necessary.  Wipe the rims clean and seal tightly with the lids.

    Process the jars for 10 minutes in a boiling-water bath.  Sealed jars can be stored in a cool, dark place for up to 1 year.  If a seal has failed, store the jar in the refrigerator for up to one month.

    Friday, August 12, 2011

    Potato Salad


    This one is for my vegetarian friends out there!

    Vegetables are good.  I like vegetables.  They're even better when served next to a side of delicious, delicious meat, but they're good on their own too.

    My biggest problem, really, is that I don't like a lot of vegetables cooked.  I shouldn't say I don't like them.  They're fine, and I'll eat them, but 9 times out of 10 I would prefer them raw.  Even fancy applications.  I have had fancy vegetables every which way you can imagine them and, while delicious, I'm almost always thinking "this would be better if it were raw.  And if it were the middle of summer.  And if I were eating it outside.  With my hands."

    Which creates a problem.  You see, one would probably categorize this as a cooking blog.  I personally would categorize it as Kate talking a bunch of nonsense blog, but I've never seen that as a category, so we'll go with the next best option: cooking blog.  In fact, I have totally used this blog as a reference to make things I made previously!  Which is good, because half the time when I make something really delicious, I can never make it again because I have no clue what I put into it...

    (That's another good cooking tip, people.  Keep track of what you're putting into your food.  If it's really good, you want to be able to make it again exactly the same way so you know you can impress your friends.   If it's horrible, you want to know what you did so you can never do it again!)

    So, since this is a cooking blog, I feel like my recipes should not read like this:

    Go into back yard.  Pick tomato.  Eat like apple while leaning over the sink so as to not get floors dirty.  Add salt if desired.

    That is, perhaps, the most delicious summer recipe I know.  I personally feel that eating it over the sink helps the taste.  It's like how eating food that is bad for you makes you feel good in a guilty way.  There is nothing more "guilty" then eating food over the sink instead of using a plate.  If you don't believe me, just keep trying it until someone walks in and catches you.  See how guilty you feel!

    Anyway, perhaps a good life tip, but not really a good recipe - especially for a cooking blog.  Which is why I don't post many veggie recipes, even though we are eating a lot of veggies.  I just don't want to mess with the flavor of the vegetable.


    I thought this was a good compromise.  It involved some sort of skill, but not a lot of "cooking."  It is tasty, and seems fancy, but doesn't involve a lot of work.  Plus, it's a good and different way to use up zucchini, which it is totally time for!  I cut my potatoes too big.  It was annoying.  Don't do that.


    Potato Salad with Zucchini and Green Beans
    (makes 6-8 side dish servings)

    • 1 lb new potatoes, red or otherwise, cut into bite sized pieces (L)
    • 1 medium sized zucchini, quartered lengthwise and sliced thin (L*)
    • about 2 cups green beans, broken into bite sized pieces (L*)
    • about 1/4 cup crumbled feta cheese (L)
    • 1 tbsp fresh dill (L*)
    • 2 tbsp minced garlic scapes (L)
    • 2 tbsp small red onions, minced (L*)
    • 3 tbsp basil chiffonade (L*)
    • 1 tbsp mayo
    • 1 tbsp champagne vinegar
    • Salt and freshly ground pepper
    Place potatoes into a medium pot, and cover with water.  Salt water well.  Bring to a boil, and cook potatoes until soft, but not falling apart.  Drain, reserving the cooking water, and put potatoes in a bowl in the fridge to cool quickly.

    Put the potato water back into the pot, and return to a boil.  Using a steamer basket (or, if you're short on kitchen tools like me, a mesh colander strategically placed over the pot), steam the beans until just tender - about 2 or 3 minutes.  They should still be crisp.  I like to sprinkle the beans with coarse salt while they are steaming.  Cool down beans quickly by placing them in the fridge as well.

    Once potatoes and beans are cool, combine all ingredients up to mayo.  In a small bowl, whisk together mayo and vinegar.  Season with salt and pepper to taste, then add to vegetables and stir to combine.  Keep in mind you might not need as much salt, because of the cheese and because the potatoes and beans should be salty as well!

    This was best on day 2, after all of the flavors have melded.  It was good on days 1, 3, and 4, but by day 5 it was done.  I may have made too much...

    Tuesday, August 2, 2011

    Summer Part 2

    So, yesterday I talked about my realization that I already was a locavore in the summer without even trying.  Today I want to talk about why I haven't been posting as much as I thought I would.  I think the excuse that it's summer and I don't want to sit in front of my computer and type is pretty self explanatory.   It's either nice out, and I want to be outside, or it's hot out, and I don't want to sit in front of a computer that is giving off more heat.  Kind of self explanatory.

    What I really wanted to explain was my statement that, in the summer, I don't want to cook fancy food.  Don't get me wrong, I have not fallen off of the locavore wagon at all.  In fact, I suspect the past four or five meals I've prepared were 100% local with the exception of olive oil, salt, and pepper.  But, there is something about summer that makes me hungry for very simple food.

    I've said it before, but during the winter in WI there isn't much fresh.  This is a good time to experiment with strong flavors and spices, because the food itself doesn't have that much flavor on its own.  But in the summer - and especially right now when the produce is really just starting to come - I want to do as little with it as possible.  I don't even want a tomato mozzarella salad, even though that is probably one of my favorite foods in the world, I just want to eat the tomato.  I don't want to make coq a vin (another one of my favorite foods), I just want to throw the chicken on the grill and let the flavor of the chicken really shine.

    One thing I'm really starting to notice is that there really is a difference in the flavor of chicken.  Purchase a local chicken from your farmer's market - one that has been butchered the day before and has never been frozen - and grill it up.  The first thing you will notice as compared to grocery store chicken is the texture.  The meat is firmer and moister - an effect of not being processed and not having anything added to it.  The next time you are in the grocery store, take a look at what you are buying and what percent of it is "added solution."  This is basically water.  They are selling you meat by weight, and adding water to it.  Most chicken at the grocery store has a label on it that shows it is 8-12% added solution by weight.  If you buy a 4 lb bird at $2 a pound, almost a dollar is going to water.

    But if you start to get fresh chickens regularly, you will also start to notice the difference in the flavor of these chickens.  A chicken that lived and was butchered in the spring tastes different than one from the summer, or one from the fall or winter.  The saying "you are what you eat" is very true when it comes to food, and if you think about it, you can taste what the chicken has been eating - whether that's chicken feed or fresh grass and clovers.  It's a subtle flavor and, in the end, it all still tastes like chicken, but I don't want to cover that up.

    In a week or two, I will have so many tomatoes and so many zucchini that I will be sick of them in the same way I am now sick of rhubarb, and will be looking for any way to get rid of them.  But for now, I want to enjoy them in their purist form.

    This, in my mind, is the perfect summer meal, followed by the perfect summer leftover meal:


    Yup.  We were eating outside.  It got dark.
    Grilled Chicken with Summer Herbs
    (serves two with leftovers)
    • 1 chicken (3 to 4 lbs) cut into serving pieces and patted dry (L)
    •  2 tbsp Olive Oil
    • 1 tbsp kosher or sea salt
    • 1 tbsp fresh oregano, finely chopped (L*)
    • 1 tbsp fresh chives, finely chopped (L*)
    • 1 tbsp fresh garlic scapes, finely chopped (L)
    • 1 tsp thyme, finely chopped (L*)
    • 1/4 tsp rosemary, finely chopped (L*)
    Combine all ingredients except chicken, then massage into chicken skin.  Allow to sit about 15-25 minutes.  Grill over medium/medium high heat about 20 minutes or until cooked through.

    Grilled Zucchini
    (recipe is per person)
    • 1 small zucchini (L*)
    • 1 tbsp olive oil 
    • Salt and fresh ground pepper.
    Cut ends off of zucchini, then quarter length wise. Toss with olive oil, salt, and pepper, and grill just briefly (about 3-5 minutes each side depending on how thick they are) until the pieces are warm all the way through but are still basically raw on the inside.

    Grilled Corn 
     (Don't tell my orthodontist!)

    Throw corn on grill still in husks.  Grill for about 10 minutes, rotating for 2-3 minutes, until husk is well charred.  I usually do this before cooking anything else, and then move the corn to the top grill rack away from direct heat and let them sit there while everything else cooks.  If you want to do the corn all at once, it will probably need 15 to 20 minutes total over direct heat to be done.

    Tomatoes and Cucumbers.

    Slice.  Season with salt.  Eat.

    The other half of not wanting to do too much cooking wise in the summer is that it does take time, and I there is always so much to do.  So, it's also important to use whatever I have in the best way possible.  So, I thought I could start giving you some of my leftover recipes as well.  I'm sure I've said it before, but not wasting food is the best way to keep your food budget low.  I know that I personally don't want to eat the same thing two days in a row, so if I can make something that involves a little bit of work the day before, and then use it to make something involving almost no work the next day, I'm not only able to use up all the food and save money, but I also get to be lazy on day two.  The official name for this recipe is "Cottage Breakfast," because it's what my family eats for breakfast when we're at our cottage.  It's basically an egg scramble of whatever you had for dinner the day before.  It doesn't have to be for breakfast, though.  I do love eggs for dinner.  This recipe is basically a road map.  Anything can be substituted for anything else...  Except the eggs.


    Leftover Egg Scramble/Cottage Breakfast
    (2 big servings)
    Total time: 20 minutes
    Clockwise from top: Tomatoes, chives, sage, chicken, mozz,
    oregano
    • 5 eggs, lightly whisked (L)
    • 1 medium potato (L)
    • 1/4 to 1/2 cup water, vegetable, or chicken stock (I used water... so... L?)
    • 2 tbsp butter, divided (L)
    • 1/2 cup cooked meat - in this case chicken - chopped or shredded into bite size pieces (L)
    • 1/4 cup vegetables - in this case tomatoes.  I would have used the zucchini too, but we ate it all the night before (L)
    • 1/4 cup cheese, in this case mozzarella (L)
    • Fresh herbs if you want.  I used chives, sage, and oregano.
    • Salt and pepper
    These potatoes are boiling too hard.
     Cut potato into bite sized cubes.  Place in a large, shallow frying pan over medium heat, and pour in 1/4 cup water or stock.  Bring to a simmer, and allow to cook.  Do not cover.  The liquid should evaporate as the potatoes cook, and they should be fork tender and ready to eat at the same time that there is no more liquid in the pan.  If the liquid is evaporating too quickly and the potatoes are not cooked through, add more liquid a tablespoon or two at a time.  Once the liquid is completely evaporated, add 1 tbsp butter and saute potatoes until they are lightly browned and crisp on all sides. 

    Add remaining tbsp of butter, and all additional ingredients, stirring to combine and to scramble eggs.  Turn heat to medium.  Cook, stirring constantly, until eggs are cooked through and cheese starts to melt.