Showing posts with label Spinach. Show all posts

Monday, November 14, 2011

A Plethora of Pumpkin, Part 3

This is one of those recipes I almost don't want to share.  It has all the components of a great recipe: It's addictingly delicious, it's visually stunning and impressive, and it is EMBARRASSINGLY easy.  Seriously.  It's made slightly more difficult by the fact that I need to be an over achiever and use only fresh, local ingredients, but if you don't share my crazy you don't have to do that.  Or you could.  It's still pretty damn easy.

Recently, I assisted my dad in cooking a dinner for some "fancy" people.  Now, I'm pretty fancy as it is (I tried to find a link to Jona Hill's Saturday Night Live Monologue, but there doesn't seem to be one in existence... for those of you who saw/remember that episode, I'm fancy just like he is!) but when you're having a dinner party with your father you need to really cook to impress, right?

So, of course, I busted out the fanciest recipe I know.  Doesn't hurt that it also fits right into the fall pumpkin theme.

This was so beautiful looking, it started getting eaten
BEFORE I could get a picture!

Really, this is just a baked pumpkin, filled with hot cheese dip.  You wouldn't need the pumpkin for this dish, and you could absolutely use a pumpkin in this way to serve all sorts of dip.  I personally think that the pumpkin is a perfect addition to heavy, cheesy dips.  It helps break up the richness of the cheese, and it adds to the illusion that you're eating something healthy.  And, it looks fancy and fall like.  It's a great option for impressing people at a Thanksgiving dinner, for example.

(Side note to anyone in my family reading this.  If I bring something that looks remarkably like this to Thanksgiving dinner, it is totally NOT this recipe.  It was a way, super hard recipe, that I slaved over for HOURS.  Because I love you that much.)

First off, the pumpkin.  I used a standard "pie" pumpkin - not sure what kind exactly - that I picked up when Jeff and I purchased our Jack-o-Lantern pumpkins.  A pumpkin pie is usually small, and not quite as orange as a "regular" pumpkin.  I've also found that they tend to have slightly thinner flesh, which is good for something like this because it means you'll have lots of room inside your pumpkin to stuff your dip.

The first step is to cut the top off of the pumpkin.  This is, on it's own, a leap of faith.  You want the pumpkin "bowl" to be the right size to hold all of your dip, without looking empty, but at the same time you don't know how thick the walls are going to be, and therefore how big the cavity will be.  So, you just sort of cut the top off.  I amazingly guessed exactly right, and saved the top of this pumpkin for my pumpkin stew... to be seen in a Plethora of Pumpkin part 4!

Once the pumpkin is cut, and the seeds and guts are all cleaned out, season the inside generously with salt and pepper.  Place the pumpkin in a baking pan big enough to hold it, and add about an inch of water to the bottom of the pan.  Bake at 350 degrees for about an hour to an hour and a half (depending on the size), until the pumpkin is soft.  A good test is to stick a fork in the top of the pumpkin near an inside edge, and see how easy to flake away little bits of pumpkin.  It should be very easy!

Meanwhile, make whatever dip you want to put inside the pumpkin.  I used a goat cheese and spinach cheese dip.  This is an incredibly versatile dip, and you can really use any kind of cheese you want:

Goat Cheese and Spinach Cheese Dip


  • 10 oz fresh spinach (L)
  • 8 oz soft cheese (I used a herbed goat cheese, but you could use cream cheese or any cheese of a similar consistancy) (L)
  • 2 cups shredded cheese (I used one cup white cheddar, one cup Romano, but you could use any kind of cheese you want.  A mozzarella would make it really melty and gooey!) (L)
  • Salt and pepper to taste (be careful with salt, if you're using a salty cheese)
This is the "base" of the recipe, and is really all you need.  From here, you can add any seasoning you want.  This is what I used:
  • 3 cloves garlic, smashed and minced (L)
  • 1 shallot, minced (L)
  • 1/4 tsp mustard powder
  • 4 dashes Tabasco hot sauce (I used the habanero)
Cut spinach into bite size pieces, and place into a pot large enough to hold it all.  Add about a cup and a half of water, and cook covered, stirring occasionally, until the spinach is soft and cooked through.  Drain the water and squeeze as much water as you possibly can out of the spinach (let it cool first.)  If you want to (I do), save the cooking water to cook with later.  This is full of all sorts of great vitamins.  You could even throw some of it into a smoothy if you're into that sort of thing.

As an alternative/even easier option, use 10 oz of frozen spinach, thawed, drained, and all water squeezed out.

(When I was explaining this recipe to a friend, I told her it needed 10 oz of cooked spinach.  "10 oz cooked!" She exclaimed.  "What is that, like 3 pounds fresh?!?"  No, dummy.  10 oz of spinach is 10 oz of spinach.  It just takes up a bunch more room when it's fresh.)

Combine all ingredients, including cooked spinach, in a glass bowl and microwave on high for about 3 minutes, stirring after each minute.  You want the dip to be hot and soft, but not to separate.  You could easily pull this dip out of the microwave and put it right on the table in the glass bowl. 

Once the dip is done, scoop the cheese into the pumpkin and serve with bread or crackers.  I like to stick a cheese knife right into the flesh of the pumpkin and flake a little bit off, so that people get the idea that they are supposed to eat the pumpkin right along with the cheese as a part of the dip.  

It's another vegetable, which means this massive quantity of melty cheese is healthy, right?

Wednesday, August 10, 2011

Fish Pasta

Recently, I've been preaching a lot about simple food that lets the taste of summer come through.  I don't want anyone to think, for a second, that I cook that way all the time, that I have always cooked that way, or that I think that is the only way to cook.  Much to the contrary, in fact.  I happen to have a specialty which I refer to as "Pasta ala Whatever the Heck I Have in the Fridge."  This is usually a garbled mess of - literally - whatever the heck I have in the fridge that could conceivably go on pasta.  Not so much a clean taste of summer - more a good way to get rid of food before it goes bad.  I would love to be fancier than I am, but let's be clear on one thing: I am not a chef.  I am just some girl who likes to cook.  And, lots of times, I make mistakes.

Ive been cooking for myself for a long time now, and I'm starting to be successful more often than not - but there is still plenty of "not."  Cooking isn't a science, it's an art.  And it's not something you're born knowing how to do... unless you're a cooking genius savant... which I am not.

You can try to learn how to cook by reading cookbooks and watching TV.  I do this.  Okay, I do the TV part.  This is helpful, but it's not enough.  It gets you good ideas and makes you want to try new things.  It helps get you excited and makes you more excited, but it won't actually teach you how to cook. 

You can try to learn how to cook through eating.  I recommend this.  Highly.  Try new restaurants in your area.  Try new foods.  One thing I like to do is get the weirdest sounding appetizer.  That way, if it's gross, I'm probably out less than $10, and I still have a meal coming.  If you order something great, and it's not too busy, ask to talk to the chef. What did they do?  What spices are in there?  Fresh or dried?  In my experience, chefs wont give you all the information.  They have their secrets, and they aren't too quick to part with them.  After all, if everyone could cook as well as they could, they wouldn't have a job.  But most of the time they will answer questions.  Especially smart questions.  Especially ESPECIALLY smart questions surrounded by flattery.  Chefs are, as a general rule, pompous, arrogant d-bags who think they are better than they are, and who loved to have their bread buttered by the customers (figuratively, not literally,because they probably didn't make the bread and if you eat too much bread you won't have room for dessert.)

What was my point?  Oh, yeah.  Eat out.  Try new food.  Ask questions.  It will help you conceptualize food and open your palate to new experiences.

But it won't teach you how to cook.

Nope.  The only way to learn how to cook is also the only way to learn how to walk.  You just have to try.  You will fall down.  But you have to get up and keep trying.

After you read that awesome recipe in the newspaper, or see it on TV, try to make it.  Try to find two or three or more recipes and blend them together into one recipe.  Try to cook without any recipe at all.  See what works.  See what doesn't.  Sometimes things won't work.  Most of the time it will still be edible.  Sometimes you will have to order pizza.  Or Chinese.  Or sushi.  Mmmm.... now I want sushi....

My long winded point is this - you have to try.  If you don't try something new, you won't learn anything new.  And you can't expect to try new things and never expect to fail.  Failure isn't bad.  Failure is good.  Failure means you're growing as a person.  Failure can be fun.  "Happy Accidents" often create the most exciting results.  I'm no food historian, but I would like to believe the invention of wine went something like this: "La la la... Oh my!  What happened to my grape juice that I stored in this oak barrel?!  This is delicious!  Let's have a party!!"

Today's recipe wasn't a happy accident, but it was a result of many years of learning.  I have learned, although still make this mistake, that more things in my pasta doesn't always equal better pasta.  And I have learned that too much dill wrecks everything - even fish which is supposed to go great with dill!

This week was also a learning experience - specifically in the form of my spinach pasta, which did not turn out great.  It's delicious, but the pasta is really stuck together in big clumps.  I'm not sure why that happened.  My theories are:

1. I rolled it to thin.
2. I didn't let it dry long enough before freezing it.
3. I packed it too tightly into the bags before putting them into the freezer.
4. Something else.
5. Some combination of the above.

There's only one way to solve this mystery - keep making pasta until I can store it perfectly.  From my experience, that should be in about 30 years.  But, on the plus side, I get to keep eating fresh pasta until that point.

I did get more fish from Sweet Water Organics, who now have a booth at the South Shore Farmer's Market.  I am a lot better at cleaning them than I was the first time.

It's all about practice.


Spinach Pasta with Dill Cream Sauce, Zucchini, and Fish
 (serves 2)
Prep time: About 15 minutes, not counting cleaning the fish
  • 2 servings of fresh spinach pasta (about 8 oz) (L*)
  •   3 tbsp butter, divided (L)
  • 1/2 cup heavy cream (L)
    Tiny Fillets....
  • 1 tsp fresh dill, finely chopped (L*)
  • 2 cloves garlic, minced (L)
  • 1 small zucchini, thinly sliced (L)
  • 8 small lake perch fillets, or the equivalent to be enough to serve two people (L), (when I say small, these things are tiny, as you can see in the picture)
  • Salt and pepper
Cook the pasta in well salted water until about about two minutes before it is done. 

Meanwhile, melt 1 tbsp of the butter in a large pan.  Add the cream, dill, and salt to taste.  Bring to a gentle simmer.

The goal is to have the pasta be done right around the same time that the sauce comes to a simmer.  Drain the pasta, add it to the sauce, and allow it to finish cooking as the sauce thickens up slightly.

Meanwhile part 2, heat 1 tbsp of the butter in a second smaller pan over medium heat.  Saute the garlic until it is lightly golden and scented, then add the zucchini and increase the heat to high.  Saute quickly, seasoning with salt and pepper to taste.

Add to pasta and sauce.  Return the pan to the heat, add the remaining one tablespoon butter, and quick fry the fish.  If it is as tiny as mine was, it should take about two minutes on each side. Dish the pasta into large bowls, and top with the fillets. 

Monday, July 18, 2011

Leftovers, anyone?


Like most people, I'm busy.  I do a lot.  So leftovers become a big part of my weekly meals.  I try to cook "real" meals on the days I can - usually Friday or Saturday, Sunday, sometimes Monday, and Thursday, and I try to cook enough that we can eat the leftovers the rest of the week.  Sometimes this means literally just a reprise of what we had the night before, but personally I would rather have something different.  Lots of times, this means pasta.

One of my personal cooking specialties is "Pasta Ala Whatever the Heck I Have in the Fridge."  This is very similar to my Super Top Secret Mac & Cheese recipe, in the fact that it doesn't really matter what you put in it.  Pasta is good like that.  Basically every time I'm watching "Chopped" I think: "Oh, I would make a pasta with that basket."  Got a bit of meat?  Throw it in a pasta.  Even better, got two different kinds of meat, neither of which is enough to make a meal?  Don't eat them as a midnight snack!  Throw them in some pasta.  Some random, kind of old vegetables?  Cook them down, add some butter and cream... like magic you have pasta sauce.  Rock hard cheese that you're not sure what it used to be?  You got it, grate it over your pasta.

Pasta is cheap.  It's filling.  It can take a lot of additional, random ingredients if you have them, or it can be eaten basically on its own.  It's a good meal.  The below recipe is just a possible example.  Basically anything can be substituted for any of the items.

This recipe is technically out of order.  I recently graduated from my MBA program, and in celebration had a crawfish boil.  The crawfish was not, as you might expect, local.  But it was good, and it did include many local ingredients - including local sausage which I have used in the below recipe.  More on my boil later...

Spinach Pasta with Chicken, Sausage, Mushrooms, and Zucchini

  • 2 servings (approx. 8 oz each) fresh spinach pasta (L/L*), or use dried pasta from a box
  • Leftover chicken - about 1 breast worth (L)
  • Leftover sausage (In this case, spicy andouille sausage) - about 1 link (L)
  • 5 or six large cremini mushrooms, sliced (L)
  • 1 small zucchini, sliced (L*)
  • Salt and pepper
  • 2 tbsp butter, divided (L)
  • 1/4 cup half and half (L)
 Cook pasta in a medium pot with well salted water, and cook until pasta is just under al dente.  Meanwhile, melt 1 tbsp butter in a large frying pan.  Add chicken, sausage, mushrooms, and zucchini, season with salt and pepper, and saute until meat is warmed through and veggies just start to get tender.  Add half and half and remaining butter, and cook, stirring, until butter melts and small bubbles start to form around the edge of the pan.  And pasta, stir, and allow to cook a 2-3 more minutes, until pasta finishes cooking and all ingredients are well combined.


Another choice for using leftovers is to make something that's almost a recipe.  For example, many quick weeknight recipes call for boneless, skinless, chicken breasts.  Generally when Jeff and I have a whole chicken, we end up with 1 breast and 1 thigh leftover.  By carefully slicing the meat off of these two pieces, I can get pieces of chicken that serve the same function as a chicken breast - even if they are a little smaller.  From there, I just follow the recipe, substituting my pieces of chicken for the chicken breasts, and cooking for less time since the meat is already cooked through.  This would work for chicken marsala, or you could cut the pieces smaller and use them in tacos.  In this case, I made chicken saltimbocca... sort of.  I made this a while ago, while there was still asparagus at the market.  You could substitute any veggies you want, or not use the vegetables at all.  If you are not using vegetables, reduce the wine to 1/4 cup, and the butter to 1 tbsp.

Chicken Saltambocca (ish) with Asparagus and Turnips 
  • 3-4 slices bacon (L), or use prosciutto to be more traditional
  • 2 cooked chicken breasts, or one breast and one thigh, sliced into tenders about 1/2 inch thick. (L)
  • 1/4 cup flour (L)
  • salt and freshly ground pepper
  • 2 tsp fresh chopped sage, plus whole leaves (L*)
  • 2 tbsp butter, divided (L)
  • 1/4 lb fresh mozzarella cheese, thinly sliced (L)
  • 3/4 cup dry white wine
  • approx. 10 stalks asparagus (L)
  • 2-3 small turnips, sliced (L)
In a large frying pan, cook bacon until it is done, but not crispy.   Remove from pan and drain on paper towels, but leave bacon drippings in pan.  Season flour to taste with salt and pepper, and stir in chopped sage.  Dredge chicken tenders in flour, and fry briefly in bacon fat over high heat (you want to create a crust on the chicken here, but you don't want to leave it in too long as the chicken will dry out due to being already cooked.)  Remove chicken from pan and set aside.  Add 1 tbsp butter to pan and allow to melt.  Add vegetables and saute for about 3 minutes.  The veggies should not be cooked through.

Meanwhile, assemble chicken by layering 1 piece of bacon on top of each chicken breast, followed by sage leaf, followed by mozzarella cheese.  Trim bacon, sage, and cheese so all items are the same size as the chicken tender.

Add remaining tablespoon butter and wine to pan, and cook just until butter melts.  Add chicken to pan, turn heat to very low, and cover tightly.  Cook just until chicken is heated through and cheese is melted.

My point, I guess, is that food is not a science.  Most of us learn to bake before we learn to cook.  I can remember helping to mix up cookies and brownies well before I was cooking anything.  This makes sense, I guess, because baking rarely requires sharp knives, and the hot part can easily be handled by mom or dad or grandma without the kids feeling left out.  But, in reality, that's backwards.  Baking is a science.  It requires following precise directions, or things don't turn out well.  I think we learn, at an early age, that cooking also has to be precise.  But it doesn't.  There are no rules.  Your pasta won't fall like a cake or a souffle.   It doesn't really matter what you put into your food, as long as it tastes good.  And the only way to learn what tastes good is to try different combinations.  I've found, if I can eat my leftovers in a meal that isn't an exact replica of what the leftovers originally were, I'm more likely to eat them, and less likely to throw food away.

Tuesday, July 5, 2011

Spinach Pasta

As promised yesterday, we will be using up some of the ridiculous surplus in my garden.  I feel bad being upset but an excess of produce, as only two months ago I was struggling to find anything green to eat at all and was extolling the virtues of dandelions as a food source.  I feel ungrateful to my garden for all it's providing, but at the same time I've got nothing to do with it and it's going bad.  Note to self, less lettuce next year!

I'm looking for ways to prepare bitter lettuce - especially ways to prepare it that can be frozen and eaten later on.  I'm not having crazy amounts of success, but I'm looking and I'm sure I'll find something.  Until then, I'm going to move forward with the things I do know what to do with.  It is my goal to have a freezer packed to the brim at the end of fall, and to have real food to eat all winter long.  Hopefully I can also do some canning, which I have no experience with, because I'm sure the freezer isn't big enough to fit a Wisconsin winter's worth of meals...
Massive pile of spinach.  This ended up being
eight cups of leaves total.


I'm starting off with what I know.  At least, then, I know that won't go to waste.

I looked at a lot of recipes for spinach pasta in the process of creating this one.  Most of them had you start with a package of frozen spinach.   The ones that included fresh spinach had you blanching it and then squeezing out and throwing away all the water.  That water is where all the nutrients go, so I didn't want to lose it.  In the below recipe, I'm basically steaming the spinach to get it soft and to get the water out of it, and then incorporating the water back into the dough.  If you want to try this using frozen spinach, it looks like you want about a 10 oz bag.  You'll also probably need another egg or 2, because you're not going to have the cooking water.


Spinach Pasta

Spinach wilting in the pot


  • 4 cups lightly packed fresh spinach leaves (L*)
  • 1/4 cup water
  • 4 cups flour (L)
  • 1 tsp salt
  • 3 large eggs (L)
  • 1 tbsp olive oil
  • additional water if necessary
 Pour water into a large pot with spinach, and cook over medium heat, stirring constantly, until spinach is well wilted.  Remove spinach and thoroughly squeeze out all the water.  I started with 1/4 cup of water, and ended with just over 1/2 a cup.  Reserve water!  Once the spinach is all squeezed out, you should have a ball about the size of a Jumbo size egg.

Two large eggs of spinach
Combine spinach, one cup flour, and salt in a food processor, and process until spinach is well broken down and combined with the flour - about 3 minutes.  I did this originally with just the spinach, and I found that it I got better results when I added a little bit of the flour as well.

Transfer spinach/flour mixture to the bowl of a stand mixer fitted with the dough hook.  Add remaining flour, and eggs, and mix on low speed.  Once the flour, eggs, and spinach are well combined (the mixture should look like wet cornmeal or sand), drizzle in the oil.  Then, slowly add the spinach cooking water, allowing the dough to mix in between additions.  Once the dough starts to stick together, stop adding water and allow to mix until all the dough sticks together.  If you need to add more water to get this to happen, do so.

Once the dough is in one big ball, turn it out onto a lightly floured surface and kneed until well combined.  Allow to rest for about 30 minutes, covered with plastic wrap, before rolling out depending on your pasta maker's instructions.

Pasta can be frozen easily, by allowing it to dry (please see my picture: pasta drying racks are for wimps!) for about 10 minutes, and then placing into a freezer bag with as little air as possible.

My pasta drying rack is cookie cooling racks, balanced on top of
boxes of cereal.


 I haven't actually eaten any of this pasta yet.  Notes on how good it is when I try some!

Thursday, June 16, 2011

Quick Recipies

Very, very, VERY early tomorrow morning I am leaving for the Mecca of Locavore-ness: San Fransisco.  Not for locavore type activities.  In fact, I'm fairly certain I won't have time to eat!  I will be filming the next FatChanceBellyDance video, which I cannot express how honored I am to be in the video, and excited and all sorts of crazy emotions that I don't even know how to feel.  But I think it's going to be a very long, exhausting weekend and I'm not even bringing my laptop with.  So here are some recipes to hold you over.

These recipes got "forgotten."  They weren't interesting enough to have their own story, but are still good and quick to make!

Grilled Turkey Wing with Sauteed Spinach and Mushrooms and a Baked Potato:
This is a Jeff style meal: Meat, Potato, Vegetable!

Serves 2:
Total Time: 30 Minutes

  • 2 turkey wings (L)
  • Salt
  • Garlic Powder
  • Onion Powder
  • Butter (L)
  • 1/4 clove garlic, minced (L)
  • 1 large bunch spinach (L)
  • 1/4 lb mixed wild mushrooms (L)
  • Fresh ground pepper
  • 2 baking potatoes (L)
Bake potatoes in your preferred method.  I prefer microwaving for about 10 minutes.

Season wings generously with salt and pepper.  Grill over medium high heat for about 20 minutes, turning once.

In a large frying pan, melt 1 tbsp butter.  Add garlic, and saute for about 3 minutes.  Add mushrooms to pan and season with salt and pepper.  Allow to cook until mushrooms soften, release most of their liquid, and liquid has evaporated.  Remove from heat and add spinach to pan.  Cook, stirring constantly, until spinach is wilted.  Season with additional pepper.


Grilled Bok Choy, Elk Steak, and Potatoes
(This is a Kate style meal - Meat, Vegetables, and Potatoes... with a twist!)
Active time: 30 minutes
Total time: 45 minutes
  • Fingerling or red potatoes (L)
  • 1 tbps Olive Oil
  • 3 tbsp butter
  • 1 bunch bok choy, pulled apart and washed (L)
  • 2 small elk steaks (or any other meat) (L)
  • Salt
  • Pepper
  • Garlic Powder
  • Onion Powder


Preheat grill.

Cut potatoes into halves or quarters depending on their size.  Toss with olive oil and season with salt and pepper. In a grill basket, grill potatoes over medium heat, tossing regularly, for about 25 minutes or until soft.

Meanwhile, melt butter in a small microwavable bowl.  Brush both sides of the bok choy with the butter, and season with salt.  Set aside.

Season steaks with salt, pepper, garlic, and onion powder.  Grill over medium high heat, for about 5 minutes per side, or until they are as done as you want them to be.

While steaks are resting, turn grill up to high and grill bok choy for about 3 minutes on each side, until stems are softened and leaves are crispy.  I have found that the back of my grill is a bit hotter than the front, so I put the stems towards the back so they get done before the leaves char off.  If you are using a gas grill with multiple burners, you could also set one to high and one to medium, and put the leaves across so the stems are over the hotter area.


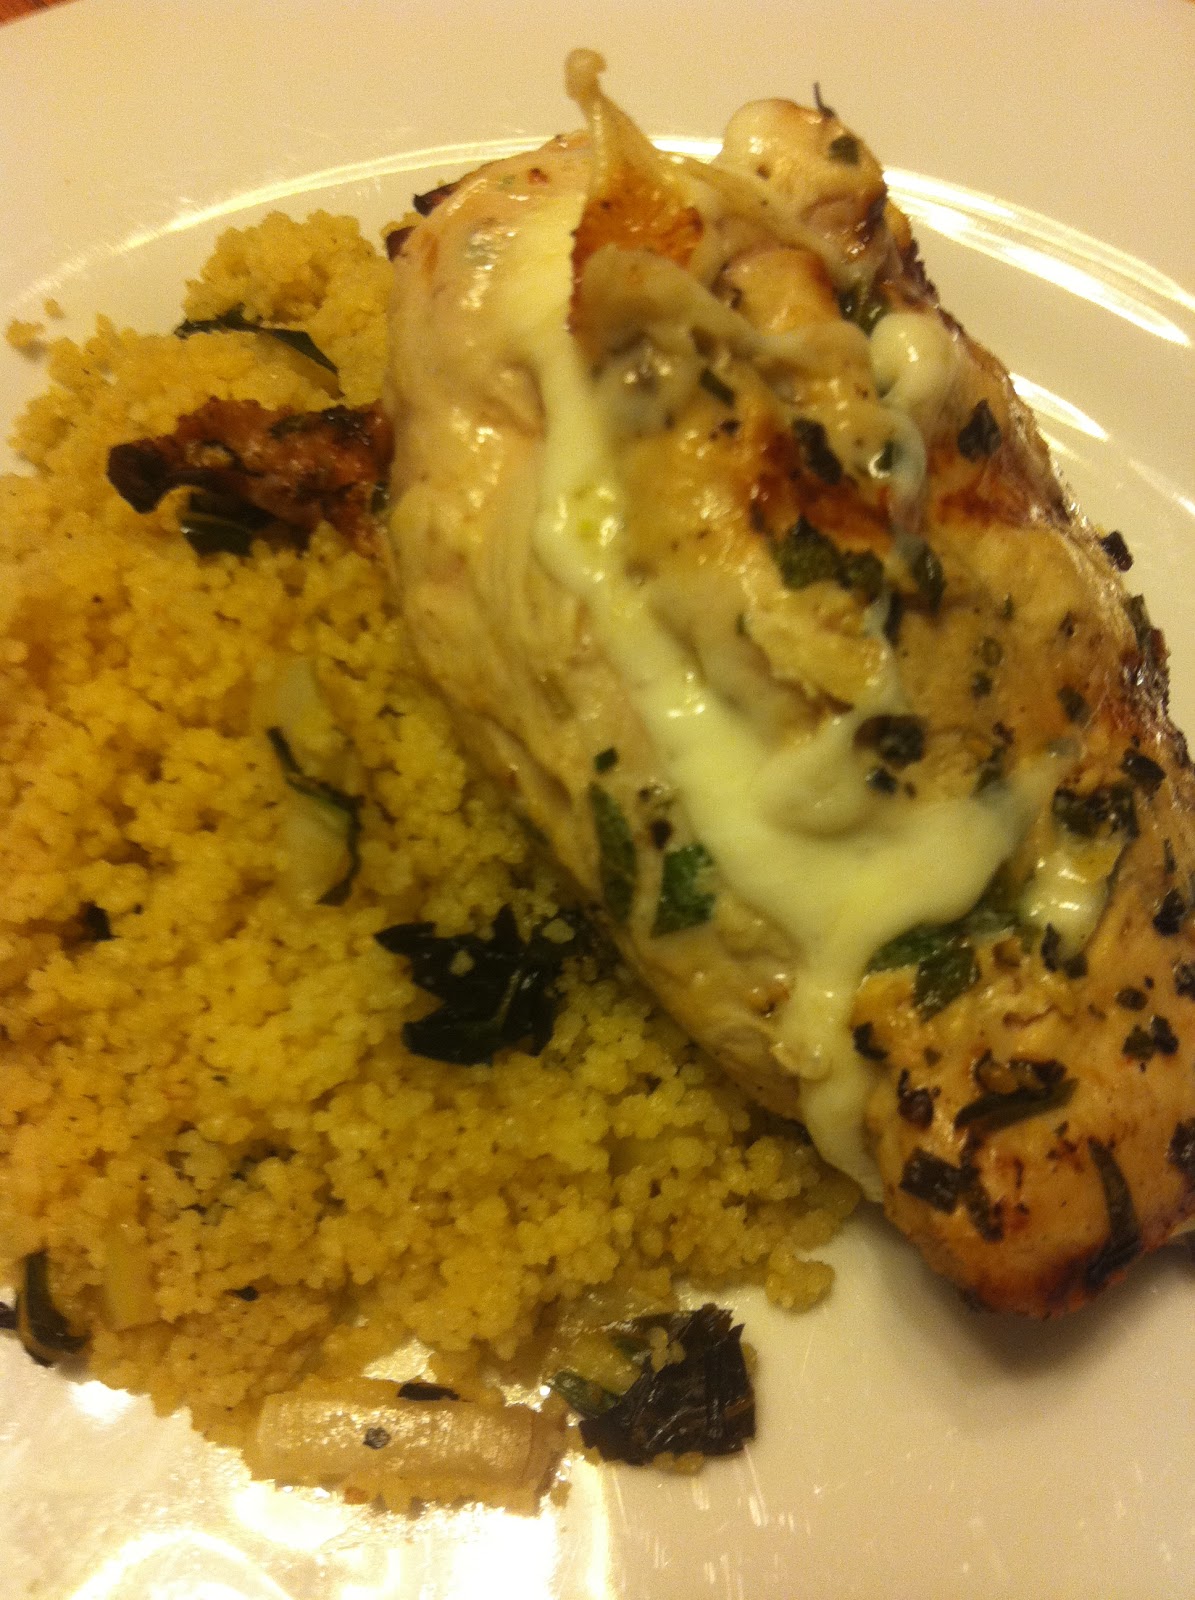
Mozzarella and Sage Stuffed Chicken Breasts

This is a summer time staple at my house, because it is super easy and delicious!
Active time: 10 minutes
Total Time: 30 minutes
Serves 2

  • 2 boneless, skinless chicken breasts (L)
  • Salt and Pepper
  • Garlic Powder
  • Onion Powder
  • 8-10 sage leaves, whole (L*)
  • 1 8 oz ball fresh Mozzarella (L)
Preheat grill to Medium-High heat.

Make sure chicken breasts are 100% thawed, or this will be harder.  Carefully, butterfly the chicken breasts: Slice chicken breasts down the length of the side of the breast, almost to the end but not all the way through, so the breast opens up like a book.  Season the chicken breast inside and out with salt, pepper, garlic and onion powder.

Open up the chicken breasts so the two "insides" are showing, and what originally was the "outside" of the chicken breast is facing down.  On one half (what will become the "bottom" half) lay 4-5 sage leaves per breast, depending on the size of the chicken breast and the sage leaves.  Thinly slice the Mozzarella, and lay that on top of the sage leaves, trimming to match the bottom half of the chicken breasts.  Fold the top half over the mozzarella, and use a tooth pick to hold the breasts closed (it should now look like the original chicken breast, except with sage and mozzarella stuffed in the middle!)

Grill over medium high heat, until cooked through, about 8-10 minutes on each side.

I served this with couscous, prepared using the manufacturer's directions, mixed with chopped leftover bok choy from the recipe just above this one (Grilled Bok Choy, Elk Steak, and Potatoes)

Wednesday, June 15, 2011

Pasta!

I love fresh pasta.  As stated previously, Jeff got me a pasta maker for my birthday, and it is quite possibly the best birthday present in the history of ever.  With the exception of maybe a sausage maker, which he did not get me (hint, hint), or all of my Star Wars baking accessories.  Oh yes, my friends, the most epic baking story ever will be documented on this blog eventually.

Anyway, pasta.  What I like most about my pasta maker is that it turns the act of making pasta into an annoying job that takes all day and gets good results about 50% of the time, into something I can do while I clean the house.  Or, more realistically, while I watch TV.

The pasta maker itself fits onto my Kitchenaid stand mixer.  I couldn't clean the house while rolling out the pasta, because I need to be there to catch it, but I could watch TV.  Before this, I had a hand cranked pasta roller that sort of half ass attached to the kitchen table and always popped off.  Also, you needed three hands - two to hold the pasta (one on each side) and one to turn the crank.  So Jeff always had to help.  Which is  why he bought me the new one!

So the roller goes onto the end of the stand mixer, and the stand mixer turns it.  All you have to do is feed the dough on one side and out comes pasta on the other side.  It might be magic!

Anyway, the best part is, one pasta recipe makes about 4 servings of pasta - and that's Jeff and me size servings... we eat a lot.  The rest can be frozen, and it comes back very nicely, so if you've got the time (and the pasta maker) you can make a bunch in advance and use it for quick dinners.  Or, if you're one of my friends who complain that my recipes take too long and require a kitchen, you could just buy a box of pasta.  Either way, these are both pretty darn quick to make:

Pasta Recipe:

3 1/2 cups flour (L)
4 large eggs (L)
1 tsp salt
drizzle olive oil
Water if necissary

Combine flour, salt, and eggs in a stand mixer, and mix on slow using the dough hook.  As it is turning, drizzle in olive oil.  Or, if you're extra fancy, use the flour bowl method.  If you don't know what this is, you don't want to do it.  If the pasta is very dry, slowly drizzle in just enough water to get it to come together and form a dough.  Be careful, it takes a while for it to fully incorporate, and you don't want wet pasta.  Allow to mix and kneed for at least 10 minutes.

Allow the dough to sit for 10 more minutes, then divide into four smaller balls.  Each one of these balls will be one serving of pasta.  Roll out pasta depending on your pasta roller's instructions and what kind of pasta you want.  Or, if you do not have a pasta roller, you can roll the pasta out using a rolling pin.  This will be difficult, however, as you want the pasta to be very thin.

These two recipes look very similar, but taste very different!


Spinach Fettuccine Alfredo
(Makes 2 servings)
Total Time: 25 minutes
Active Time: 25 minutes
  • Salt
  • 2 tbsp butter (L)
  • 3 large garlic cloves, crushed and minced (L)
  • 1 large handful spinach, washed (L*)
  • 2/3 cup heavy cream (L)
  • 1/4 cup Parmesan cheese (L)
  • Pinch freshly grated nutmeg
  • 2 servings pasta (L)


Bring a large pot of heavily salted water to a boil.  Once the water is boiling, add pasta and cook until almost al dente.  Be aware that fresh pasta cooks a lot faster than the dry boxed stuff.

Meanwhile, melt butter in a large frying pan.  Saute garlic for a few minutes, until lightly fragrant.  Remove any stems from the spinach, and slice into about 1/2 inch think ribbons.  Add spinach to butter and garlic, and then add cream.  Allow to cook, stirring regularly, until cream just starts to form bubbles around the edges (not boiling or even simmering!!)  Add cheese, and stir until cheese is melted.  Be careful not to overcook or cheese will get stringy.  Grate in nutmeg, then stir in pasta.  Allow everything to warm together, and pasta to finish cooking, about 5 minutes.


Fettuccine with Goat Cheese, Turnip Tops, Mushrooms, and Spicy Sausage
Makes 2 Servings

Active Time: 25 Minutes
Total Time: 25 Minutes

  • 1 link smoked, spicy sausage - I used Usingers Linguica, but any spicy, smoked sausage would do (L)
  • 1/4 lb mixed mushrooms, chopped (L)
  • 1 large bunch turnip tops, chopped (just the tops.  Save the turnips for later) (L)
  • 1/4 cup heavy cream or half and half (L)
  • 2-3 oz crumbled goat cheese (L)
  • pinch cayenne pepper
  • 2 servings pasta
Bring a large pot of heavily salted water to a boil.  Add pasta to water and allow to cook until al dente.

Heat a large frying pan.  Thinly slice sausage and add to pan.  Allow to cook until just starting to brown.  Add mushrooms and cook until mushrooms just start to brown.  They should still be firm.  Add turnip tops and saute until they are wilted.  Add cream, and cook until hot.  Add cheese and cook, stirring constantly, until cheese is melted.  Add cayenne and stir, then add pasta and stir to combine.

Sunday, April 10, 2011

Smoked Salmon and Goat Cheese Pasta with Spinach and Mushrooms

For my birthday this year, my husband got me one of those pasta makers that you hook up to your KitchenAid stand mixers.  I had a pasta roller previously, and made pasta on occasion, but I could never figure out how to crank the dang thing and hold on to my pasta.  Which means he had to help.  So I'm pretty sure he got me this one so I could do the whole thing myself while he sat on the couch.  He's a smart boy.

Anyway, it worked like a charm!  I was especially pleased by the pasta recipes that came with the instruction manual - not for the recipes themselves, but for the directions.  I have always done the traditional make a well with the flour, break the eggs into it, etc., but these directions just said to put everything in the stand mixer bowl and use the dough hook.  I personally couldn't taste the difference and it was SO much easier.  (Somewhere, someone's Italian Grandmother is rolling over in her grave... but not mine.  First, because she's not dead.  And second, because she's all about saving time!).

So I made basically the equivalent of fettuccine, which came out very nicely, and I had enough left over to freeze about three servings - so we'll see how that works out later.

The salmon itself was not caught or grown locally, but it was processed locally at Rushing Waters.  Apparently the grocery store "can't" sell their smoked trout, which is local.  The guy working behind the fish counter didn't want to elaborate.

Smoked Salmon and Goat Cheese Pasta with Spinach and Mushrooms

  • Pasta (about two servings worth)
  • Olive Oil
  • 1/4 cup red onion
  • 1-2 cloves garlic (I found more local garlic!! YAY!!)
  • 1/2 lb. mixed mushrooms
  • 3 tbsp. butter
  • 1/2 cup white wine - preferably something a little more acidic, like a pinot gris
  • 4-5 big handfuls spinach, chopped roughly
  • 1 fillet smoked salmon, skin removed and chopped roughly
  • 3 oz. goat cheese, crumbled
  • Salt and pepper
 Cook the pasta according to the directions (or make your own.  It's not so hard!)  Meanwhile, saute onions and garlic in a large frying pan.  Add mushrooms and cook until they just start to brown.  Add butter and white wine, and bring to a simmer.  Remove from heat and add spinach, stirring until spinach is wilted.  Season with salt and pepper.  Add pasta and salmon and stir to combine, until pasta is nicely coated and the salmon is warmed.  Add goat cheese and stir once more.  The goat cheese should just start to melt, but should not blend totally into the sauce.

Top with freshly ground pepper if desired.

If I would have had them, I would have added tomatoes to this as well.  They would have added color and a nice texture.  Next time!

Total non-local ingredients:
  • Olive Oil
  • Salt
  • Pepper
  • Wine